Posts Tagged ‘greens’

Semi-Permaculture Garlic


Glorious spring is here. There are no leaves on the trees yet, but the fruit trees are starting to bloom, and the perennials are starting to show up. 
Green garlic is always the first vegetable of my gardening year, and it’s one of the most welcome. I have seen “green garlic” in stores and farmers markets that was an elongated stalk with an actual bulb of garlic, and that isn’t what I’m talking about. At that age, the green parts are too tough to be of any culinary interest. The green garlic that I relish is tender and sweet. 
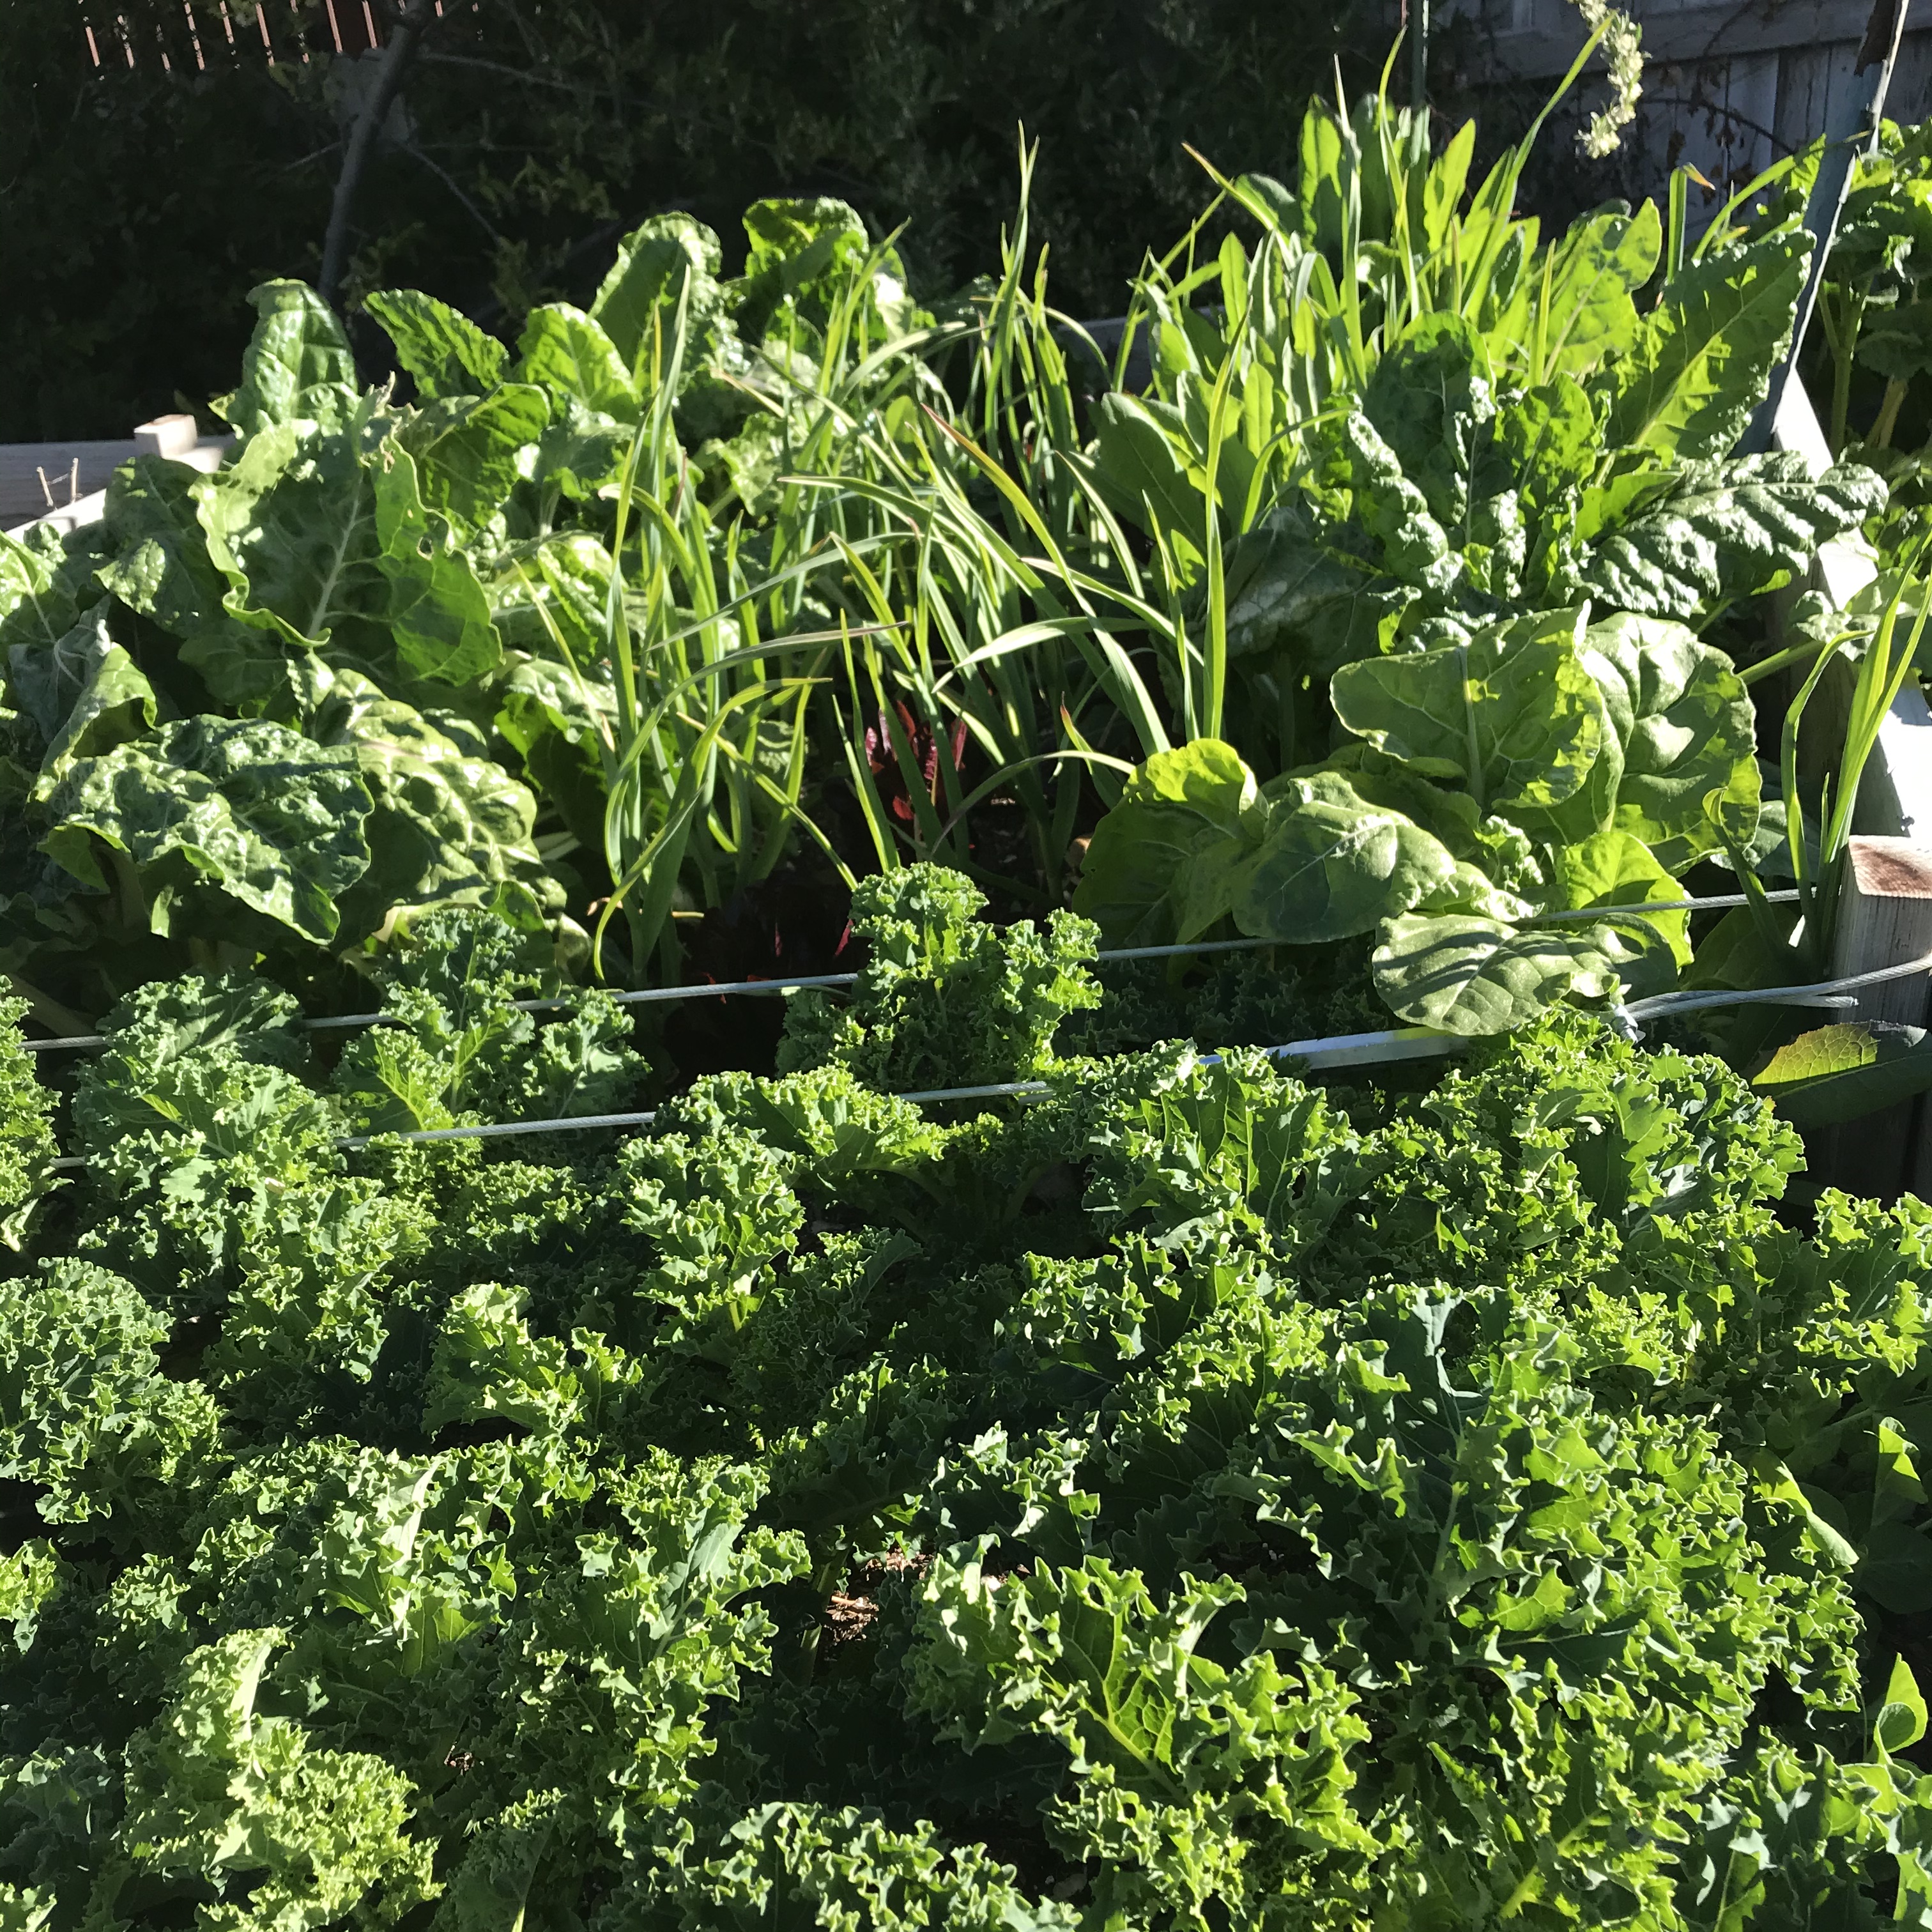
I grow my garlic in permanent beds that  are enriched every fall with top-dressings of manure but are no longer ever dug. There are three sections. The first and largest section is planted in fall with seed garlic of whatever type seized my fancy when the catalog arrived. The cloves are pushed down through the mulch into the rich earth below. Spacing is about 8”x8”. Once planted, the bed is topped with some mixed alfalfa and manure from the goat and chicken areas, about an inch thick, with a thin cover of grass clippings or similar over the top. By mid-March it looks like this:

This bed will be harvested as fresh bulbs in summer and replanted in fall.

The second bed, shown at the top of the post, was created by planting whole bulbs in late summer one year when I had a ridiculous excess. They were spaced 8” apart each way, and top-dressed with rich stuff as described above. In mid-March I start harvesting big luxurious bunches of green garlic from this bed. I dig each clump carefully with a thin-bladed trowel as I need it, taking care to leave one large plant with its roots undisturbed and tucking the dirt and mulch back in around it and water it to resettle the roots. This stalk will produce a garlic bulb, which will be left in place to become next spring’s clump of green garlic. There is technically a bit of digging with the trowel in this patch, which is why I call my methods semi-permaculture; I am not interested in tedious arguments about what constitutes “true” permaculture, I’m just interested in good food and good soil.

The third patch is truly perennial and the roots are never disturbed. It was started by planting a few whole bulbs of garlic in fall and just leaving them in place for a few years. Treated this way, they produce thick clumps of tender thin leaves every spring.

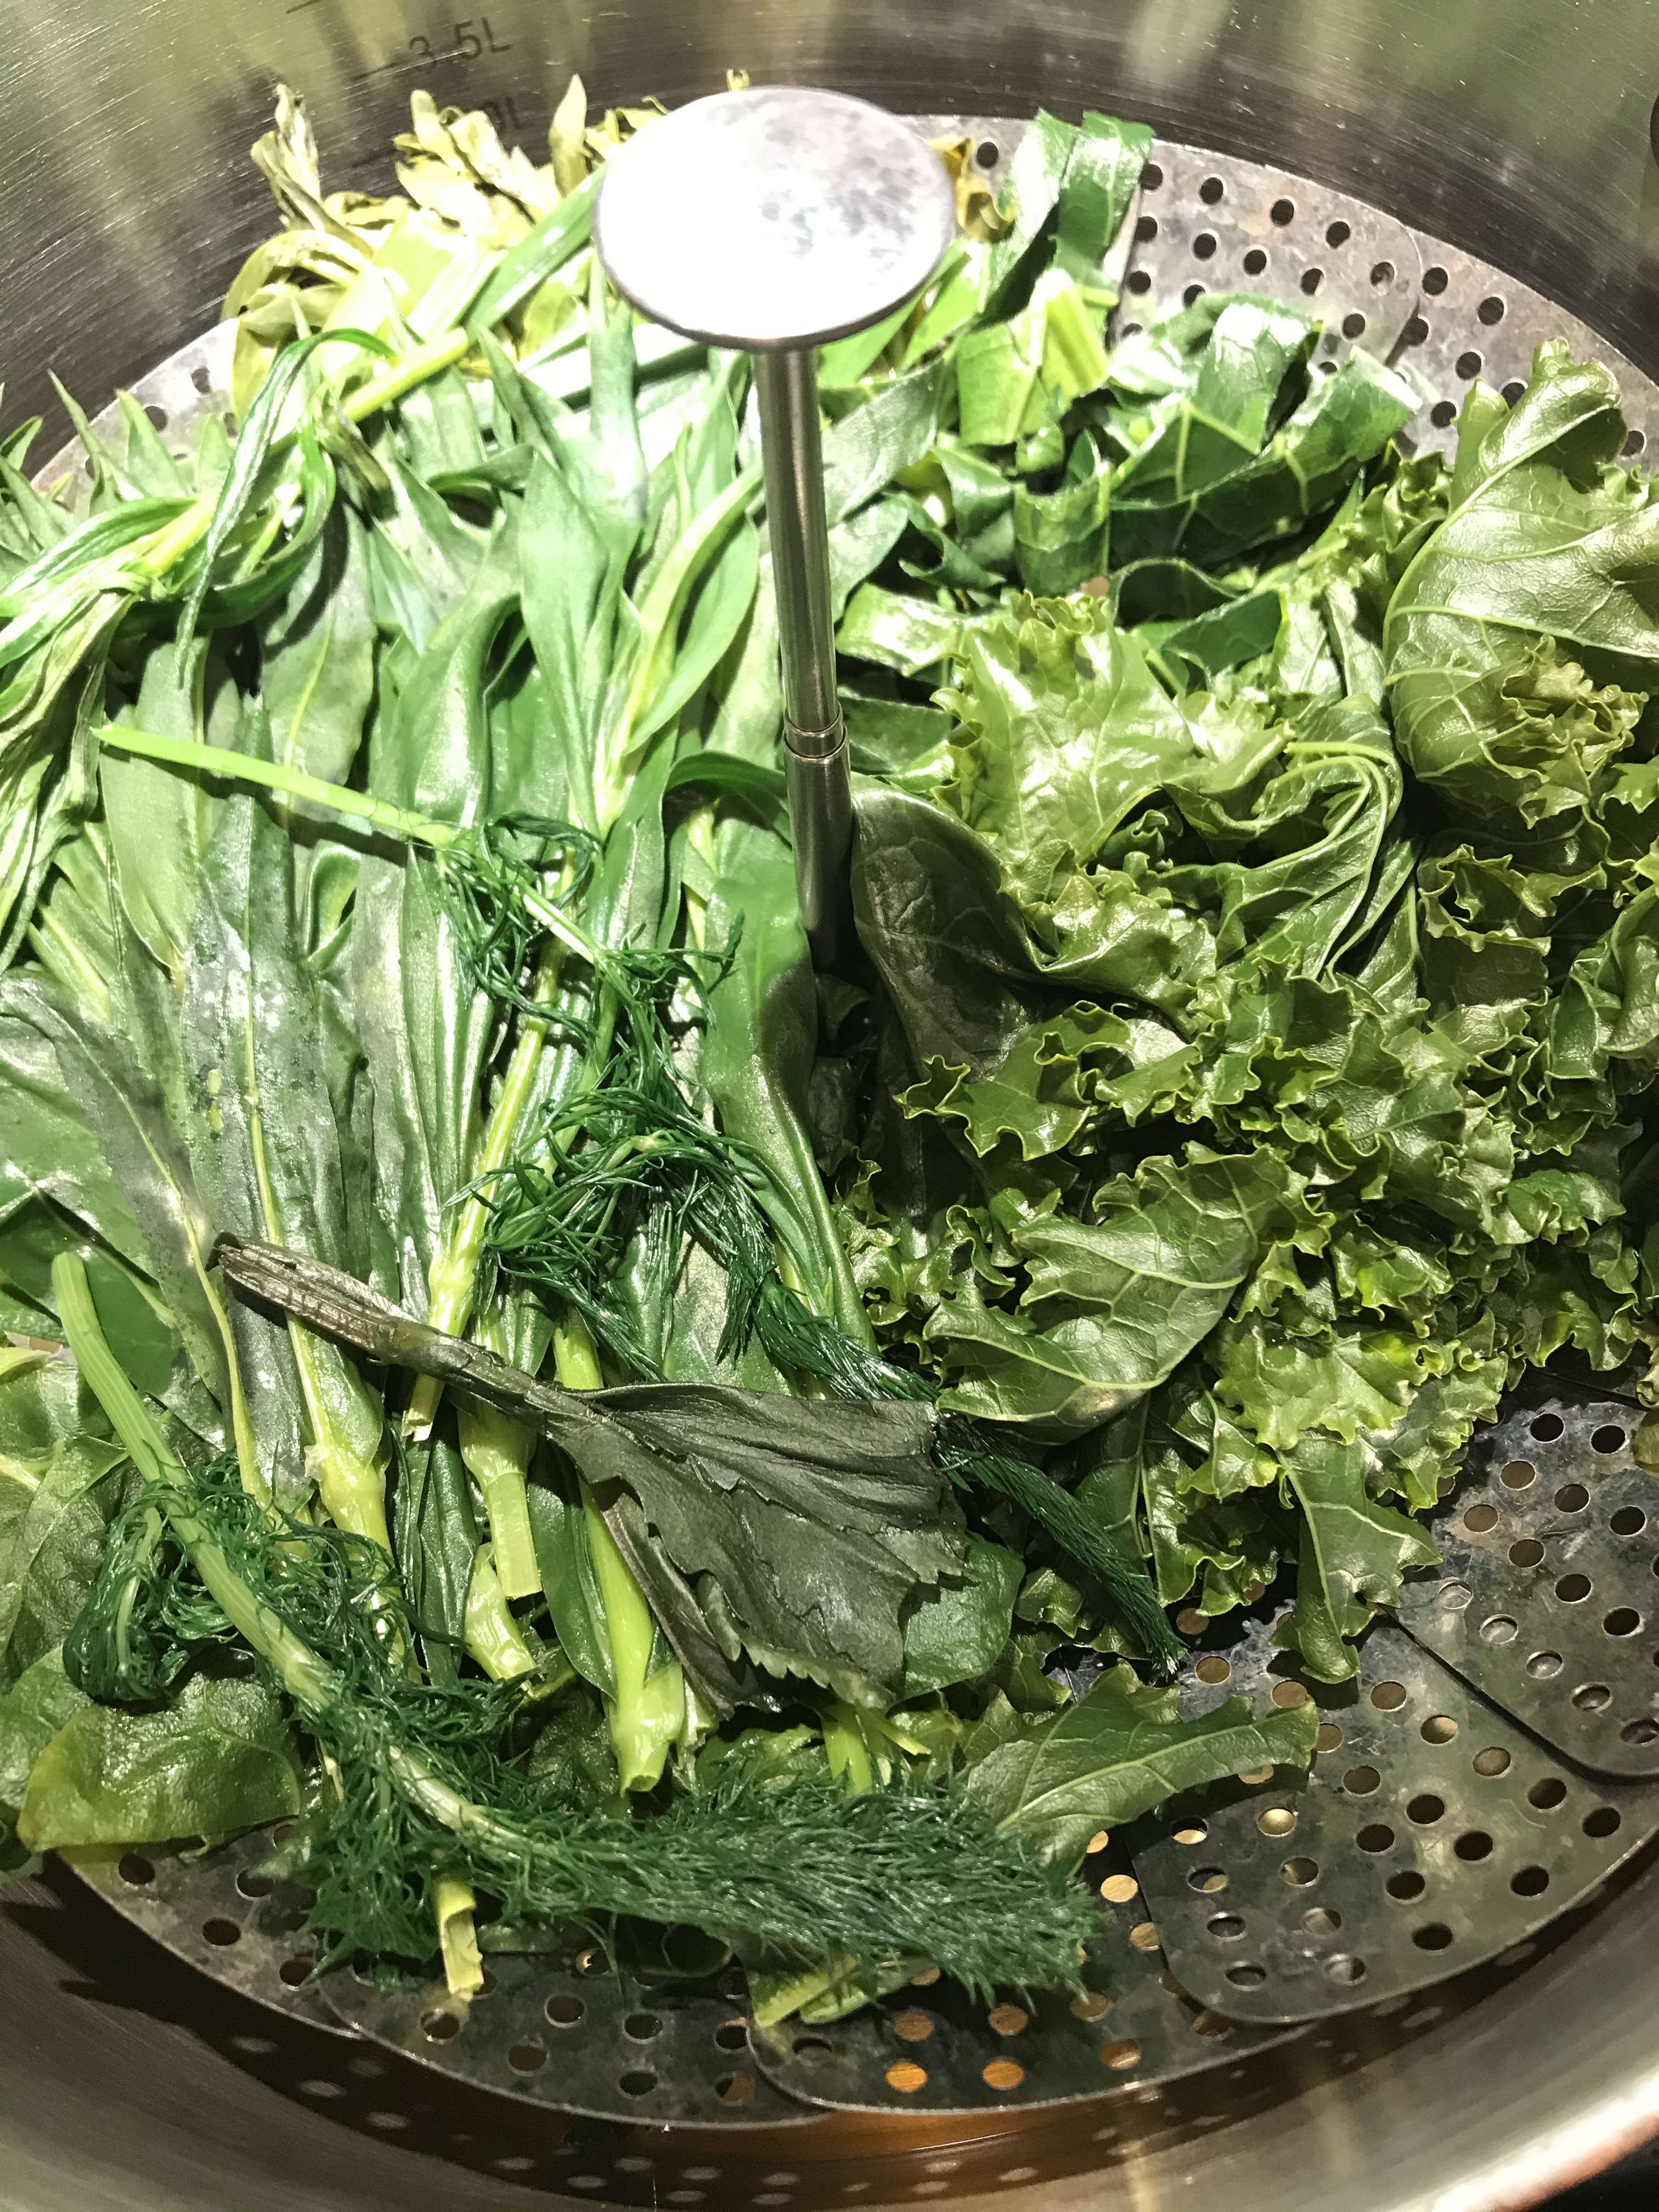
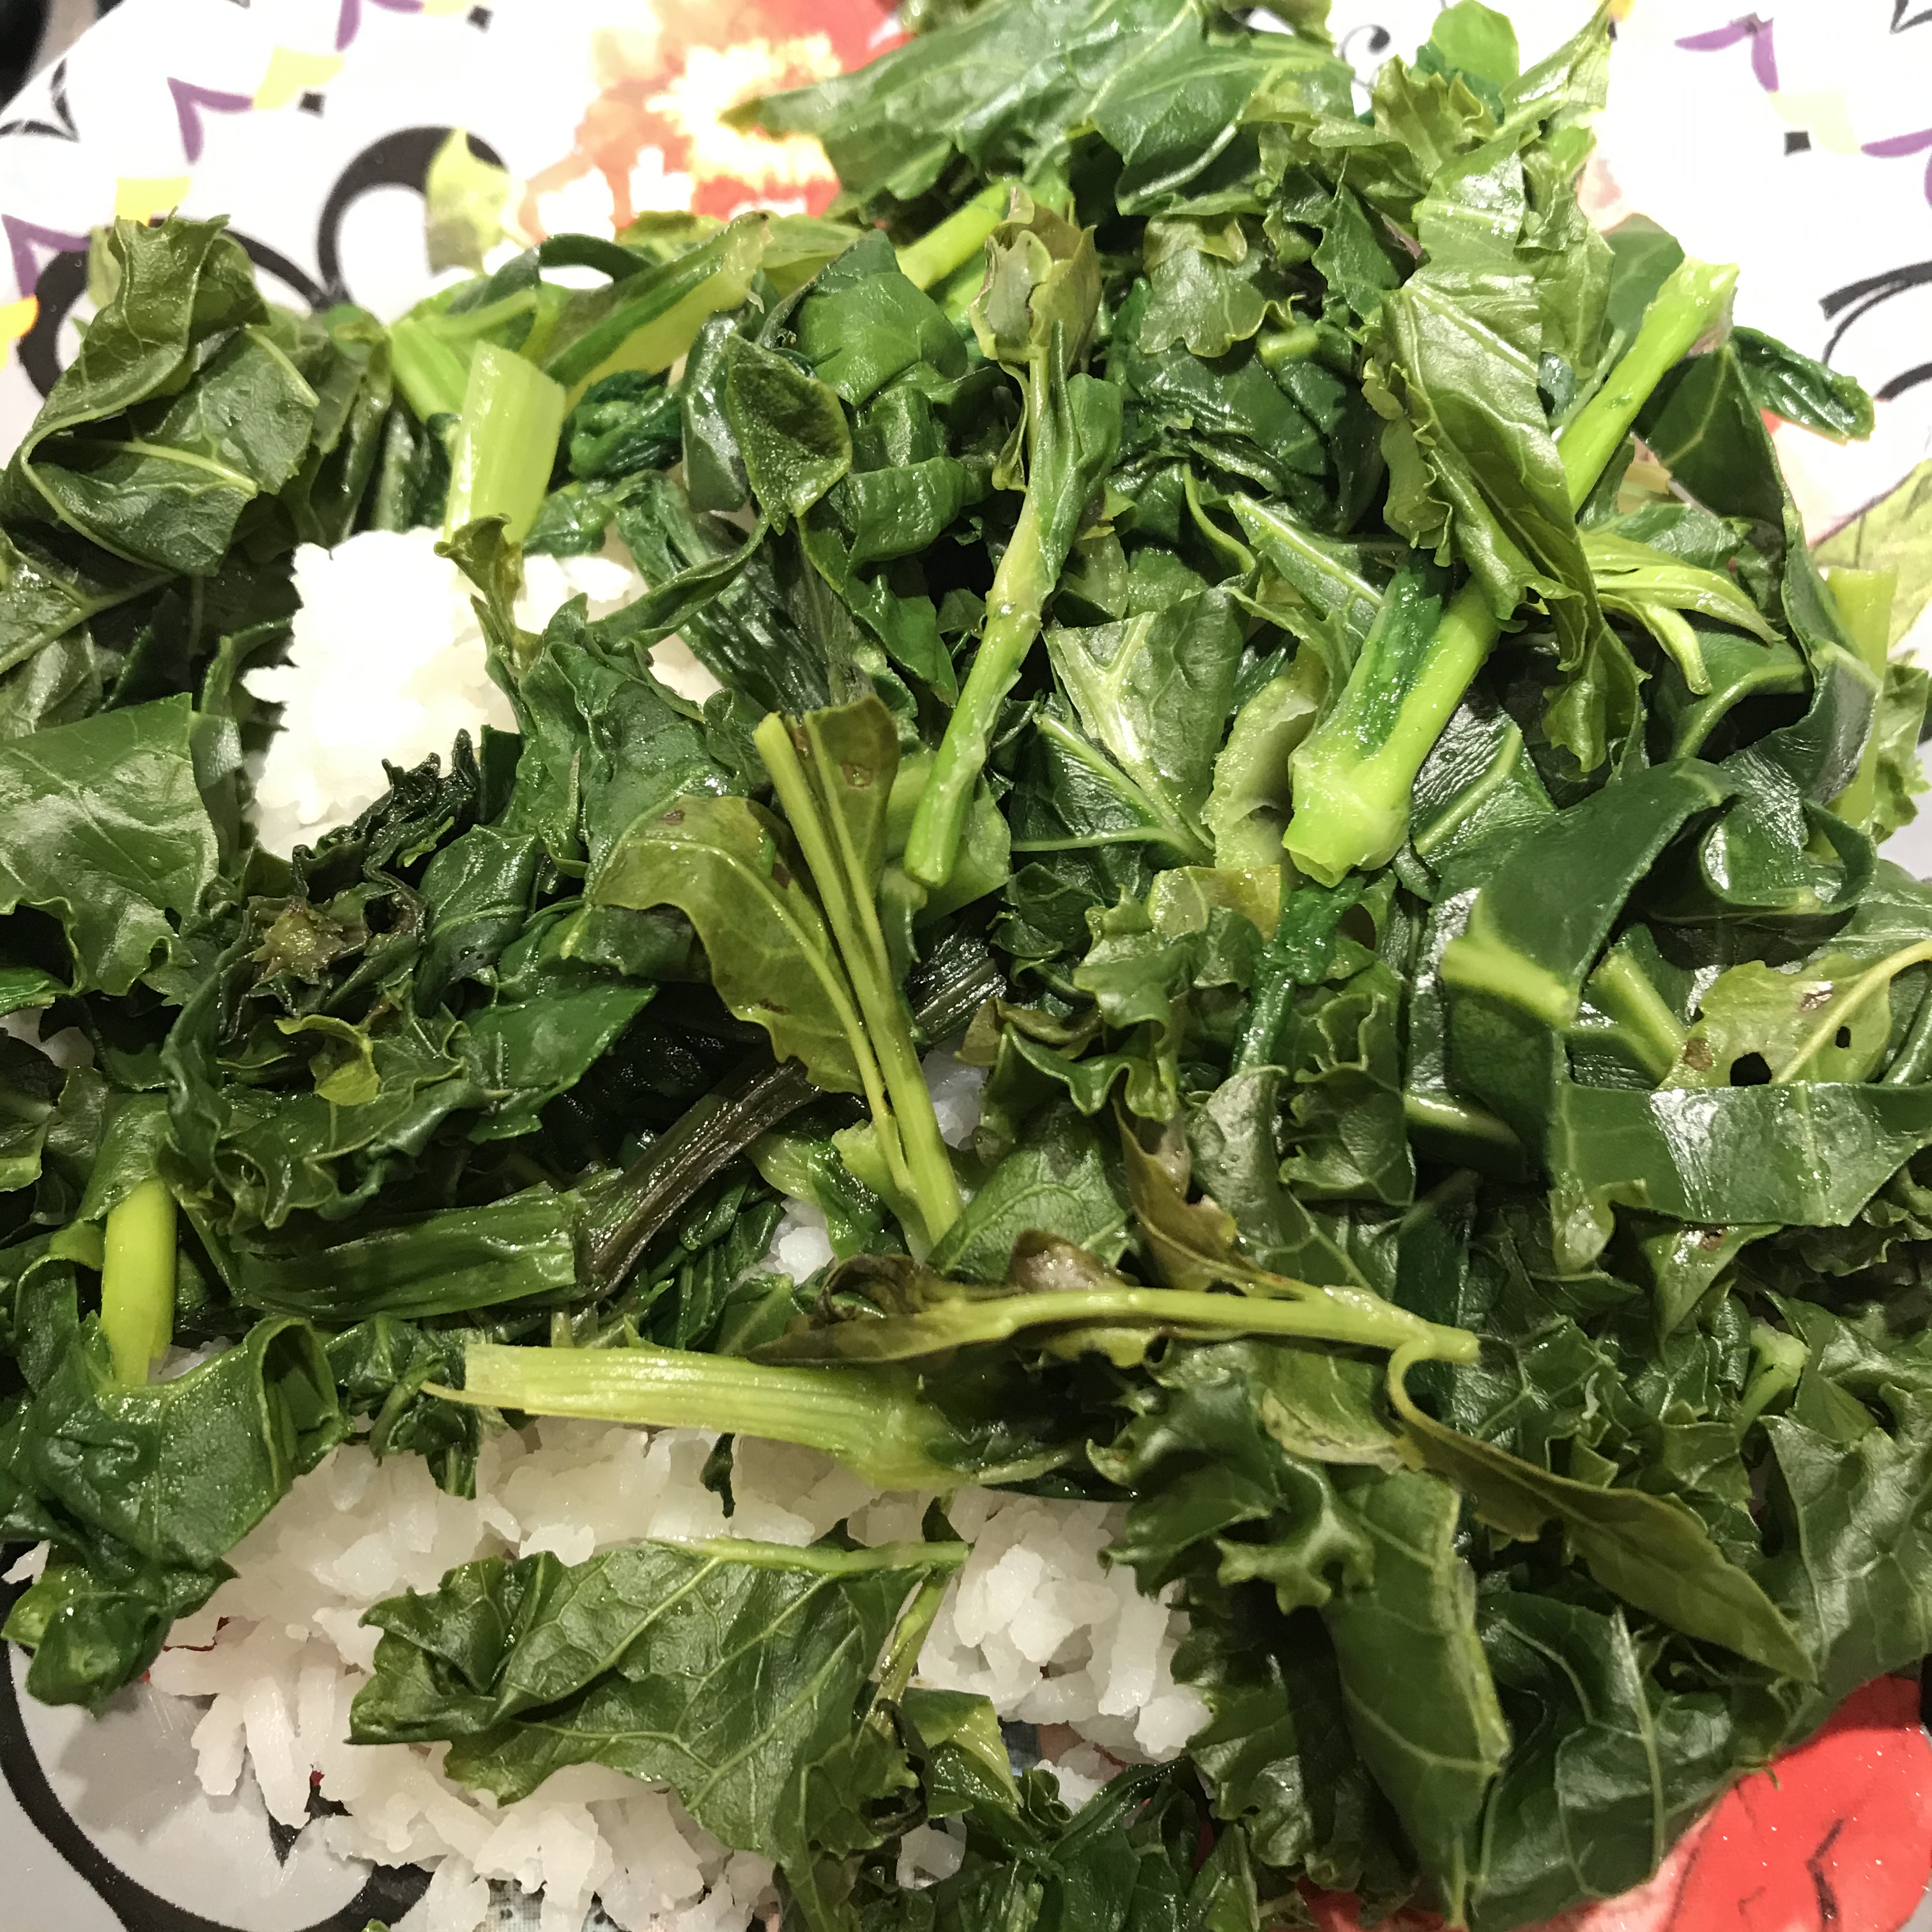
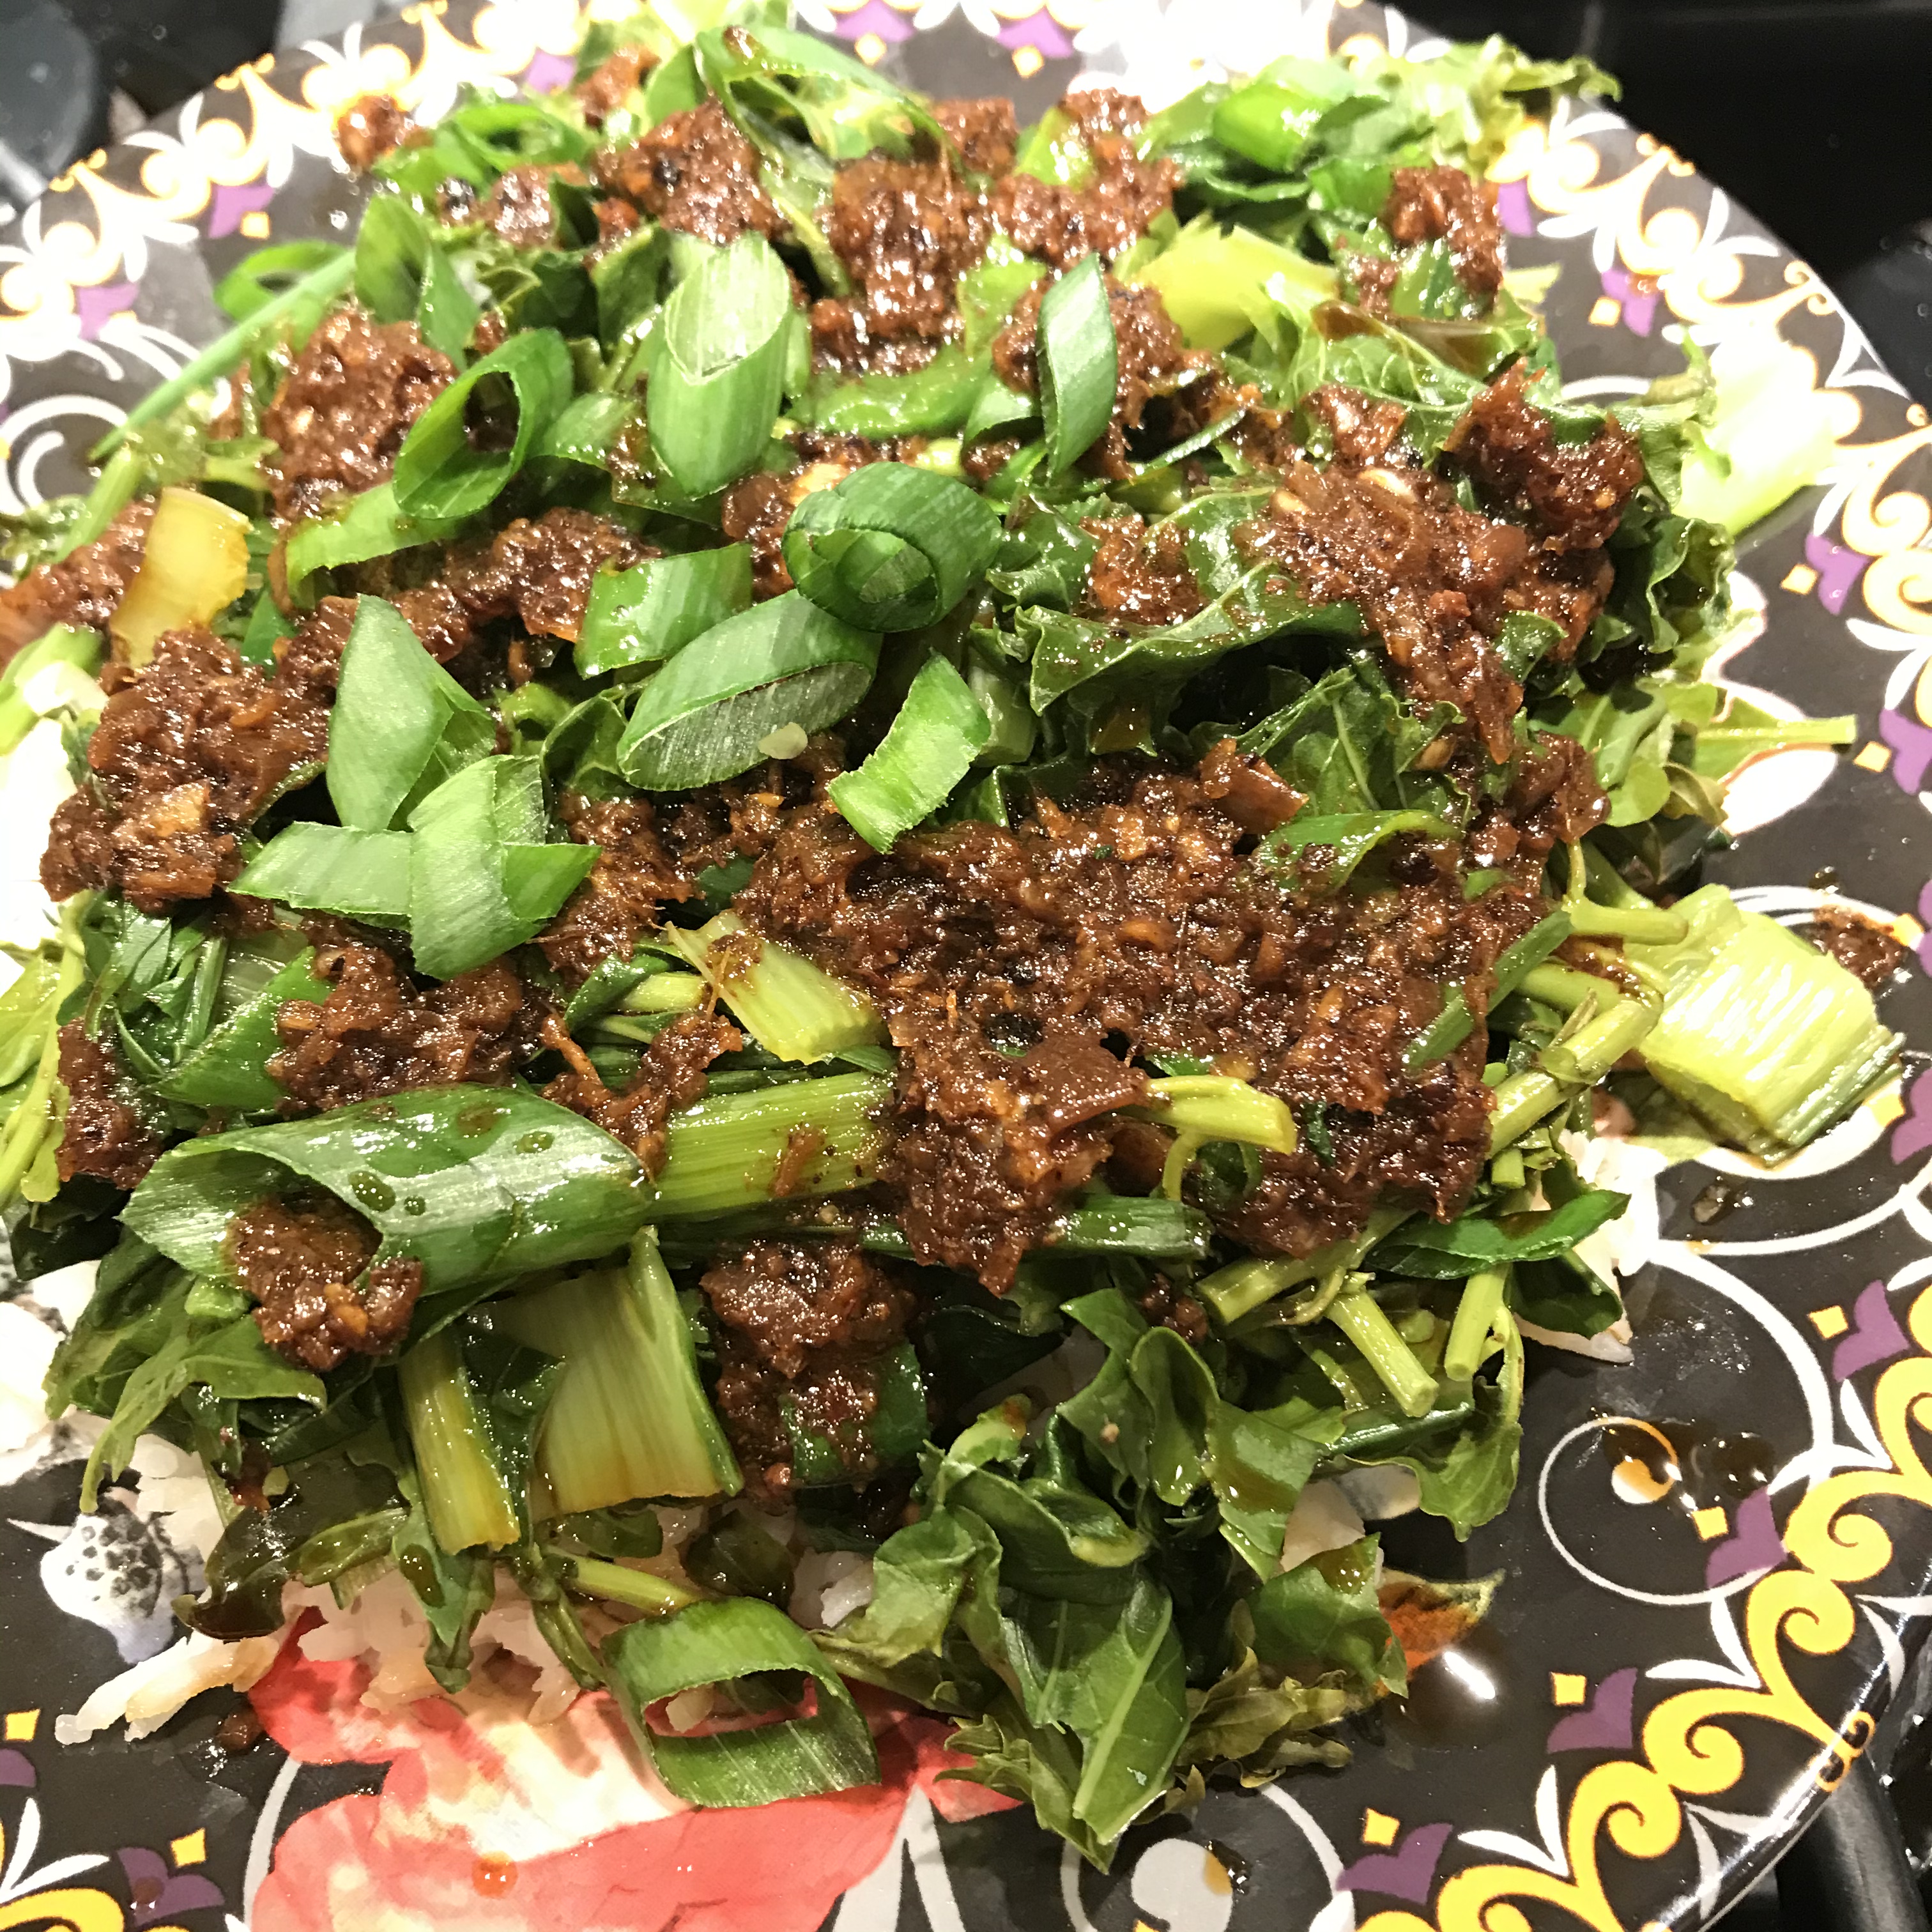
I cut the leaves and slice them finely crosswise to make “garlic chives,” sweet and delicious with a sublime essence of garlic. When I sauté’ chopped green garlic stems and leaves from patch #2 I often add a handful of chopped leaves from patch #3 after cooking is completed for a “pop” of garlic flavor to freshen the effect. The flavor is mild overall, and I love sautéed green garlic as an omelet filling, maybe with some crumbled feta if I’m especially hungry.

Green garlic is wonderful in early spring, tougher as the days grow warmer, and by early summer is not of culinary interest. I harvest pounds of it in its glory season, sauté in olive oil with some salt, and freeze it to eat later. It’s delicious in greens mixtures and terrific tossed with homemade egg linguine and some very good Parmesan. You can click “greens” in the sidebar for other uses, and there is a little more about it here.


I have been asked if viruses will kill my permaculture garlic beds eventually, and I really wouldn’t know. So far they’re doing fine. I guess if that happens I’ll start over in another part of the yard, but meanwhile I’ll have enjoyed years of largely effort-free harvests.

Using What You Have IV: Your Friendly Local Weeds


I have written a lot about foraging at various times in the past, but it occurs to me that there was never a better time to bring it up again. And if you are not willing to commit the time to learning foraging in general, then learn two weeds: amaranth and lambs quarters. These two are worldwide and ubiquitous, mild-flavored and easy to use, and in warm weather they are nearly always somewhere nearby.
The botanical  names are Chenopodium berlandieri for lambsquarters and Amaranthus (various species) for amaranth. You can see them above coming up in a pot near my porch, lambsquarters toward the top of the photo and amaranth further down, and they come up everywhere that I water a piece of soil. They both get huge but are best when young and tender, and both are available from May to August. Both have mild flavor and are a reasonable substitute for spinach. Both are nutritional powerhouses. And both need to be carefully identified if you aren’t familiar with them, as does any unfamiliar food.

This is the book I recommend as your first foraging book, because the plants are widely available, Dr. Kallas is an acknowledged authority, and the information on identification is impeccable. Get your IDs down cold. Not because there are any poisonous look-alikes, but because it’s the right way to approach foraging. The book also contains excellent information on kitchen preparation and cooking.

Now that you know exactly what plants you are dealing with, how do you want to prepare them? The possibilities draw from all the cuisines of the world. I love greens as a simple stirfry with some ginger and oyster sauce to be eaten with rice or by itself, and I make gallons of the Greek mixture called Horta, flavored with garlic, herbs,  and black olives, to keep in the refrigerator or freezer and eat by itself on a piece of sourdough bread or baked into a quiche or hortapita, or any other way. Horta also makes a great base to land some fried or hard boiled eggs on, and is a good side dish for nearly anything. Smoked pork has a magical affinity with greens, and some ham trimmings or meat pulled from a leftover smoked rib is a great addition to greens sautéed with onion and garlic.  Rick Bayless has published some tasty variations on a theme of greens tacos (here’s just one) and he uses chard or spinach but using your own weeds is an easy substitution. Combinations of greens and beans or chickpeas are classic. Pile seasoned horta into salted zucchini shells with some feta or Parmesan and a topping of pine nuts and bake until done, serving with or without seasoned tomato sauce. Or click the “greens” heading in the sidebar of this blog for more greens talk and recipes.


When I gather a bunch of greens I try to wash them immediately and, if possible, blanch them briefly or stir-fry in neutral oil just until wilted down, so that they use minimal refrigerator space and are ready to use in seconds when a quick meal is needed.
Be aware that both these plants can get enormous, up to ten feet in good soil, so grab them young if you want to grow anything else in that space.

Living in Interesting Times: More Experiments with Greens


Spring weather is always erratic here in the high desert, but more so this year than usual. First an early spring, with the crocuses blooming a full two weeks earlier than they ever have before. Then weeks of balmy spring weather and a glorious fruit-tree bloom, followed this week by a hard freeze, a day of snow, then a week of 70 degree afternoons. Seriously weird. The tiny green fruit that set so abundantly has shriveled and turned black, but of course the greens are undaunted. This is their glory season and the sudden temperature changes seem only to amuse them.

My only concern is to find new ways to eat them. Right now I’m happily reliving the Chinese phase that lasted through most of my twenties. While rereading Fuschia Dunlop’s The Food 0f Sichuan, I was reminded of the small cold dishes of vegetables with complex spicy dressings that are served in small portions as a sort of tapas array before meals, and I decided to try a larger version on a rice base as a light meal.

The greens were a handful each of a lot of things growing around the yard: two chard leaves with stems sliced, a collard leaf sliced into threads, scorzonera leaves sliced crossways, bladder campion stems, the tender tips of goji berry shoots, small fennel leaves, a few tarragon tips, and several leaves of young curly kale. All were steamed for about 4 minutes and then allowed to cool to room temperature. Cooked white rice was brought to room temperature.
The greens were chopped into pieces about an inch long, mixed up, and layered on top of the rice.

To make the dressing, a 1”x2” piece of ginger and two large cloves of garlic were pounded to a paste in the mortar with about a teaspoon of sugar. Stir in a tablespoon of hot oil with chile flakes (or less, depending on heat preference,) half a cup of good soy sauce, a couple of tablespoons of rice vinegar, and a tablespoon of Asian roasted sesame oil and you have a good basic dressing. Taste and see if you want it sweeter. Drizzle generously over the greens and eat, or elaborate further if you want with the addition of meat or shrimp.

The Winter Kitchen: Pipian Verde


My recent Mexican cooking binge began with darker richer flavors but a spell of warmer weather got me thinking about pipian verde, which is complex but fresher and more spring-like in flavor. I became determined to develop a paste for it so that I could have it on short notice.  Pipian verde is a highly variable sauce based on herbs and thickened with ground seeds, often pumpkin seeds. It’s simpler than the more complicated mole verde but can be surprisingly similar to it. When I first ate it in Oaxaca more than a decade ago it had a flavor that I have not come across before, and which I later identified as hoja santa. This is a fascinating large perennial which grows well in warmer parts of our country, and in fact I noticed it growing wild near San Antonio, but my mountain area is too cold for it. The dried leaves are readily available but are a pale shadow of the taste of the fresh leaves, which resembles authentic sarsaparilla. Ebay came to the rescue, and I found a seller who sent me eight of the large leaves impeccably wrapped up in damp paper towels so that they arrived in perfect condition. There are as many pipian verde recipes as there are cooks in Mexico, so I can’t say that yours has to contain the special leaf, just that mine does. I also think that fresh epazote is necessary, and it’s available at my local Mexican grocery. Again, don’t use dried.
This makes a lot of seasoning paste. It’s concentrated and will be diluted in the final dish. It freezes well. You’ll need a blender.

My ingredients (study some recipes online and your ingredients may vary):

5 fresh poblano peppers

2 fresh jalapeño chiles, only if your poblanos are mild or you love fire

1 cup raw pumpkin seeds

9 medium-sized tomatillos

1 medium onion, peeled and sliced

5 cloves garlic, peeled and chopped

stems (just cut the washed bunch in half vertically) of one bunch cilantro, chopped

1 cup steamed spinach or other mild greens (I used foraged lambsquarters)

1 fresh hoja santa  leaf about 8” long

1 bunch fresh epazote, about 1/2 cup chopped

1/2 teaspoon dried oregano

1/4 cup home-rendered lard or avocado oil

Roast the poblanos (and jalapeños if using) under the broiler, turning frequently, until blistered all over.

Use tongs to transfer into a plastic bag, wrap in towels, let “sweat” for about 20 minutes, then peel off the skins, remove and discard stems, veins, and seeds, and set the peeled flesh aside.

The tomatillos can be roasted under the broiler until cooked through (requires close attention) or cooked in a heavy saucepan over medium heat, turning frequently, until they have a few dark spots. Then add enough water to prevent burning and cook until soft. Set aside.

Toast the raw pumpkin seeds in a heavy skillet over medium heat, stirring continuously, until they swell and darken a bit but don’t let them brown, which ruins the flavor. As soon as they’re ready, pour them out of the hot skillet into a bowl to cool.

Chop up the various fresh leaves and stems into small pieces, crumble the oregano a bit, chop the steamed spinach or similar if not already chopped.

Put the cooled pumpkin seeds in the blender and blend to the fine-crumbs stage but don’t let them turn to butter. Add all other ingredients except the lard or oil and blend, adding a little water if needed to keep the blades turning. I like to keep some texture in mine.

Now, the final step that makes everything meld. Heat a large saucepan or a wok with the lard (more authentic) or oil (more readily obtainable) over high heat and pour in the seasoning paste to “sear.” Careful, it spatters furiously. Cook over high heat, stirring and scraping constantly, for a few minutes until the entire potful is boiling hard. Turn off the heat and (cautiously) taste and add salt to taste. Let cool, and package in suitably sized containers for refrigeration or freezing.

Now it can be used to sauce pork, chicken, or fish, diluting to the right consistency with good broth appropriate to the meat or seafood and adjusting the salt as needed. Roasted salted pumpkin seeds and/or some fresh cilantro leaves make a good garnish.  It’s great in a soft taco or sope  with a slice of fresh panela cheese and a crumbling of the far more intense cotija cheese on top.  My favorite use for it is shown at the top of this post: pan-grill some very good shrimp with salt and garlic, add a cup of pipian paste and 1/2 cup of shrimp broth per pound of shrimp and cook briefly until the sauce comes together, adjust seasoning as needed but keep the sauce very thick, and serve with an endless supply of good hot fresh tortillas.


For lunch in 10 minutes, use pipian verde paste diluted half and half with broth, bring to a boil to thicken, and adjust seasoning. Heat tortillas. Scramble two or three eggs with a little salt to taste until fairly firm. Cover a plate with the sauce, heap the eggs in the middle, sprinkle with chopped cilantro and a handful of roasted salted pumpkin seeds (darker squash seeds here,) and add a red dash of salsa macha. Eat with soft tortillas. Yum.

About those tortillas: in general I stick to a low carbohydrate diet, but when in a Mexican phase I don’t. Simple as that. Without rice, beans, and the endlessly creative uses of masa, it isn’t real Mexican food as far as I’m concerned. So I watch my portion sizes, eat one main meal a day and some light snacks, and try not to stay in a Mexican phase for too long. But it’s worth it.