Archive for the ‘Cook’s treat’ Category

The Winter Kitchen: Salsa Macha

When I’m on a Mexican cooking binge I have to make some condiments to serve with meals and Salsa Macha is among my favorites. I love the name, which could be translated roughly as “bold sassy woman sauce,“ and I love the flavor, which manages to be very hot and very delicious. This one is for fire-loving palates. When most Americans hear “salsa” they think immediately of the tomato-based pico de gallo, but in fact there is a huge range of salsas and table condiments in Mexico and, as far as I can tell, most of them are delicious.

Among published recipes there are infinite variations, and my preference is for the simplest version, which I learned from the writing of Zarela Martinez more than a decade ago and have been making with only slight alteration ever since. You will need both a spice grinder and a mini food processor. The blender doesn’t work, since too much oil would be needed to keep the blades turning.

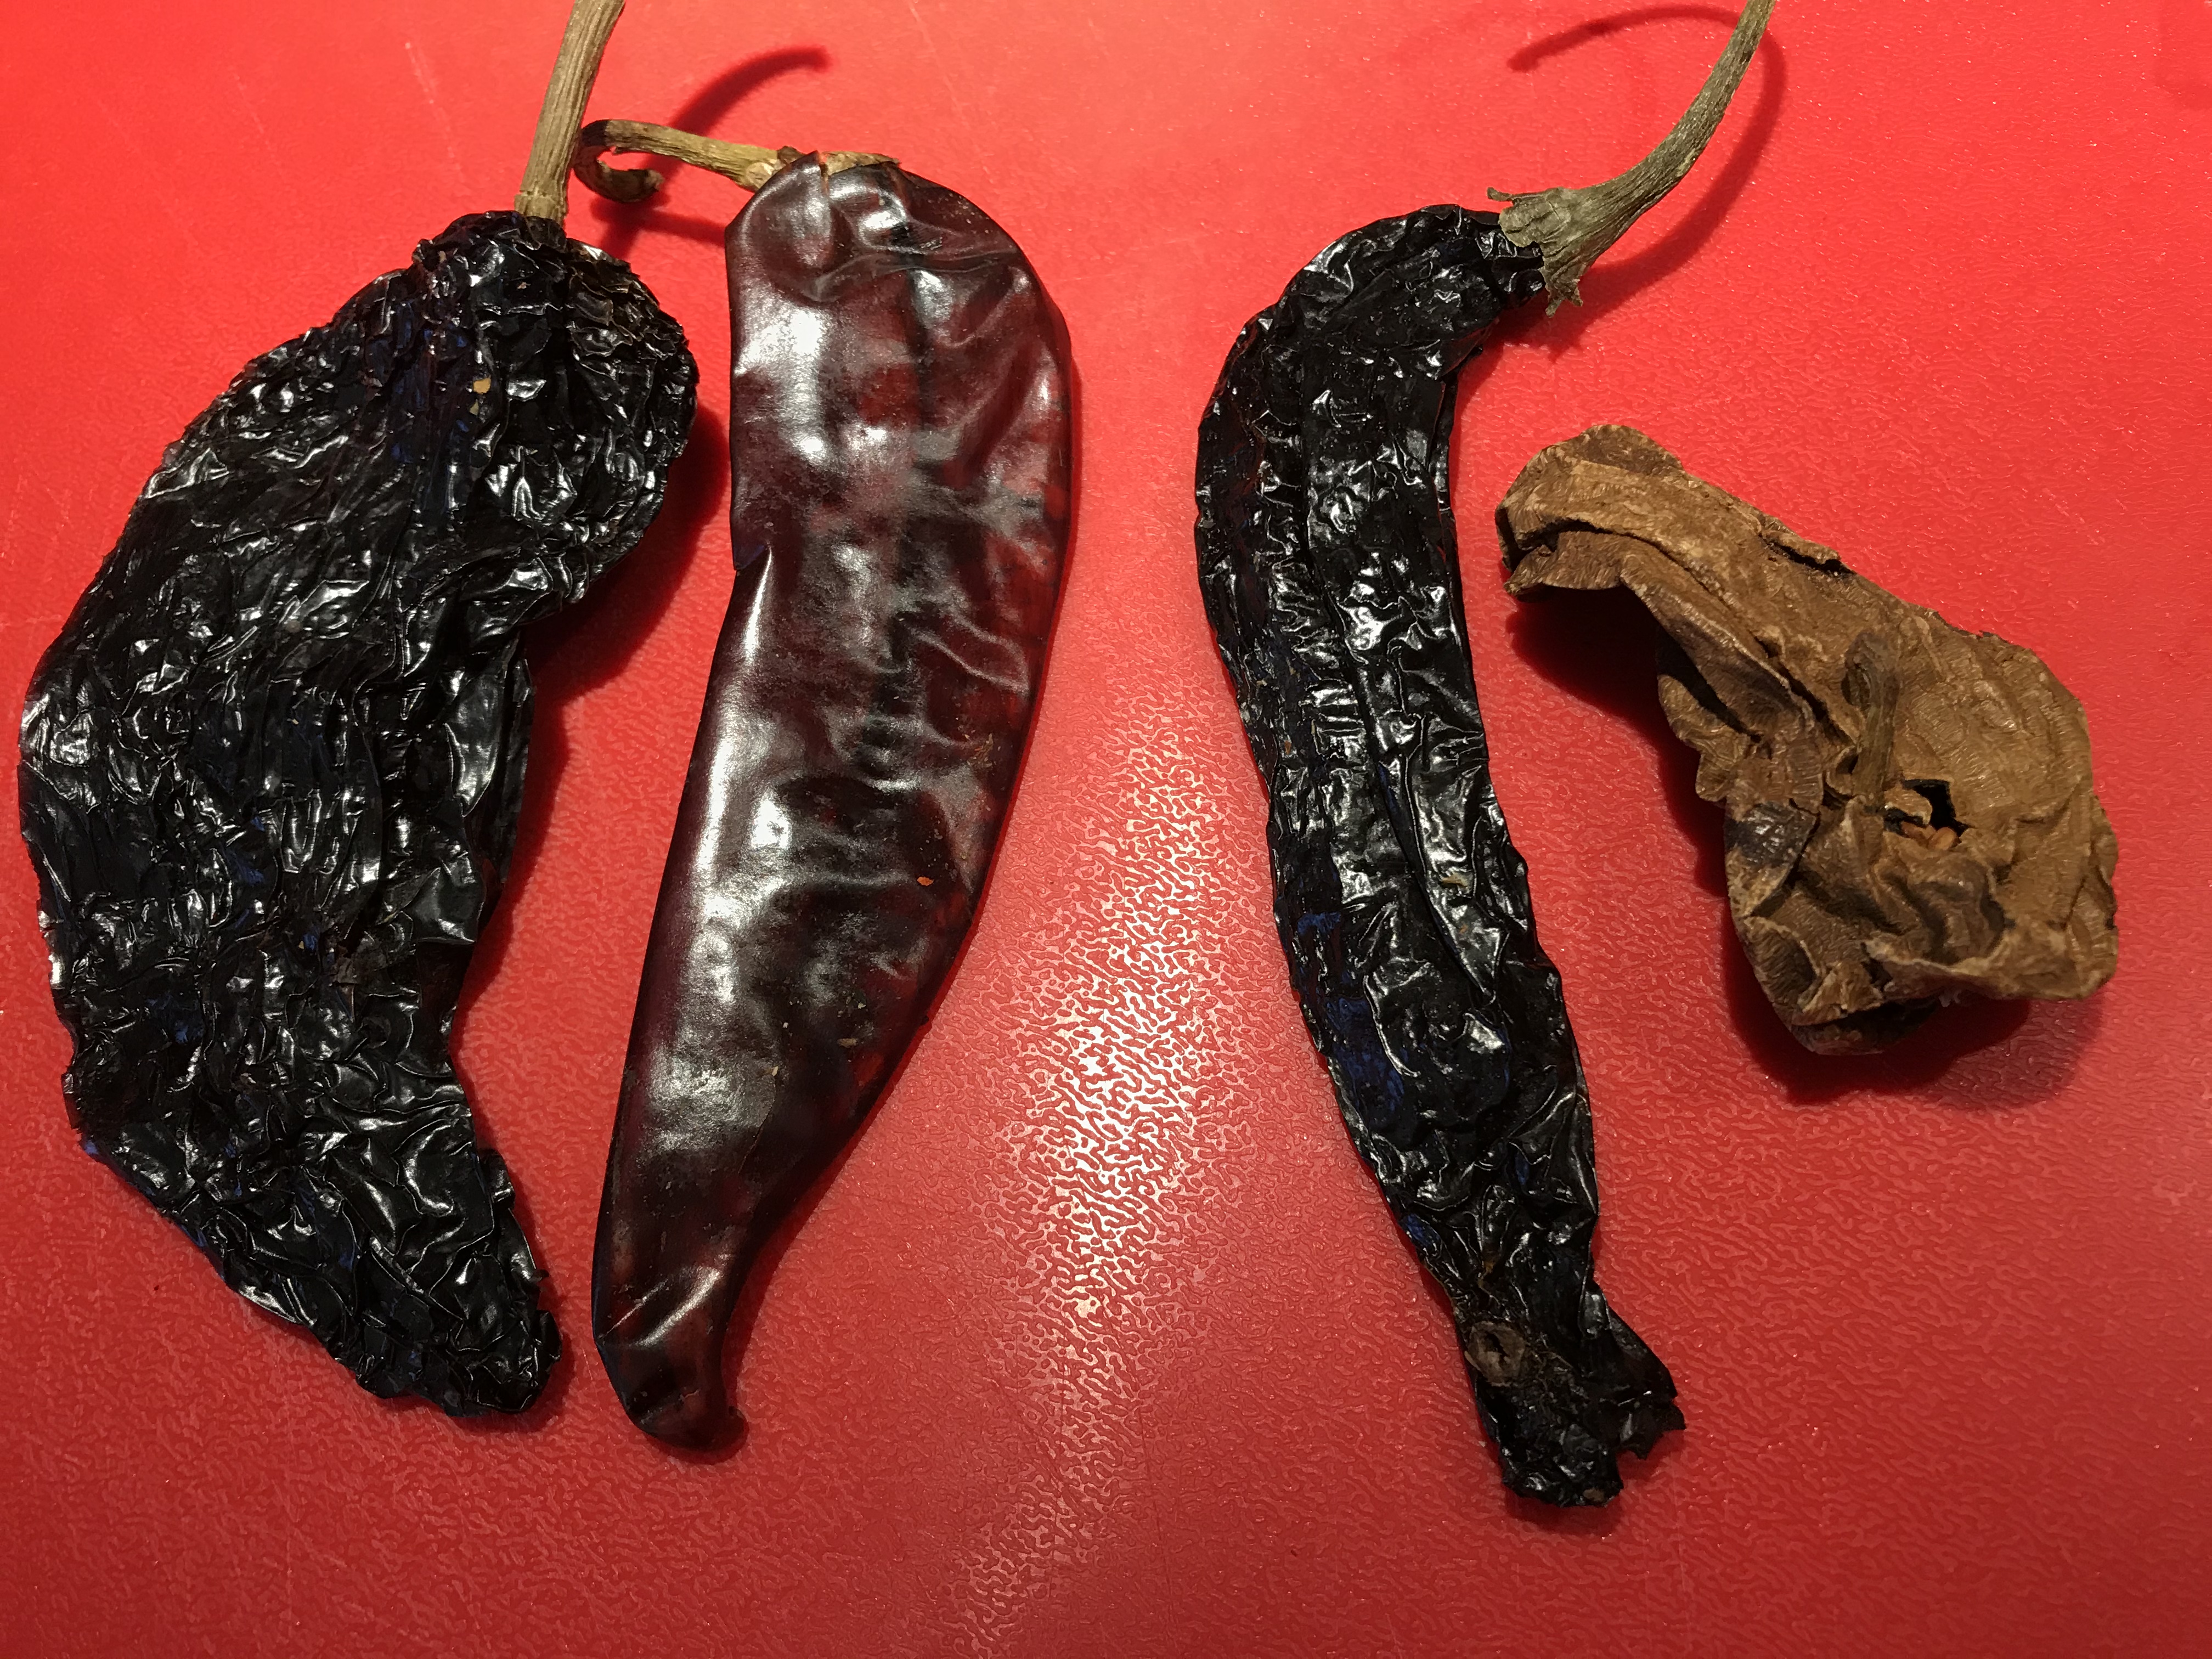
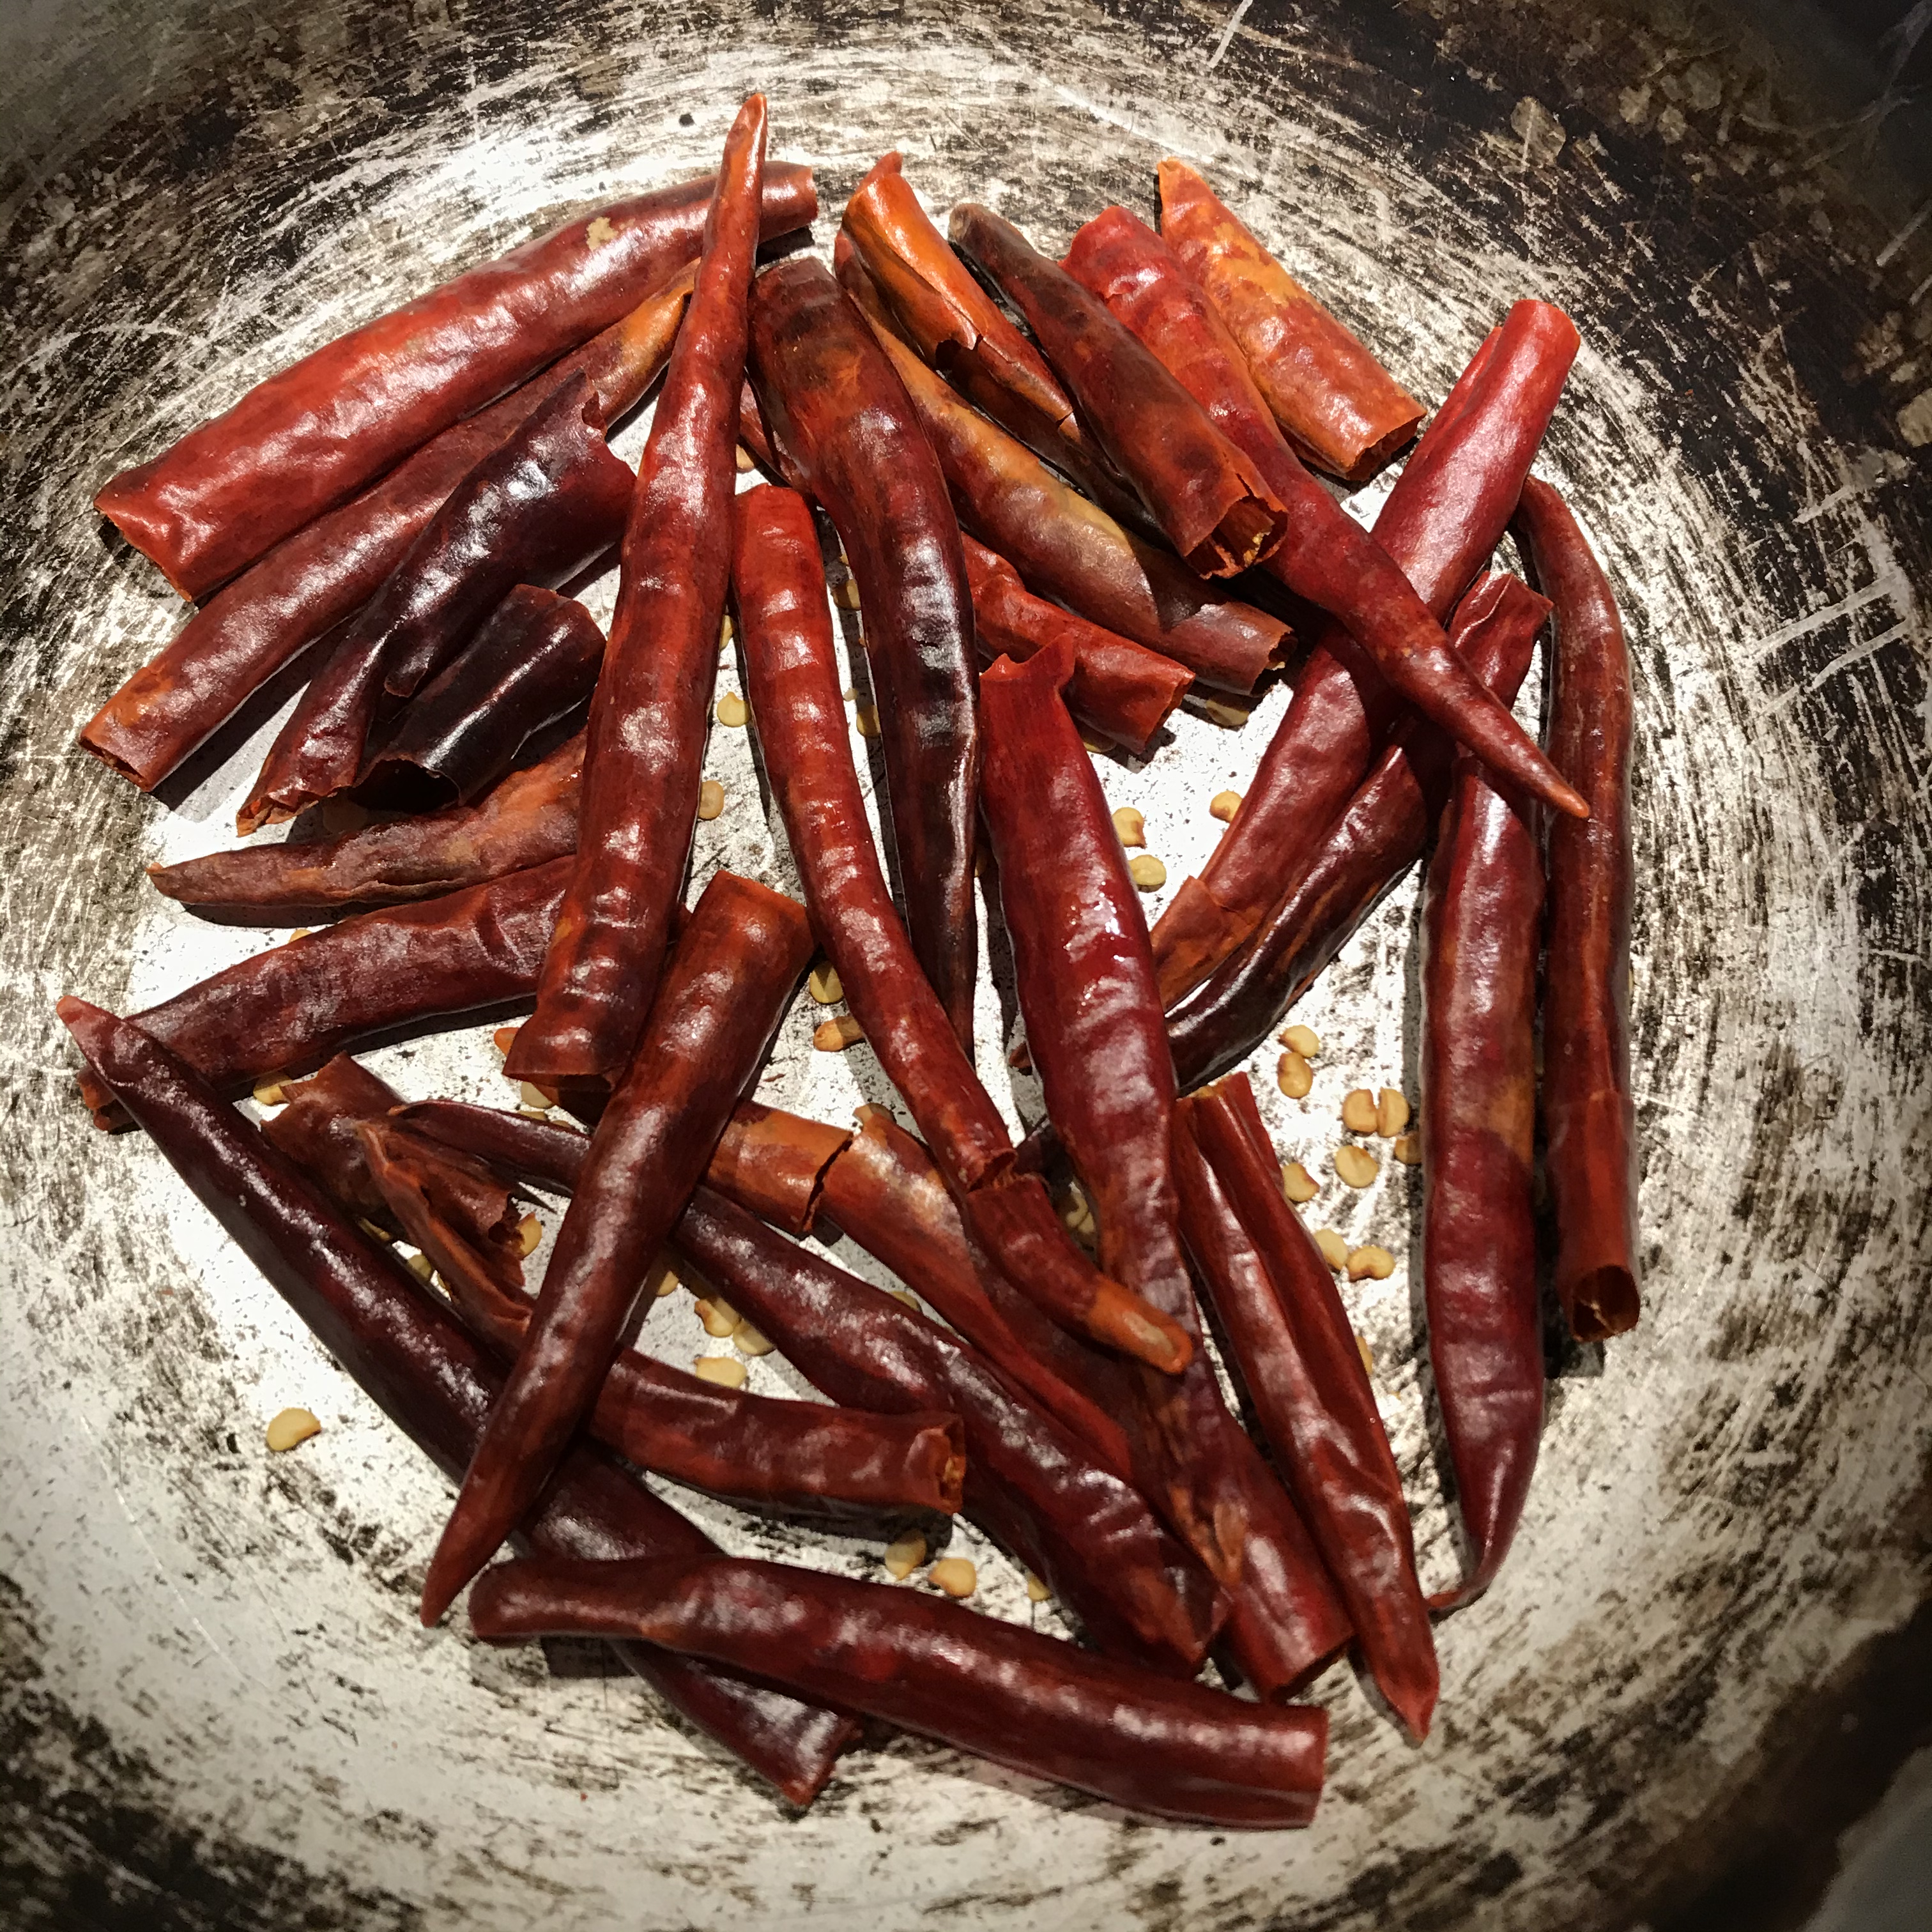
1 ounce chiles de Arbol, about 25

1 cup roasted peanuts

2 cloves garlic

1 teaspoon cider vinegar

salt and mild olive oil as needed

Snip the stem end off each chile and shake out all the seeds you can. Discard the seeds. Put the chiles in a small saucepan over the lowest heat and cook somewhere between 20 and 30 minutes, stirring and shaking occasionally. When you start, notice the sound they make when you stir them, because your best indication that they are done is when the sound becomes higher pitched and somehow drier. They will be a couple of shades darker and a little smoother and glossier than when you started, and more brittle if you squeeze one between your fingers. Be careful not to scorch them.

At the same time, put a small skillet over low heat, put the garlic cloves still in their skins in the skillet, and turn them occasionally while the chiles cook. When the skins are browned in spots, take them out of the skillet. The important thing is that the cloves inside be a bit cooked and no longer raw-tasting. At times when I have leftover roasted garlic or garlic confit in the refrigerator I often use that, using several cloves instead of two to compensate for the milder flavor.

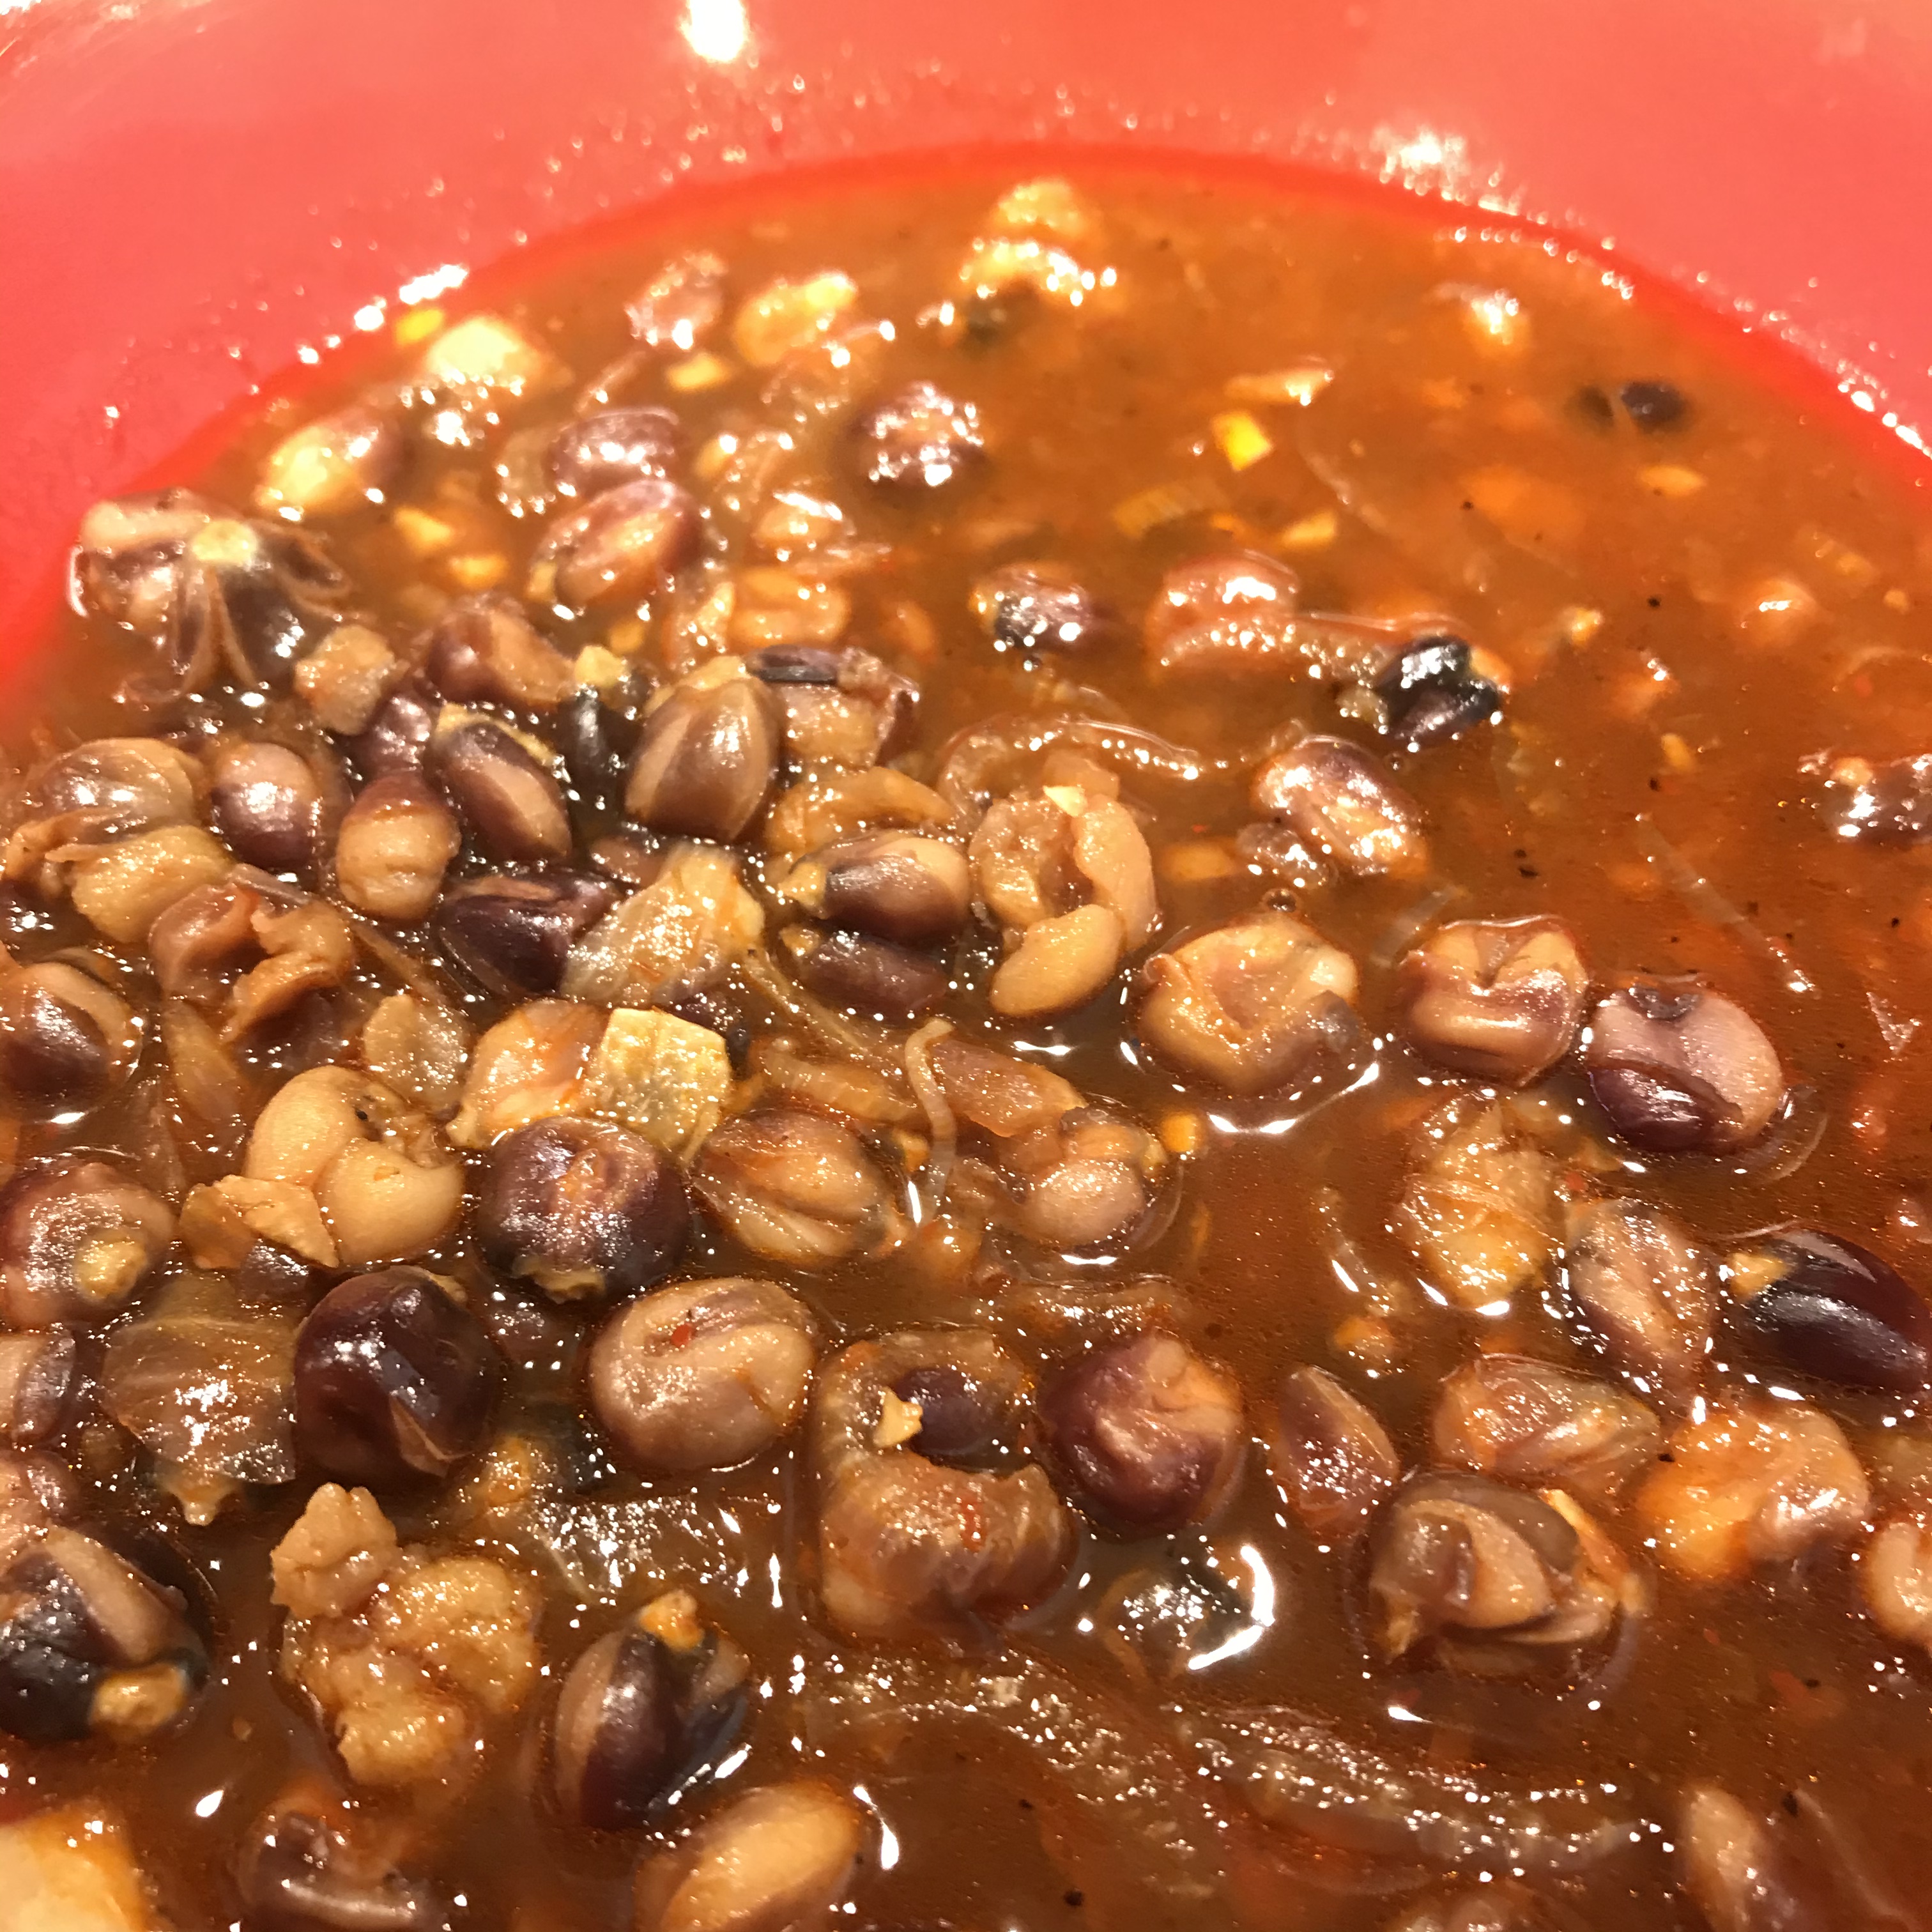
Grind the chiles in the spice grinder to a fine powder. Put the powder in the mini prep and add the peanuts. Process until the mixture looks like coarse crumbs.

Peel the cooked garlic cloves, add them, and process to the fine-crumb stage. Sprinkle in the teaspoon of vinegar and add olive oil to taste. I add the oil a tablespoon or two at a time, processing briefly between additions, and add only enough to coat the “crumbs” and bring the salsa together. Many commercial versions are swimming in oil, which doesn’t appeal to me, but suit yourself. Now taste and salt as needed. I can’t guess at a quantity because it depends how much salt was on your peanuts, but this is a condiment and in my opinion it should lean salty, to balance the heat.

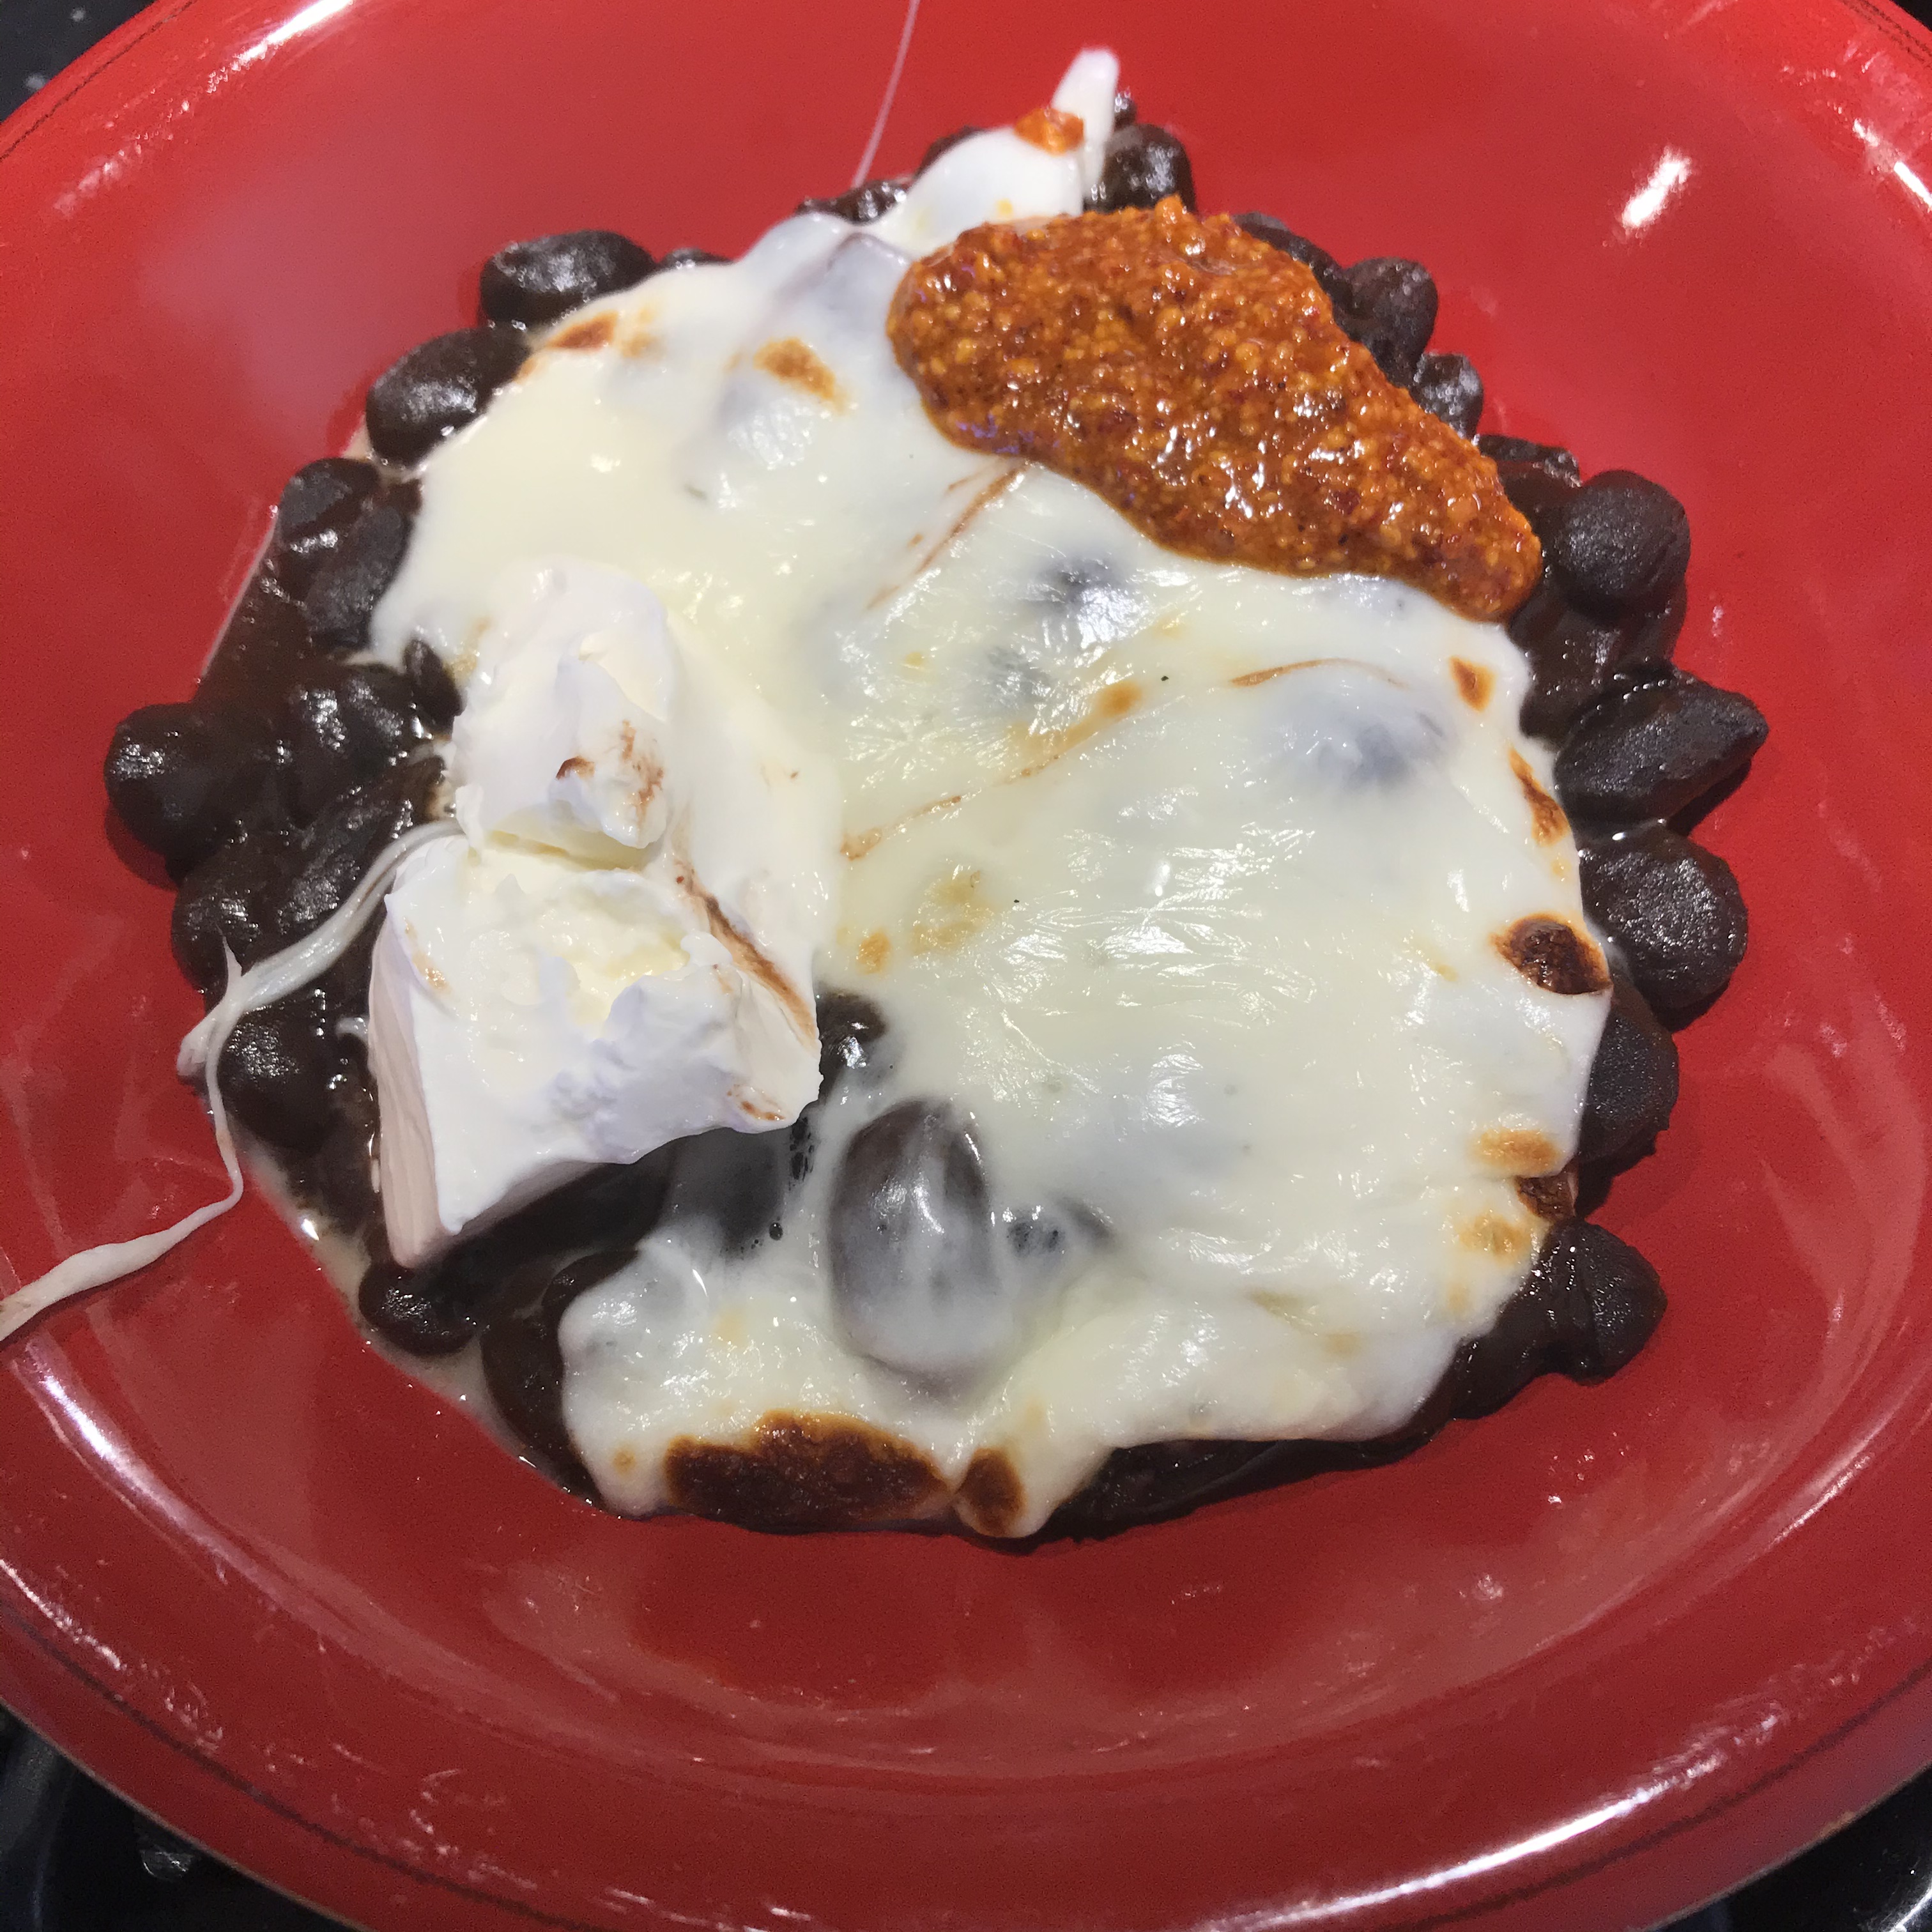
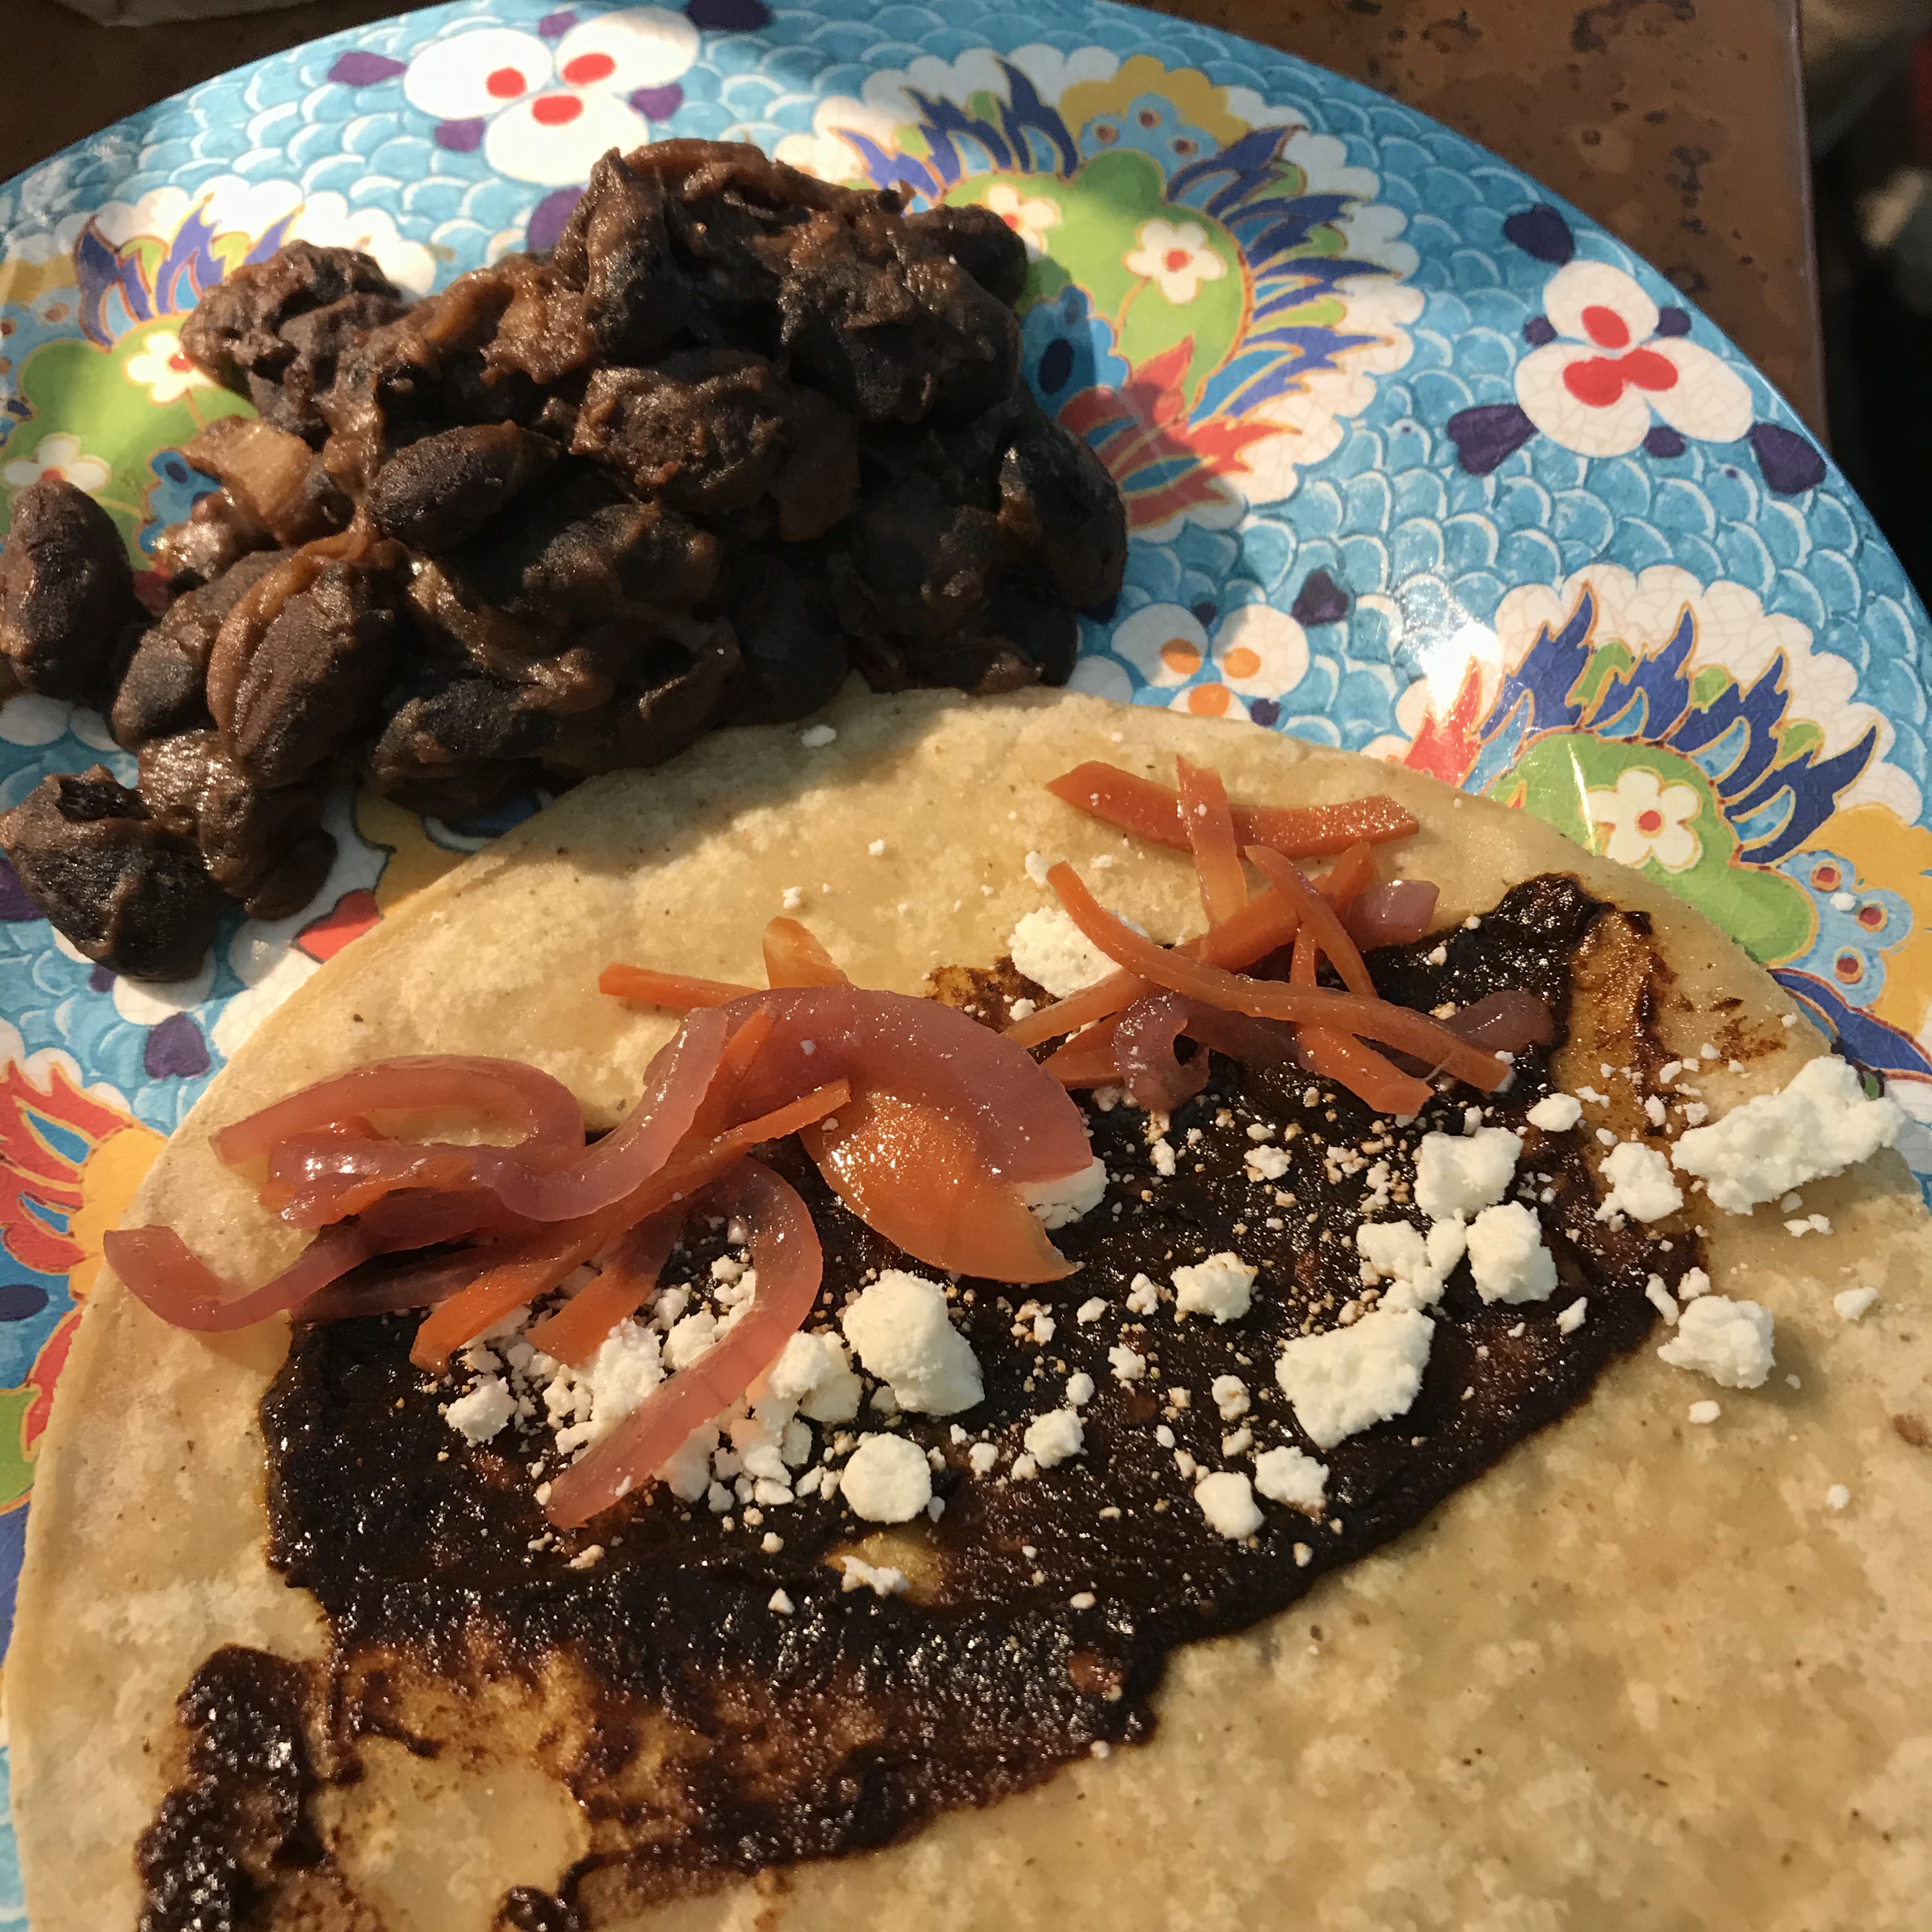
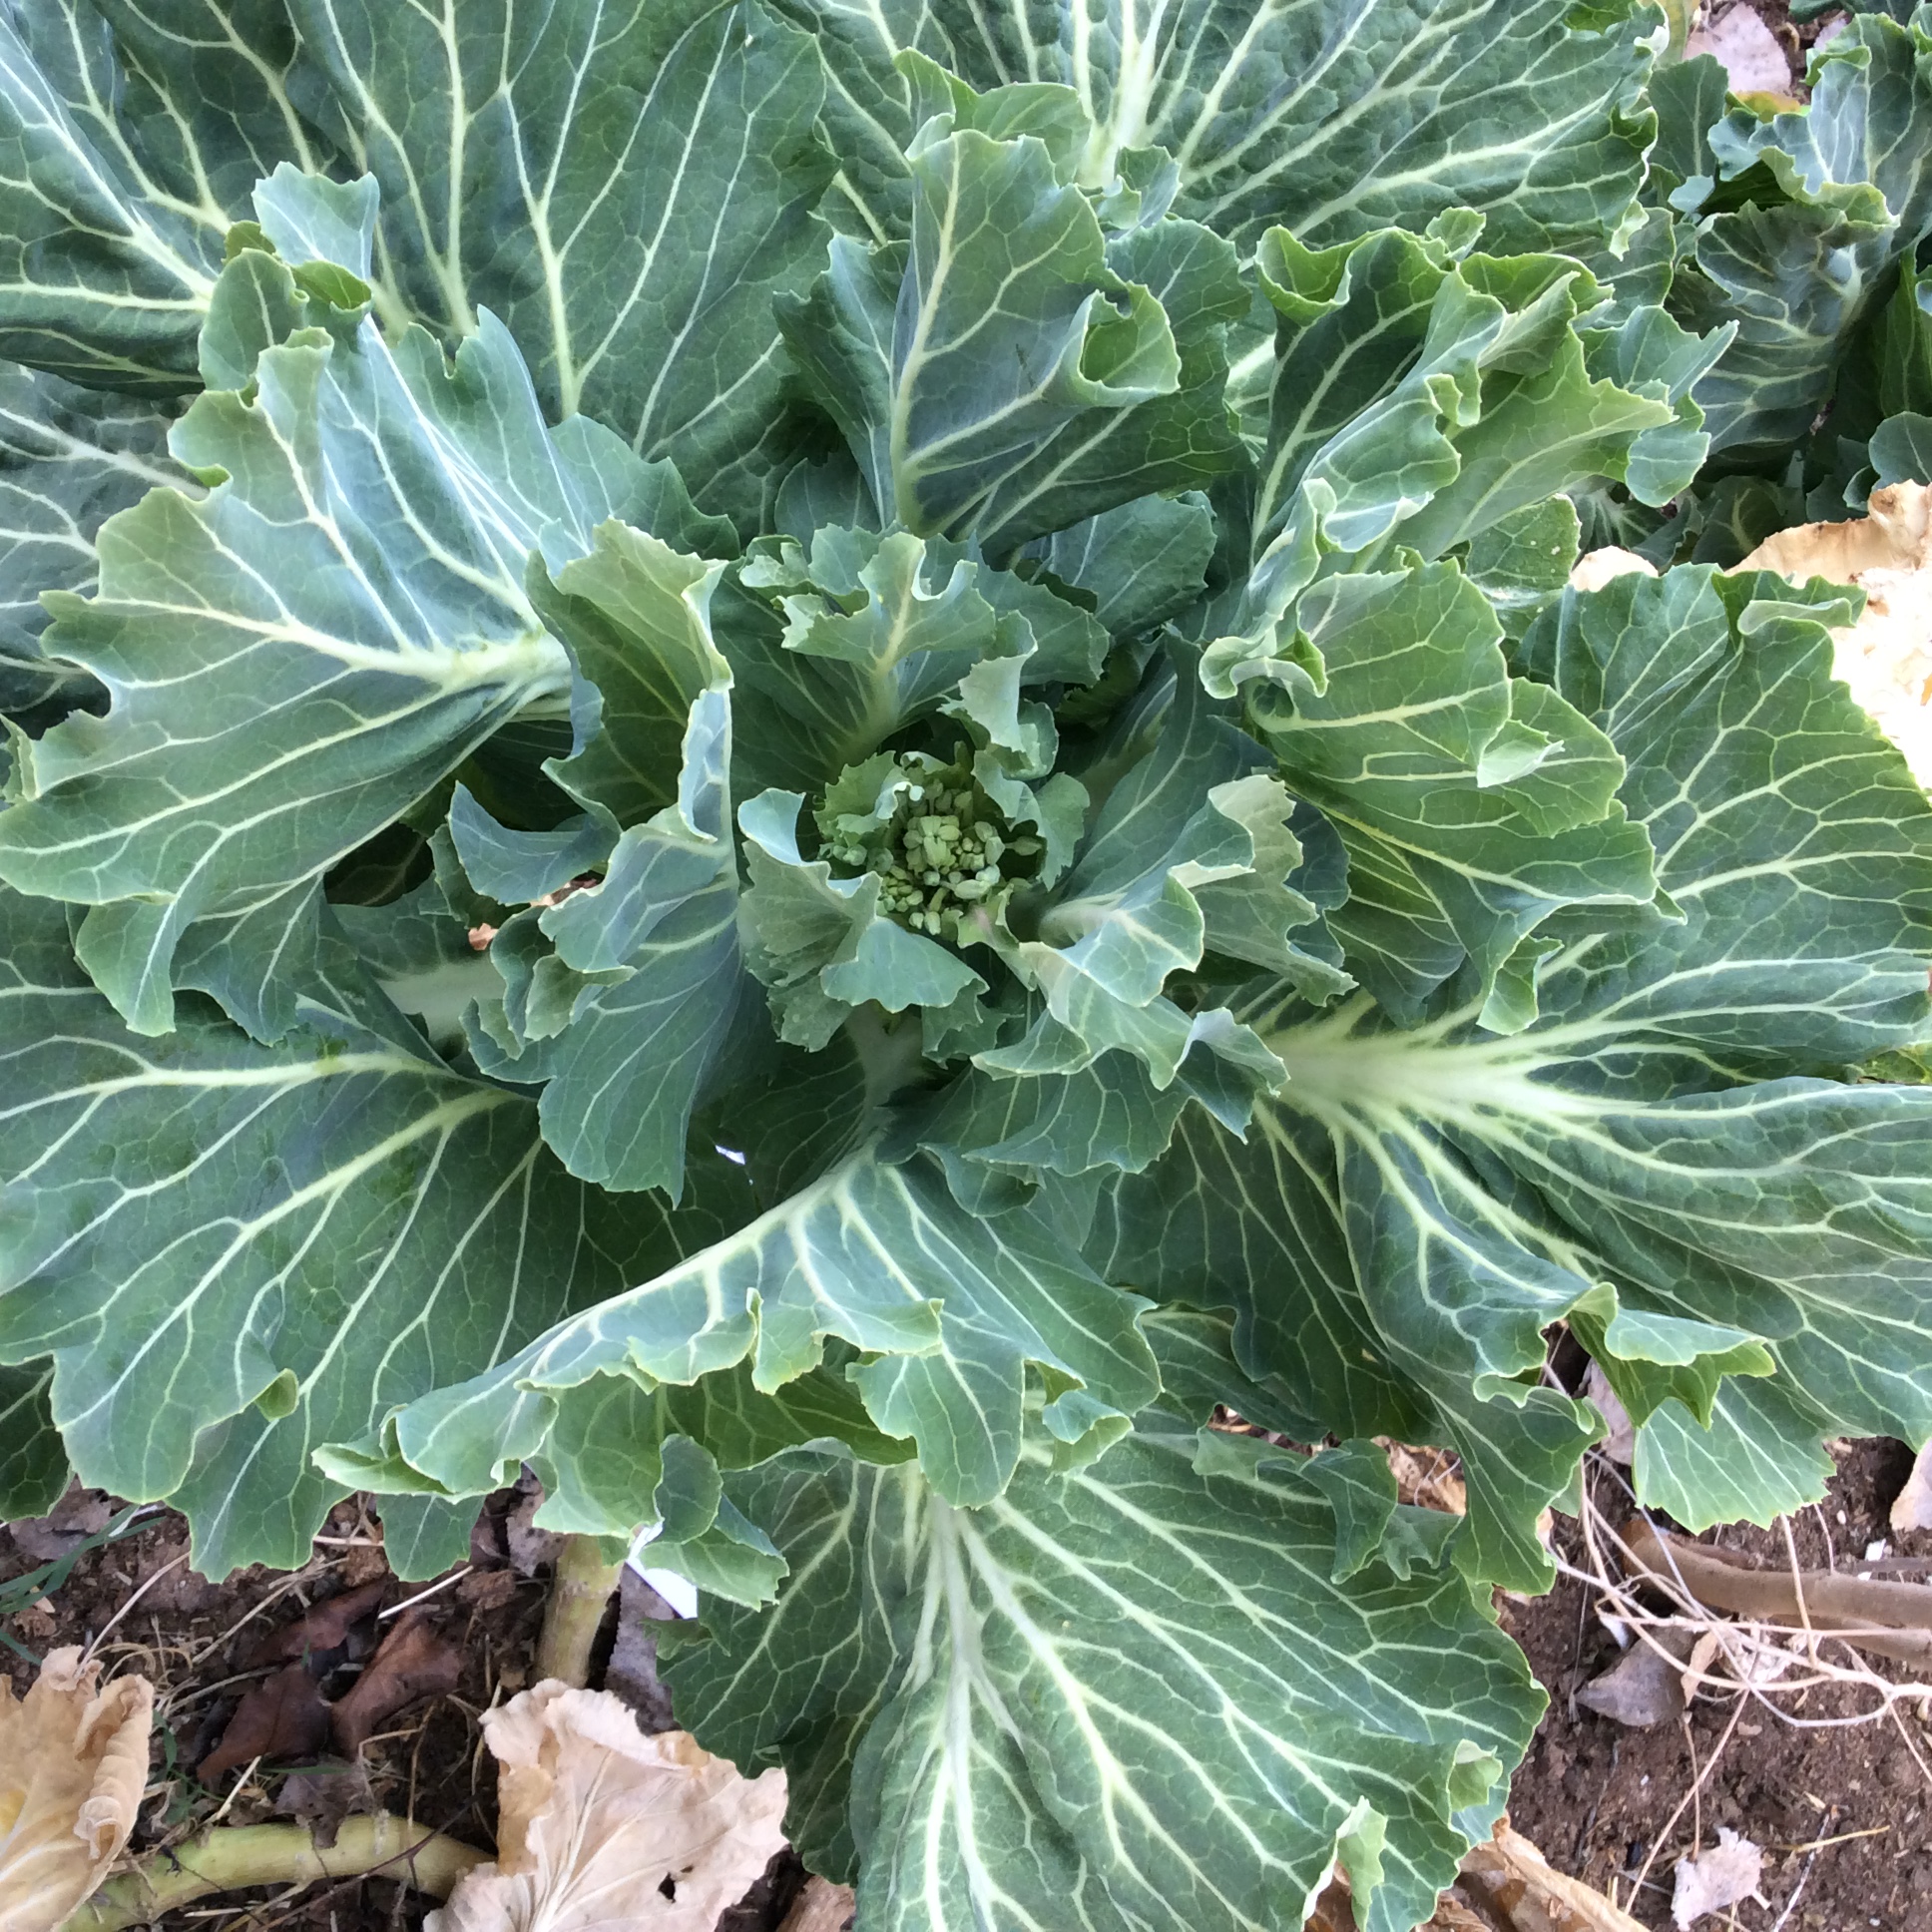
It’s great on a grilled tortilla as a snack or cook’s treat, and good as a table condiment with any dish that isn’t too delicate in flavor. I’ve enjoyed it with shrimp rubbed with chipotle and garlic and grilled. It would be good with simply cooked and salted earthy greens. Today I dished up simply cooked black beans from Rancho Gordo, grilled some asadero on top, and dolloped  some creme fraiche and salsa macha on the side. Simple, filling, and interesting to eat.


The Winter Kitchen: Earth and Fire Sauce


In the past, when I traveled in Oaxaca, I fell in love with the moles, as nearly every traveler there does. My favorite is the rich, complex, highly seasoned mole negro, and I have made the mole paste for it a few times but find that I seldom have enough uninterrupted time to collect all the ingredients, prepare and fry them individually, grind them together, etc. There are a few good commercial brands of mole negro paste, and on the rare occasions when I want this special dish, I tend to use them.


But I often crave flavors that are somewhat reminiscent of mole negro, involving deep, rich, earthy tones with a spicy seasoned overlay and an element of slow, dark fire. For those occasions, I have come up with a seasoning paste that I can make in the winter, keep in my refrigerator, and add where appropriate. Properly speaking it’s a salsa, but in the American minds salsa is the fresher lighter tomato concoction, so I call it a sauce. The ingredient list is simple, although if you live in an area that lacks a substantial Mexican population you may need to order the chiles by mail. The prep may seem time-consuming, but comfort yourself that it’s insignificant compared to the time spent making mole negro. You’ll need a blender.

The long, narrow Pasilla negro and the light brown chipotle meco are the two on the right

7 chiles Pasilla Negro, often just sold as chiles negros

7 chiles chipotle meco (medium-sized and light brown, not small and dark red)

1 7 ounce can chipotles in adobo, including all the liquid

8 cloves garlic, not peeled

1/2 cup raisins

3 cups chicken broth

1/2 teaspoon Ceylon (canela) cinnamon or a bit less standard cinnamon

1/4 teaspoon freshly ground allspice

2 tablespoons grated piloncillo or coconut sugar

1/2 teaspoon salt, oak-smoked if available.

2 cups avocado oil for frying

1/4 cup homemade lard or more avocado oil for searing the sauce


Cut the stem ends off all the dry chiles, cut them open down one side with kitchen scissors, and scrape out most of the seeds and veins. Snip each one across the length a couple of times. In a small deep sauce pan, heat the avocado oil intended for frying to about 350 or until a piece of chili put into the oil immediately bubbles and sizzles. Have paper towels ready for draining. Put a small handful of the chiles into the oil at a time, fry them until the color changes visibly turning as needed, fish them out with a slotted spoon, and drain them. Now put the cloves of garlic, still in their skins, in the oil and let them fry until the skins are somewhat browned, and drain them. Put the raisins in the hot oil and fry just until they swell and puff, then drain. Now set the saucepan of oil aside in a very safe place to cool off.

Heat the chicken broth to boiling in another pot, turn off the heat, and put all the fried chiles in the hot broth to soak for 20 minutes. Peel the garlic cloves and add them.

Put the soaked chiles and peeled garlic cloves and their fluid in the blender jar along with the seasonings, the sugar, and the canned chipotles with all their adobo fluid. Grind smooth, scraping down the blender as needed. Add a little more water if needed to keep the blender blades turning.

Now for the dramatic step that pulls the sauce together. In a large frying vessel (I prefer a wok to minimize the inevitable splattering,) heat the lard or avocado oil over high heat. When it’s very hot, pour in the purée from the blender jar. Use an apron and don’t lean over the stove, because it will sizzle and splatter viciously. Stir cautiously with a wooden spoon. After 3-4 minutes turn the heat down to simmer and simmer the sauce for about 30 minutes, stirring occasionally.
When ready, the sauce is very thick and will hold indentations when stirred, but it’s not cooked down to a paste. Taste it and adjust the salt if needed, but in my opinion use table salt and not smoked salt at this point. If it tastes a little bit on the acrid side, you may need to add a little more dark sugar.

Now you’re done and can quickly and efficiently add notes of earth and fire wherever you think they are needed. Use diluted or undiluted. The finished sauce can be spread directly on hamburgers immediately after grilling. A tablespoon or two per serving of black beans adds immeasurably to their meaty richness,  and this combination is especially good with a dollop of crème fraîche on top. A few tablespoons per cup of chicken or turkey broth makes a wonderful sauce for roasted or smoked birds. It could be used as a rub for grilled chicken, although you need to be careful not to burn it. I think that it might make a good grilling rub for salmon or other strong-flavored fish. It adds wonderful depth to sautéed mushrooms, and I think it would be great on grilled carrots or roasted sweet potatoes, especially with a pat of butter on top. For a quick snack or lunch, nothing beats a quickly griddled tortilla with a smear of Earth and Fire sauce, a sprinkle of crumbled cotija  cheese, and a few quick-pickled vegetables. A quick soft taco also makes a great cook’s treat. If you’re hungrier than that, add some frijoles negros or frijoles refritos as shown at the top of this post. A good dollop in a bowl of good posole elevates it to a feast.

It can be frozen after preparation for use later, either in jars or in individual portions in large ice cube trays. On late afternoons when you need something warm and not too filling, a cube could be dropped in a cup of hot chicken broth to make a warming “instant” soup.


A few notes on ingredients:
The best chiles that I know of come from The Chile Guy
The best beans and posole corn that I know of come from Rancho Gordo
The only lard worth using is the lard that you render yourself, not the awful commercial stuff. If you don’t want to render a little, use oil instead.
My favorite tortillas are the nixtamalized heirloom corn tortillas from Masienda. In my area, Whole Foods carries them.

Snacking Greens

Probably everybody has made kale chips, the delectable snack made by oiling and seasoning pieces of curly kale and baking them at 375 or 400 until they are crisp. They are delicate, and not much good for dipping in anything, but they are quite wonderful by themselves. Recently I was making a batch and began to wonder about using some of my other available greens. Ultimately I used both green and scarlet curly kale,  carrot leaves, and torn sections of collard leaf because that was what was left in the garden.  The leaves were washed, allowed to drain, and 12 mid ribs removed from the larger leaves. In the case of the small carrot leaves, the stem was snapped off just below the lowest leaflet. I drizzle them with olive oil and seasoned with salt, finally grated Parmesan, nutritional yeast flakes, and a sprinkling of roasted ground garlic. If you want an exact recipe, there are dozens on the Internet. This is something you can do in a very improvisational way as long as you don’t oversalt.

Lesson learned:  don’t put them all on the tray at the same time, no matter how pretty it looks. The three greens finished at very different times.  Collards needed the least time, and despite several experiments I never did get them quite right. They go from olive-green and ready to eat to brown and burnt-tasting  in under a minute. Also, they don’t cook very evenly despite your best efforts, so ultimately what I ended up doing was just picking out the brown leaves, which taste burnt, and throwing them away. I still think there are real possibilities here but I did not get them to work as a satisfactory chip.

The carrot leaves were astoundingly good, with a perfect delicate crunch and a mild flavor. Even the stems had a good texture, lost their toughness, and tasted just fine.  I wish I had discovered this earlier in the year when I had more carrot leaves. But this is a good reason to keep a blog, or a written record of some kind, because if you don’t you end up “discovering” the same things every few years.  I am recording it so that I won’t have to discover this again. It’s a handy thing to know if you buy carrots with the leaves on. Remove the leaves as soon as possible before storing in the refrigerator, because they seem to go limp more quickly if still attached to the roots.

Curly kale was delicious, as it always is when baked this way.  I just love the stuff, and have no idea how large a bowl of kale chips I could eat, but I guarantee that it would be a big one.  If you live in a snowy climate, it is very likely that you can keep curly kale in good shape through much of the winner in your garden. Here in the high desert it does not get all that cold but we don’t have any snow cover and we have a lot of drying winds,  so by this time of year the curly kale that is growing uncovered looks pretty tattered. Also, for reasons I don’t know, there is an invasion of aphids in early December, and they are hard to wash off. But this year I did plant a row of curly kale and put frost blankets over it in early November, and that row is looking great and has no aphids.  So I have at least a few more batches of homegrown kale chips coming.

Incidentally, if you are cooking a meal and have the oven at 375 or so for something else, a few kale leaves out of the garden in a little pan make a great cook’s treat to tide you over until the meal is ready.

Green Slaw, and notes on salt-curing greens

Right now my garden is full of savoy cabbage and collards, the cold-hardiest greens around, and I’m trying to eat them in as many forms as possible. There are no greens more nutritious, and after a few hard frosts the texture is excellent. One way I really love to eat them is salt-wilted or salt-cured, which makes them more tender and gives them a velvety texture. The slaw shown above was designed to go with Mexican flavors and makes use of cilantro stems, which are often wasted but shouldn’t be. They have pure cilantro flavor and, unlike the leaves, will stand up to marinating or cooking.

For two people, I used one giant outer leaf of savoy cabbage and cut the midrib out. I then rolled the leaf halves up and cut them into thin strips less that 1/4” wide. Half a red onion was cut into very thin slices. The cabbage and onion strips were put in a bowl and salted generously. I didn’t measure the salt, but the idea is to use somewhat more than you might sprinkle on at the table, not to drench them with salt. Half a teaspoon for this small salad would probably do it.  Then- this step is important- I massaged the salt in with my fingertips for about a minute. The bowl was then put aside for half an hour. Meanwhile, I chopped a small clove of garlic finely and cut a handful of cilantro stems in fine cross section, as well as getting the chicken breasts and sauce ready. While the chicken breast was cooking, I squeezed out the greens to get rid of excess liquid. Then I tossed in the cilantro stems and garlic, squeezed the juice of half a lime over the leaves, tossed with couple of tablespoons of good olive oil, and finished with a few grinds of black pepper and a generous sprinkle of ground toasted cumin. The most important final step is to taste and consider the seasoning before serving. It may need additional salt, since much was lost when the liquid was squeezed out. And after considering the flavor balance, I ended up tossing in a light sprinkle of stevia, probably equivalent to about half a teaspoon of sugar.

This basic technique can be taken in many other directions. For a more Chinese take, leave out the cumin, use rice vinegar instead of lime juice, and add some grated ginger with the garlic and finish with a final drizzle of roasted sesame oil.  A sweeter take that can accompany Korean food or barbecue with equal facility can be achieved by tossing the wilted veggies, garlic, and cilantro stems with quasi-Korean sauce.  (Incidentally, when making that sauce, remember that oligofructose is not an essential ingredient and, if you aren’t low-carb, you can just use a smaller amount of sugar.) If pursuing an Asian flavor, use a neutral oil like macadamia oil rather than olive oil.  Rather than cilantro stems, you can use finely chopped parsley stems or a handful of finely sliced celery. You might want to salt-wilt the celery with the cabbage and onions if you use it, to make the texture blend in more harmoniously. You can dress the wilted veggies with wine vinegar or tarragon vinegar, add some finely chopped fresh thyme, and finish with a very good olive oil to have the slaw accompany more traditional western flavors. Parsley stems, lemon juice, oregano, and a final sprinkle of feta on top makes it more Greek, which is where I learned the salt-wilting technique in the first place. You can of course use part of a cabbage head rather than outer leaves, and red cabbage turns a lovely scarlet when salt-wilted and dressed with something acidic.  The point is that salt-wilting is a way to make thick cabbagey leafy greens more tender and chewable so that they can readily be eaten raw, and then you can take the flavor in any direction you want.  If you absolutely don’t have time for the salt-wilting step, you could try just massaging the finely sliced veggies with your fingers for an extra couple of minutes, and depending on your greens, this may soften the texture enough to make them very tasty, although the plush texture achieved by salt-curing won’t be there.  And if you don’t want to serve it as part of your meal, a small portion from half a large leaf or  so made in the kitchen while you do other things is a great cook’s treat  to eat while you work and prevent overeating later on.

I never tire of harping on the fact that leafy greens form the basis of the Cretan diet, the diet that nourished some of the healthiest and longest- lived people in the world. Also, they are full of soluble and insoluble fiber and very filling, so you have half the chicken breast left over to eat the next day, providing economies of time and money in addition to the health benefits.There is a meme going around that says

“How do you reset your body back to its factory settings?

It’s kale, isn’t it?

Please don’t say it’s kale”

Substitute “leafy greens” for “kale” and this becomes fairly accurate, and can be made delicious. If you grow your own greens, it’s also dirt-cheap. So there just isn’t a downside.