Archive for the ‘recipe’ Category

Improvisational Cooking: Greens on the Table

imageimage
I am always yapping on about eating more leafy greens, and periodically I like to write about how I put leafy greens on my own table. Here is a low-carb recipe that even greens-phobes tend to like, and leftovers make wonderful lunches and snacks. It is improvisational in nature and you can substitute at will: this is a skeleton recipe and you can flesh it out any way you like.

The basic ingredients are greens, alliums, flavoring leaves, oil, cream, eggs, nuts, seasonings, and cheese. The greens, alliums, and flavoring leaves can be varied endlessly, except that the bulk of the greens should be relatively mild.

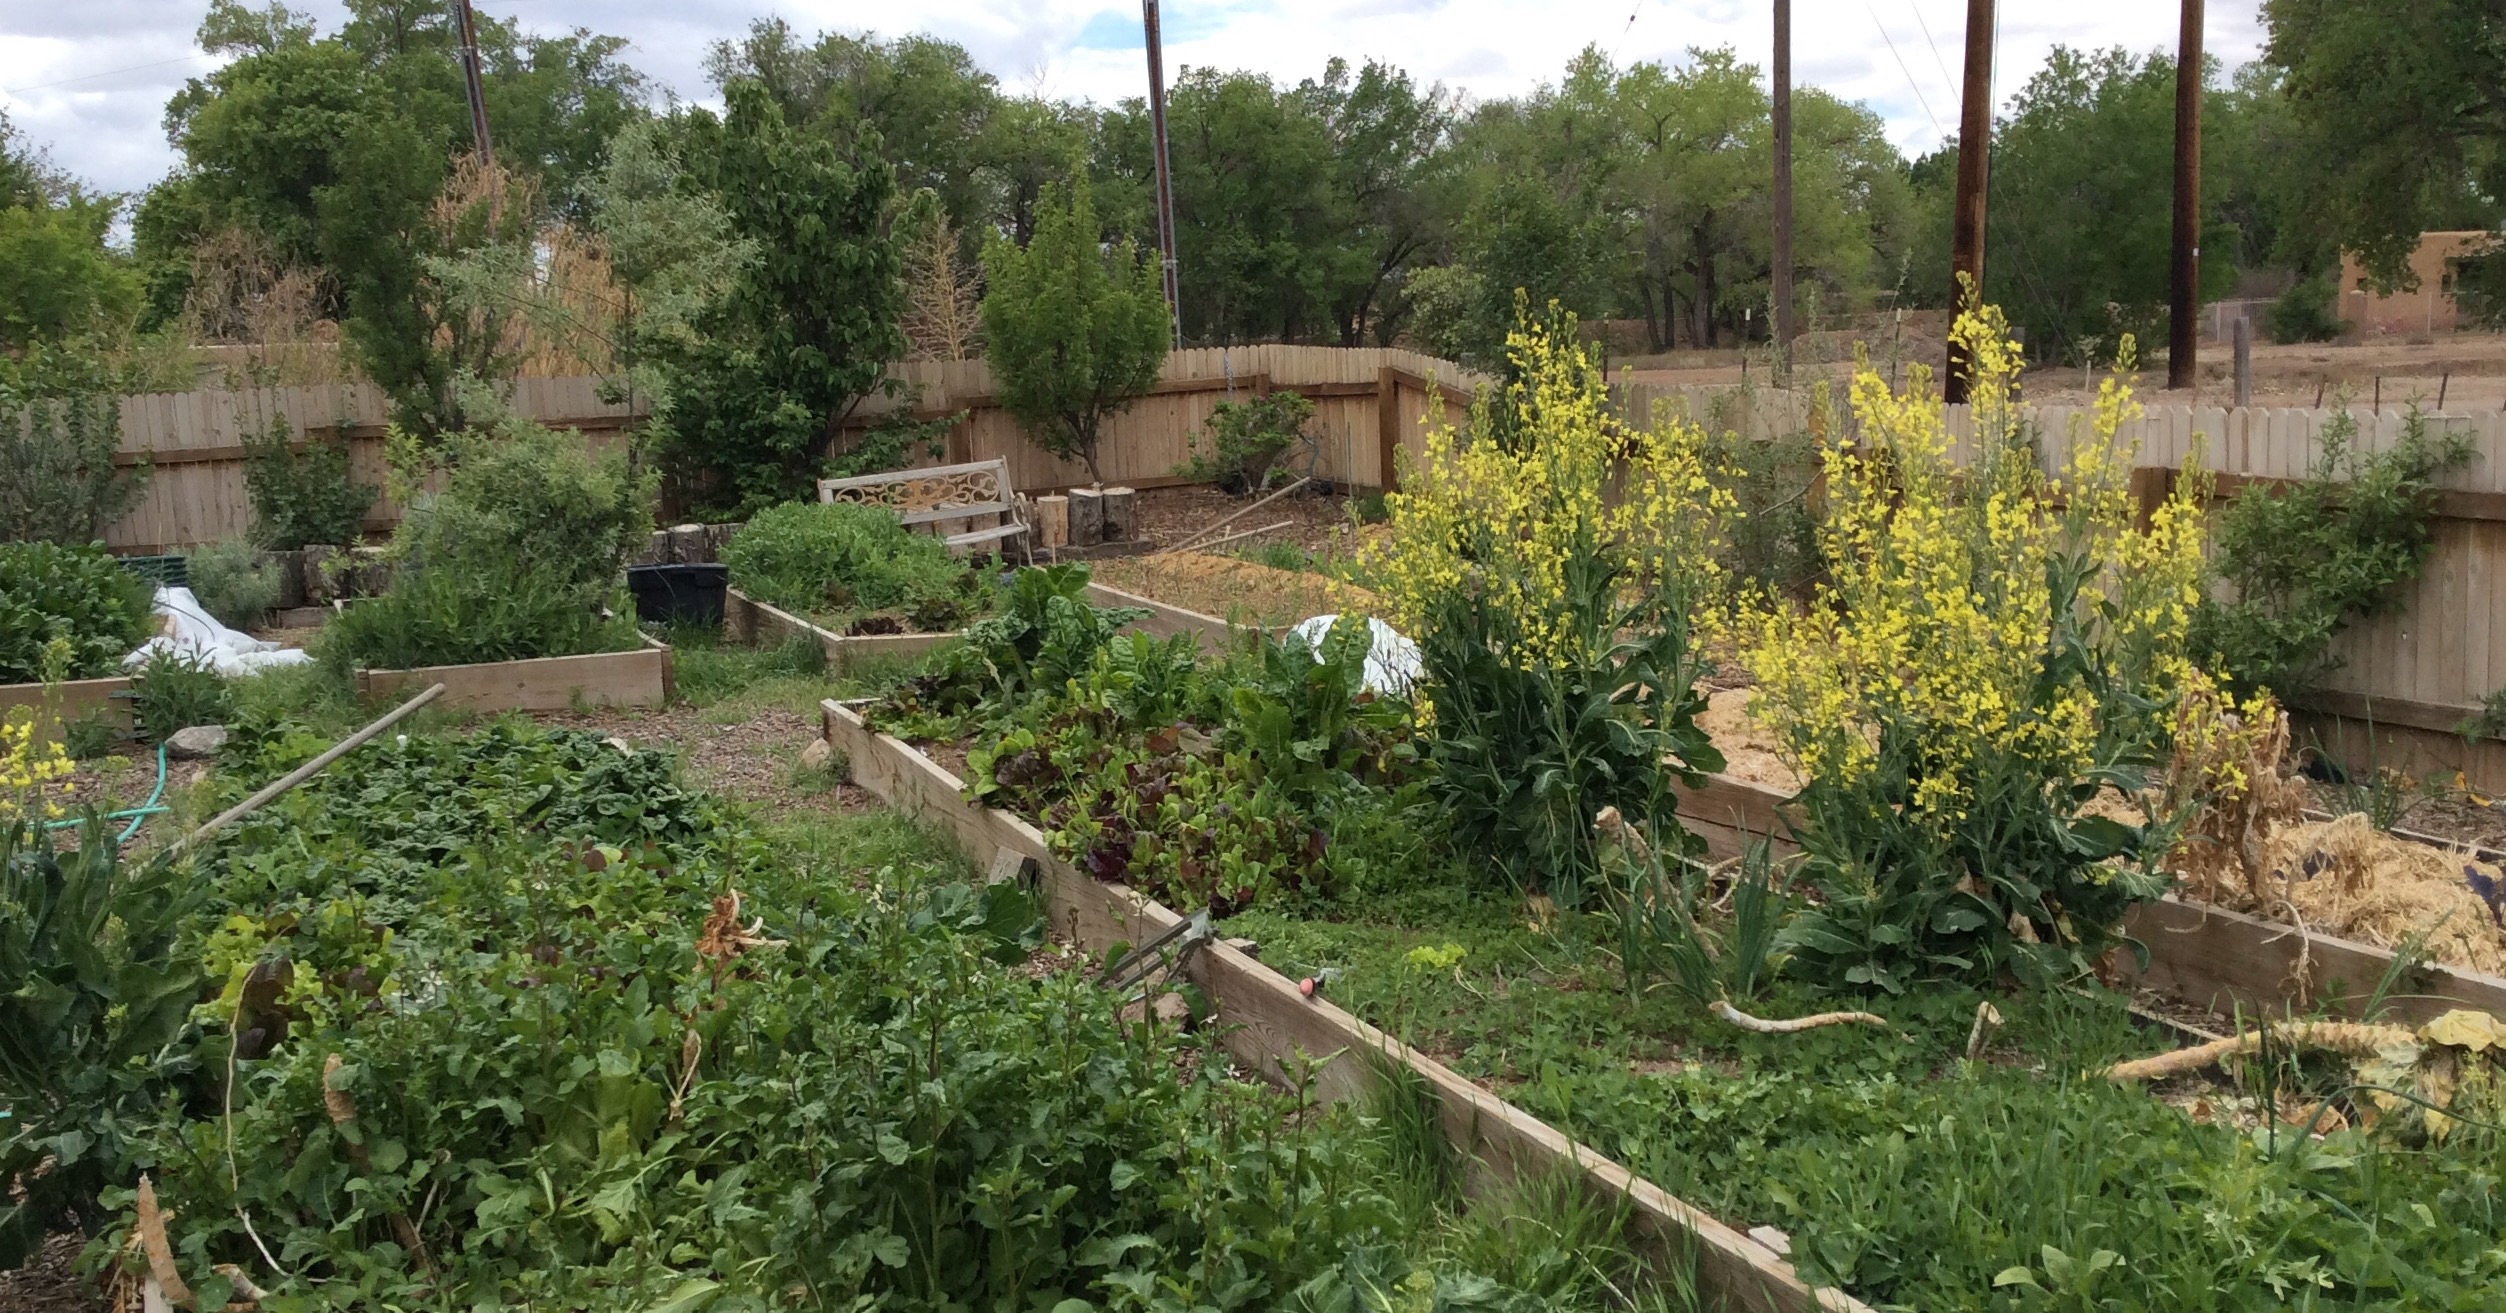
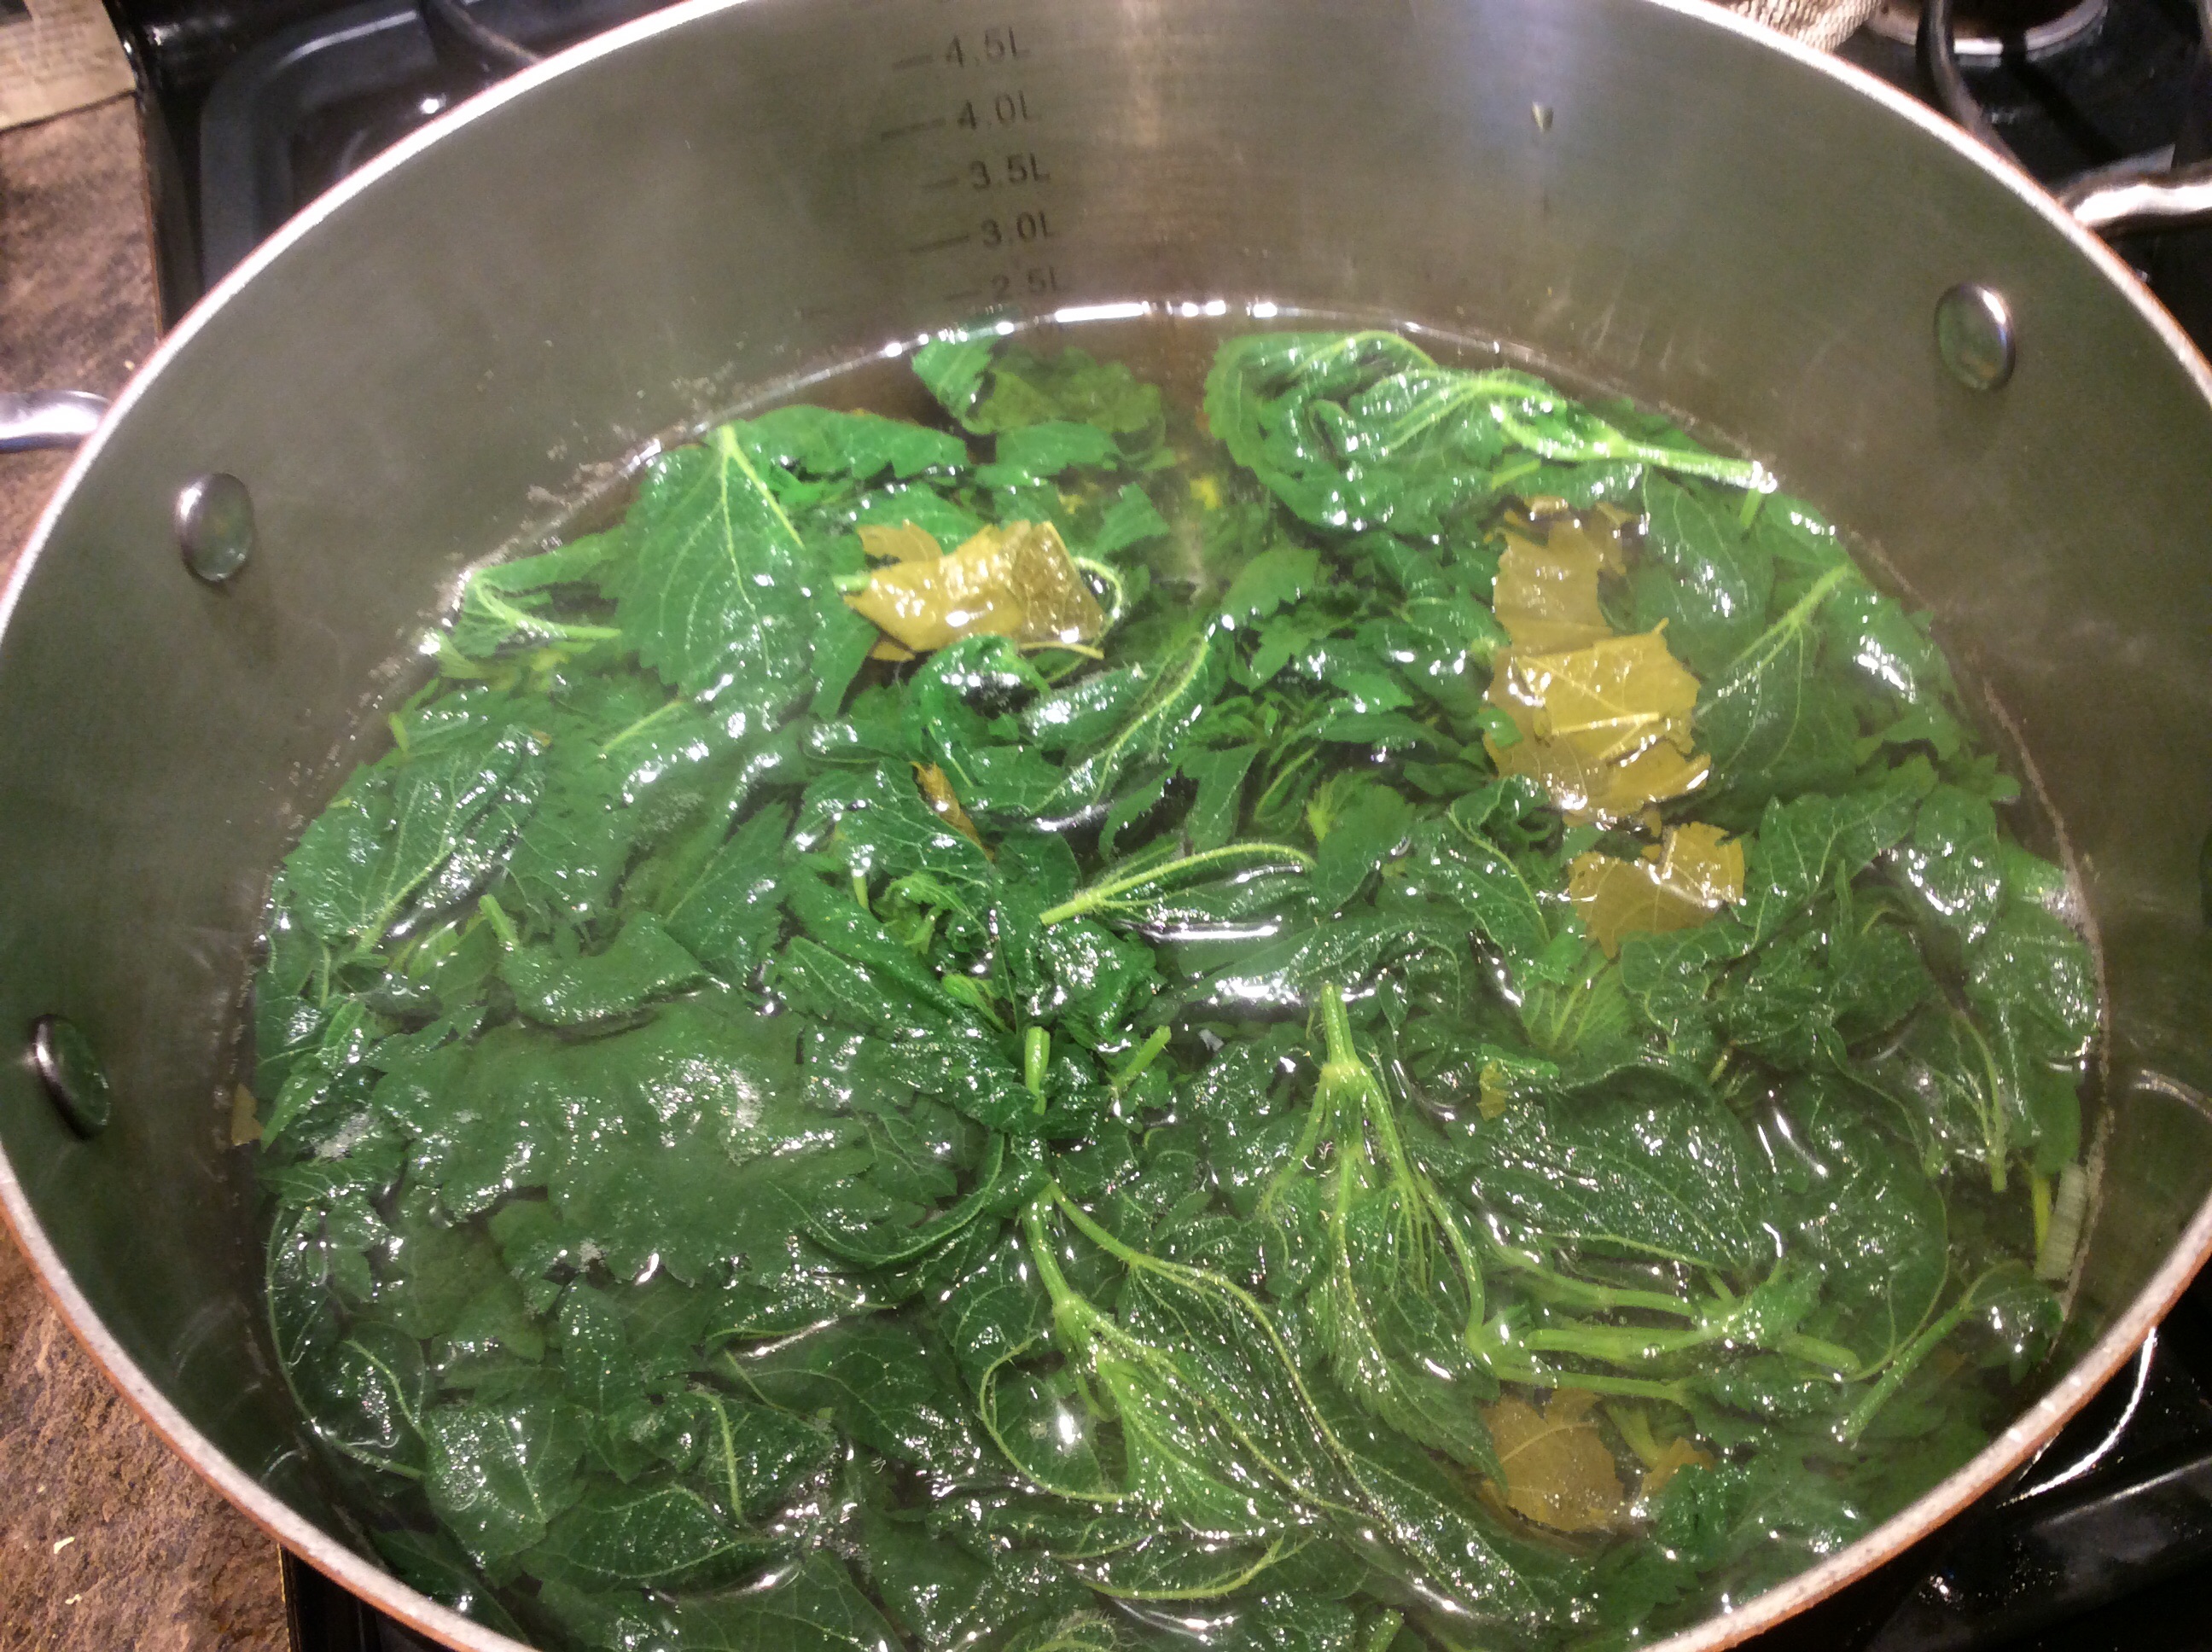
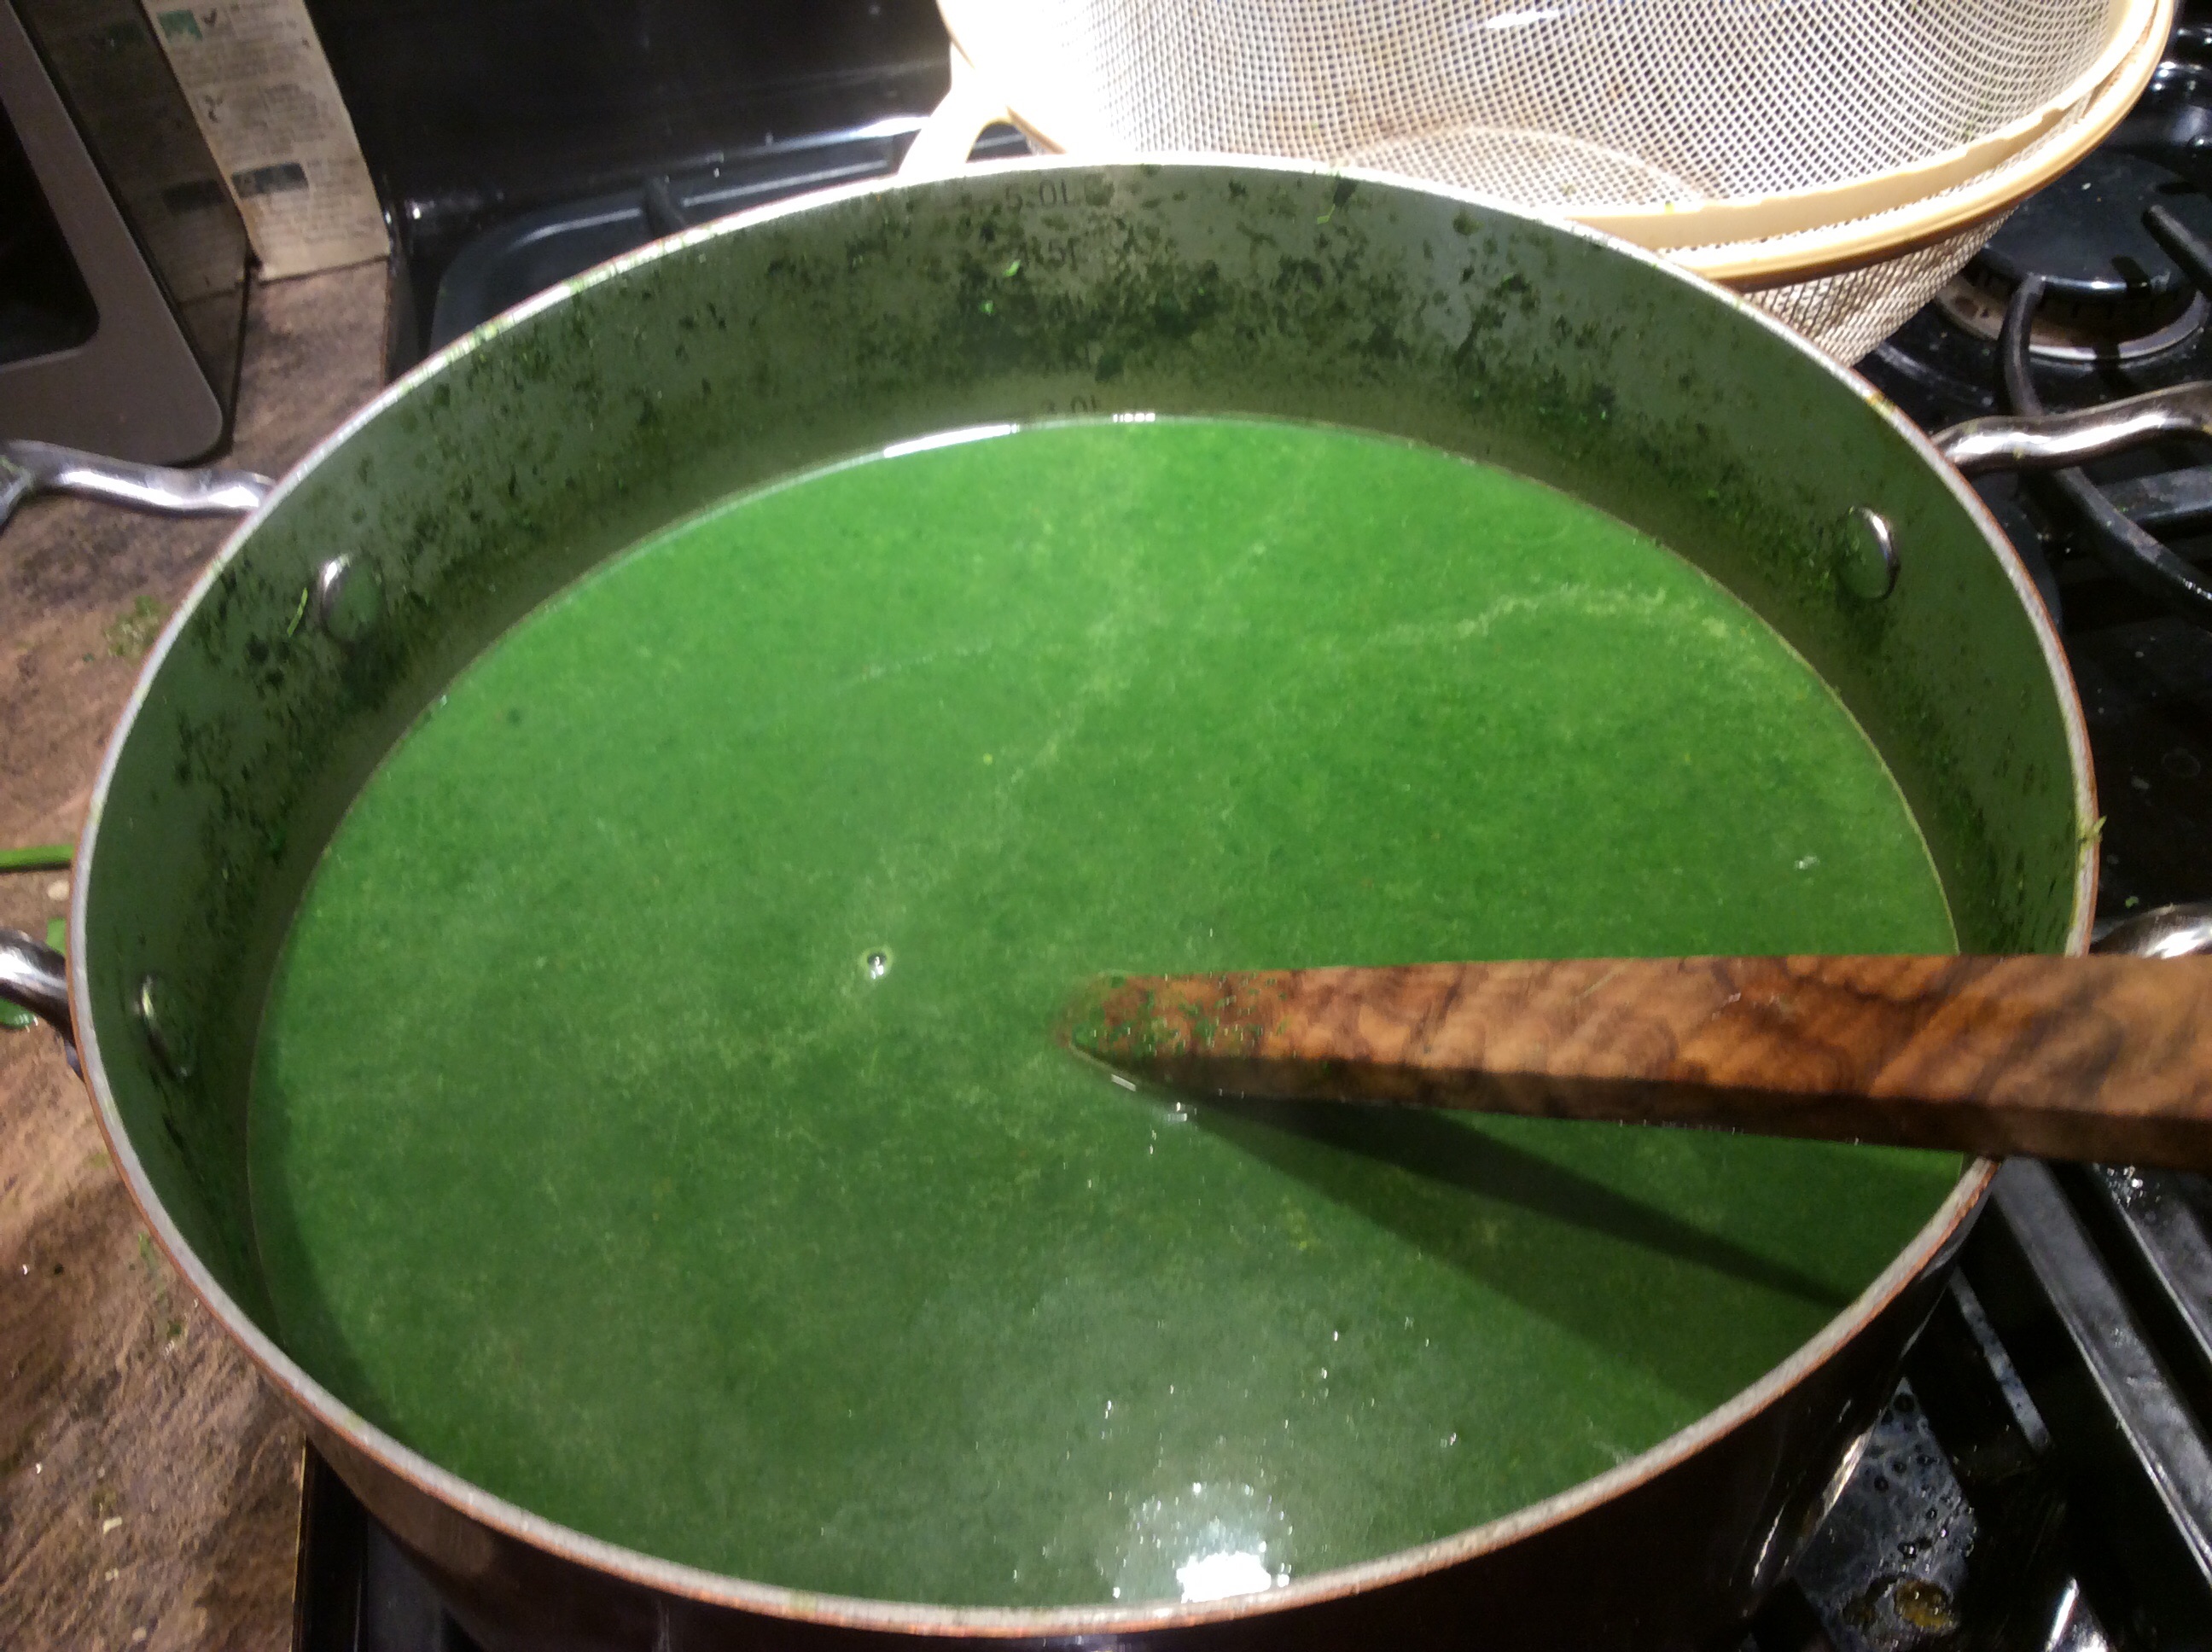
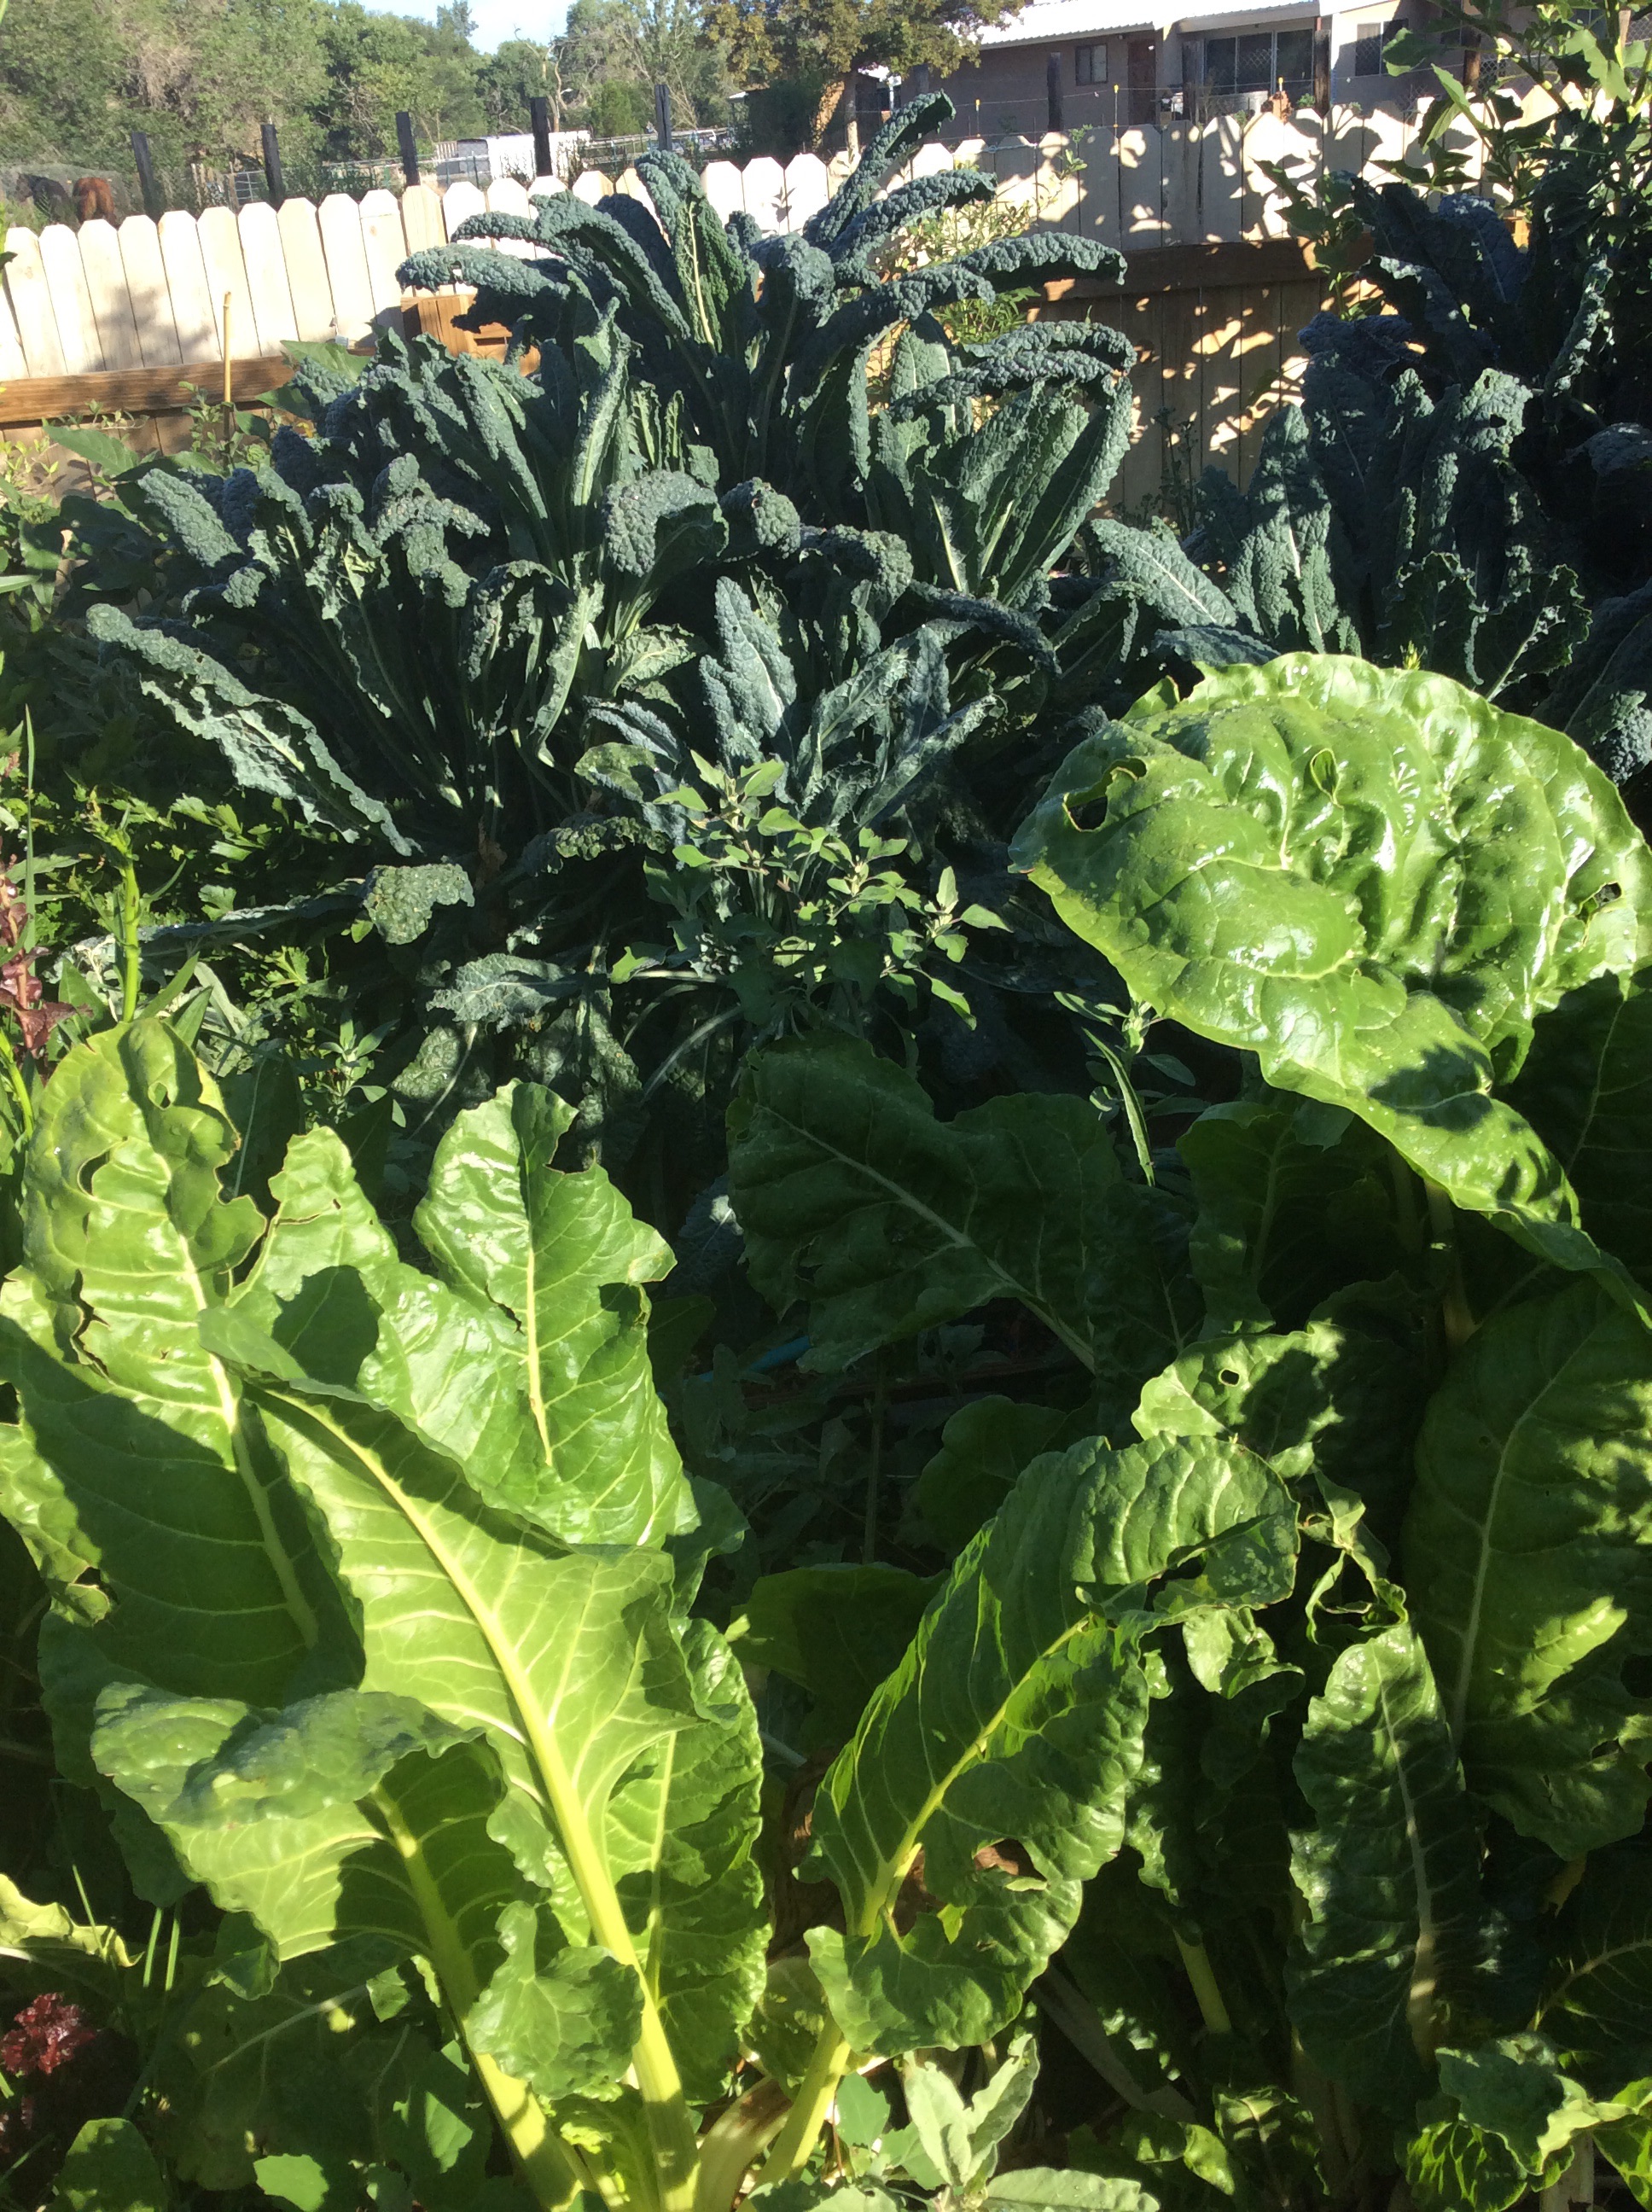
First, catch your greens. I carry a white plastic food-grade 3 gallon bucket out into the garden and pick it full, with the greens loosely thrown in and not packed down. Today I picked mostly lambs-quarters leaves, with some late spinach and early chard. If I was working from the farmer’s market or grocery store, I would choose a very large bunch of chard and Tuscan kale, and would tear out the large central midribs. Wash the greens twice. Grab them by handfuls and, on a BIG cutting board, chop them coarsely.

Second, decide on your alliums. Today I picked two big green onions and a couple of very big stalks of green garlic. If you don’t have a garden, a large onion and three cloves of garlic would work. You could use two cloves of garlic and two bundles of onion scapes from the farmer’s market.  Shallots are good in the winter. Don’t use garlic scapes in this recipe, because the texture doesn’t work.  Chop your alliums finely.

Third, consider your flavoring leaves. Think in terms of adding herbal, sharp, aromatic, and sour flavors. Today I picked several large young wine grape leaves for the sharp-sour note, a few leaves of lovage and a handful of parsley for green-herbal tones, and a few sprigs each of thyme and fennel for aromatic notes. Possibilities are endless. If working from the grocery store shelves, I would often choose a small bunch of parsley and some tarragon and thyme. Chop your flavoring leaves finely.

For the oil, I use top-notch extra virgin olive oil.

For the cream, I chose a can of coconut milk because I had one on hand, but heavy cream would do just as well, and if you insist on almond or cashew milk you can use that. You need a cup or a little more of your cream of choice.

For eggs, I use three whole eggs and nine egg yolks. Do be sure to get the best pastured eggs that you can get.

For nuts, I always use about half a cup of pine nuts. If you choose some other nut, chop them coarsely.

For seasonings, I used about a teaspoon each of red pepper and Urfa pepper flakes. I seldom vary this, just because I love this combination with greens. You may prefer freshly grated black pepper.

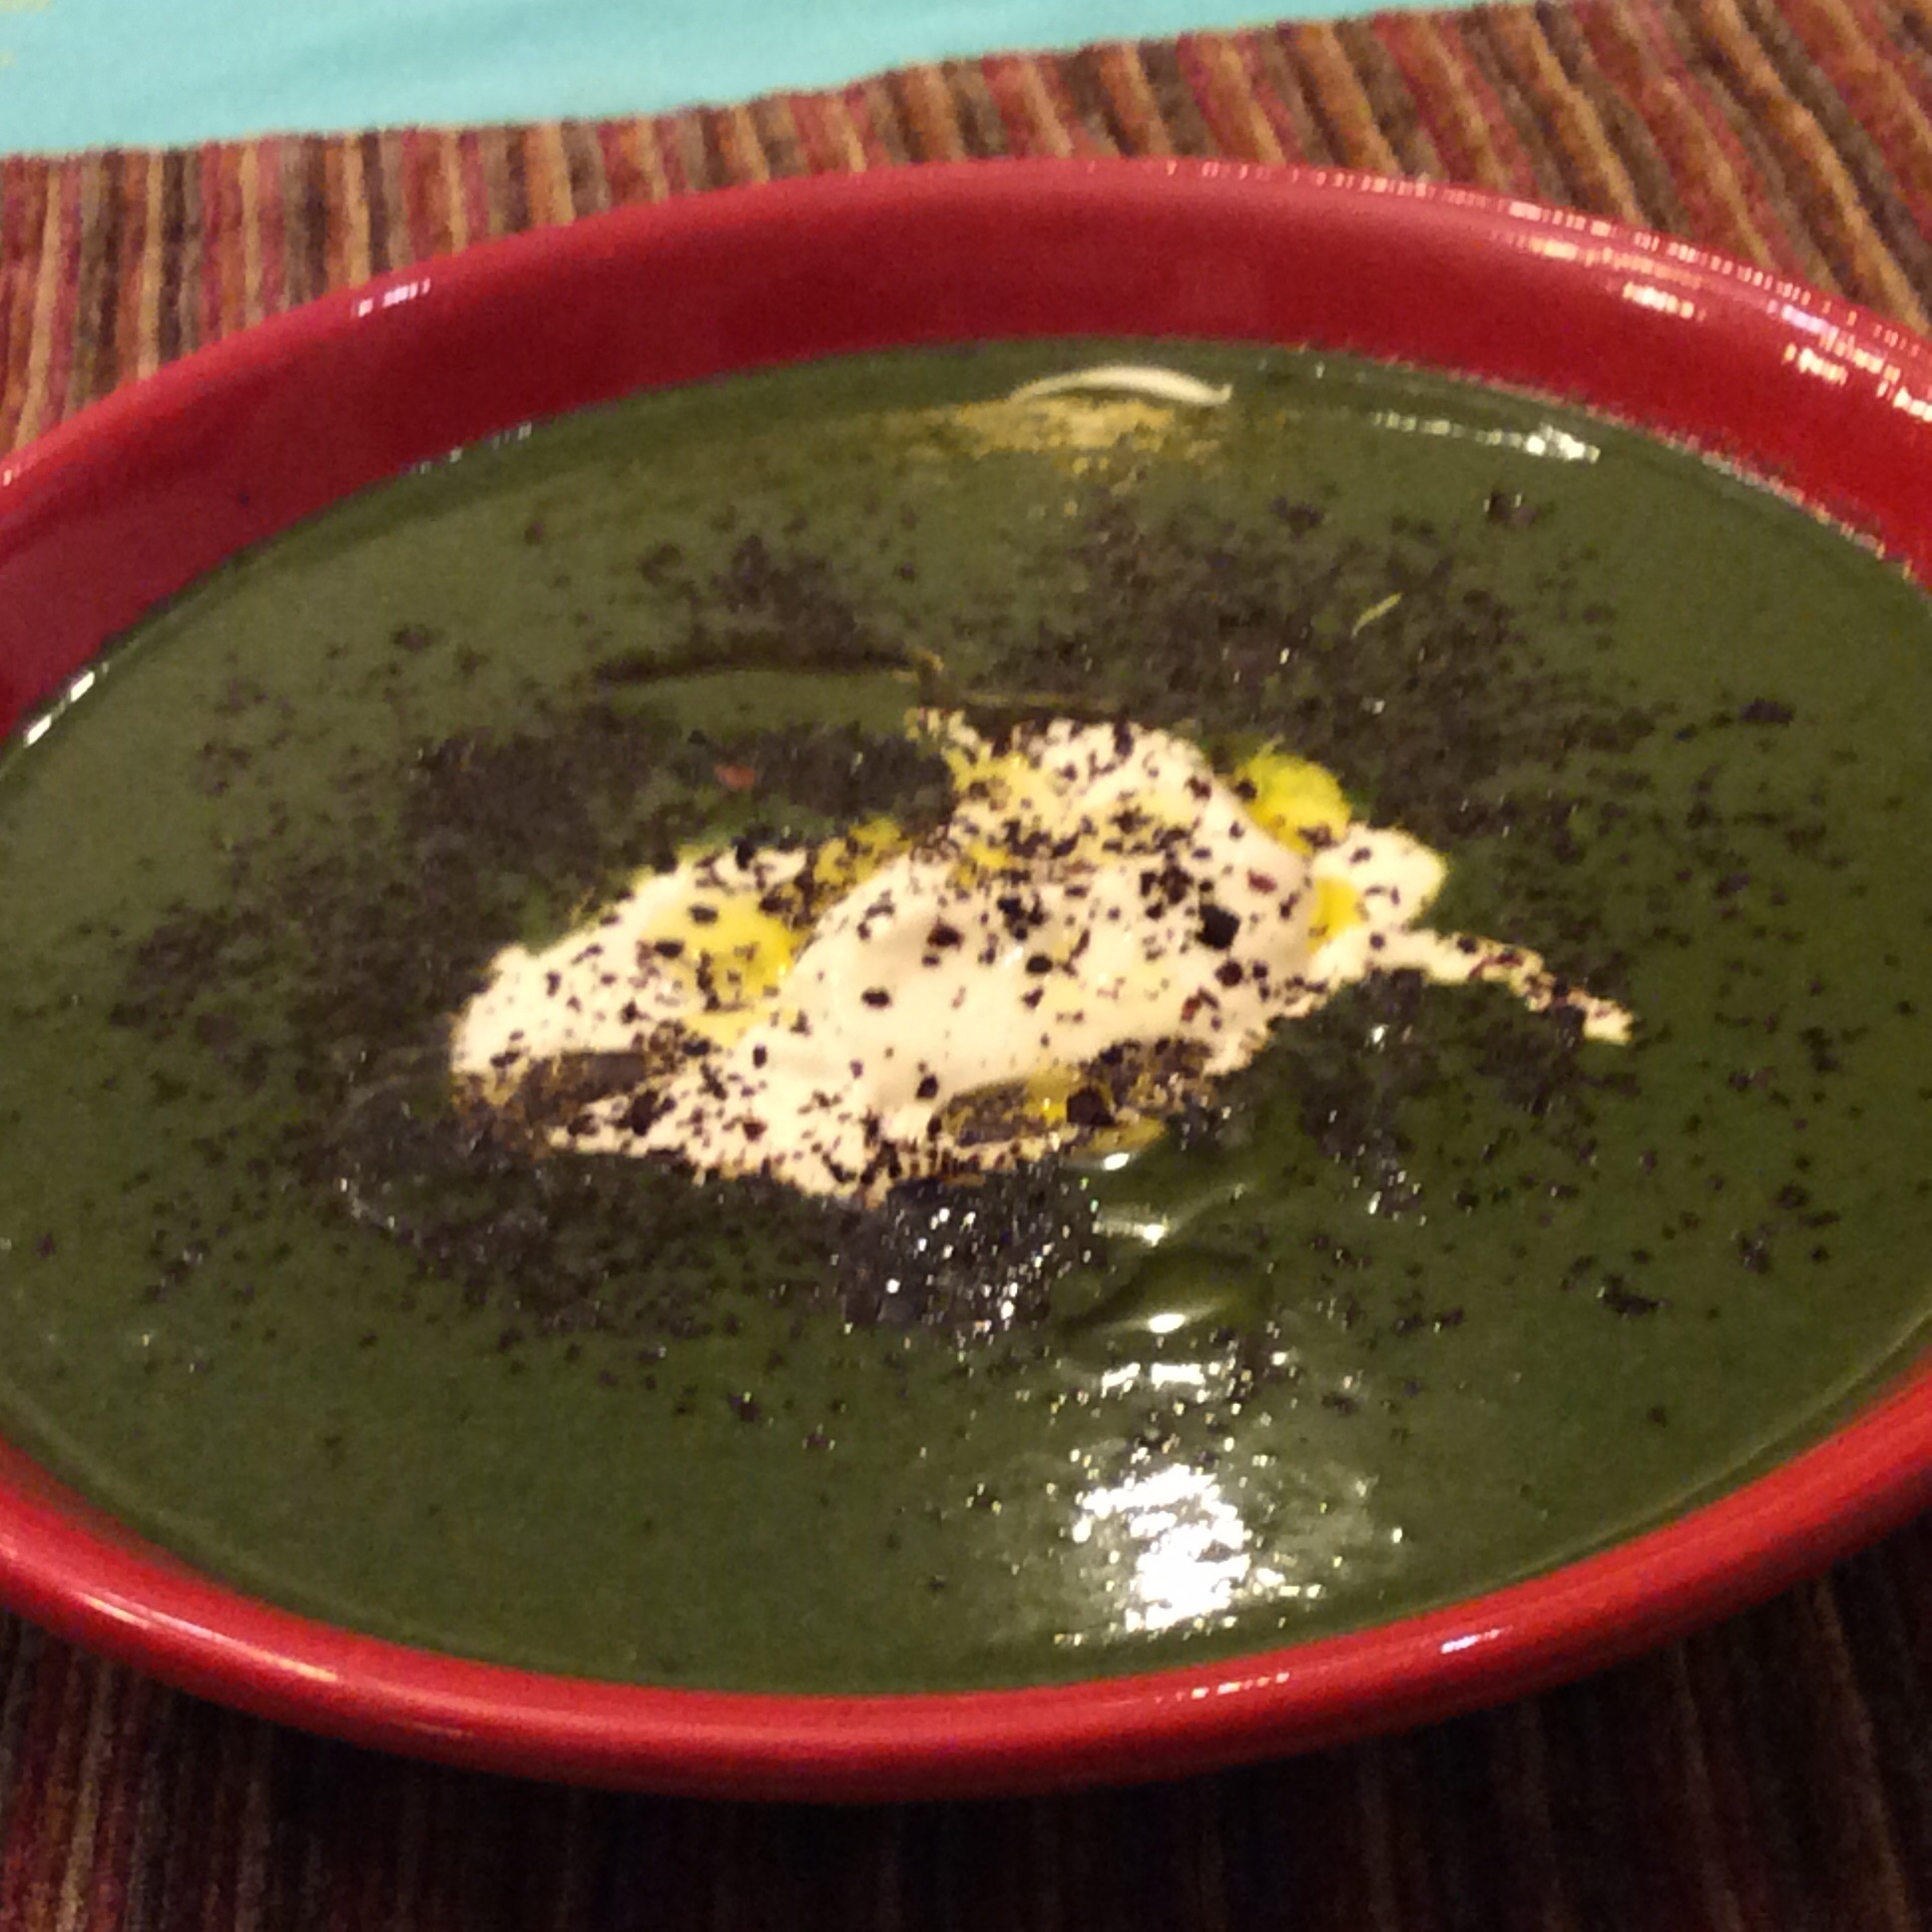
For the cheese, I nearly always use 6 ounces of finely grated Parmesan and eight ounces of the wonderful Mt. Vikos feta, crumbled.

Having made your choices and prepared your ingredients, preheat the oven to 375 and generously grease a pan about 10 by 14 with olive oil. Sprinkle the bottom of the pan with some of the Parmesan. Beat the eggs and egg yolks together and salt them a bit.

Heat some olive oil, about a quarter cup, in your largest skillet and sauté the alliums until they are softening. Add the coarsely chopped greens and salt rather generously, and cook turning frequently and carefully as the greens shrink. Cook them 15 minutes or longer, until they taste good when you eat a bite, and then add the flavoring leaves and sauté about two more minutes. Now add the cream. Boil a minute and take them off the heat and let cool 10-15 minutes.

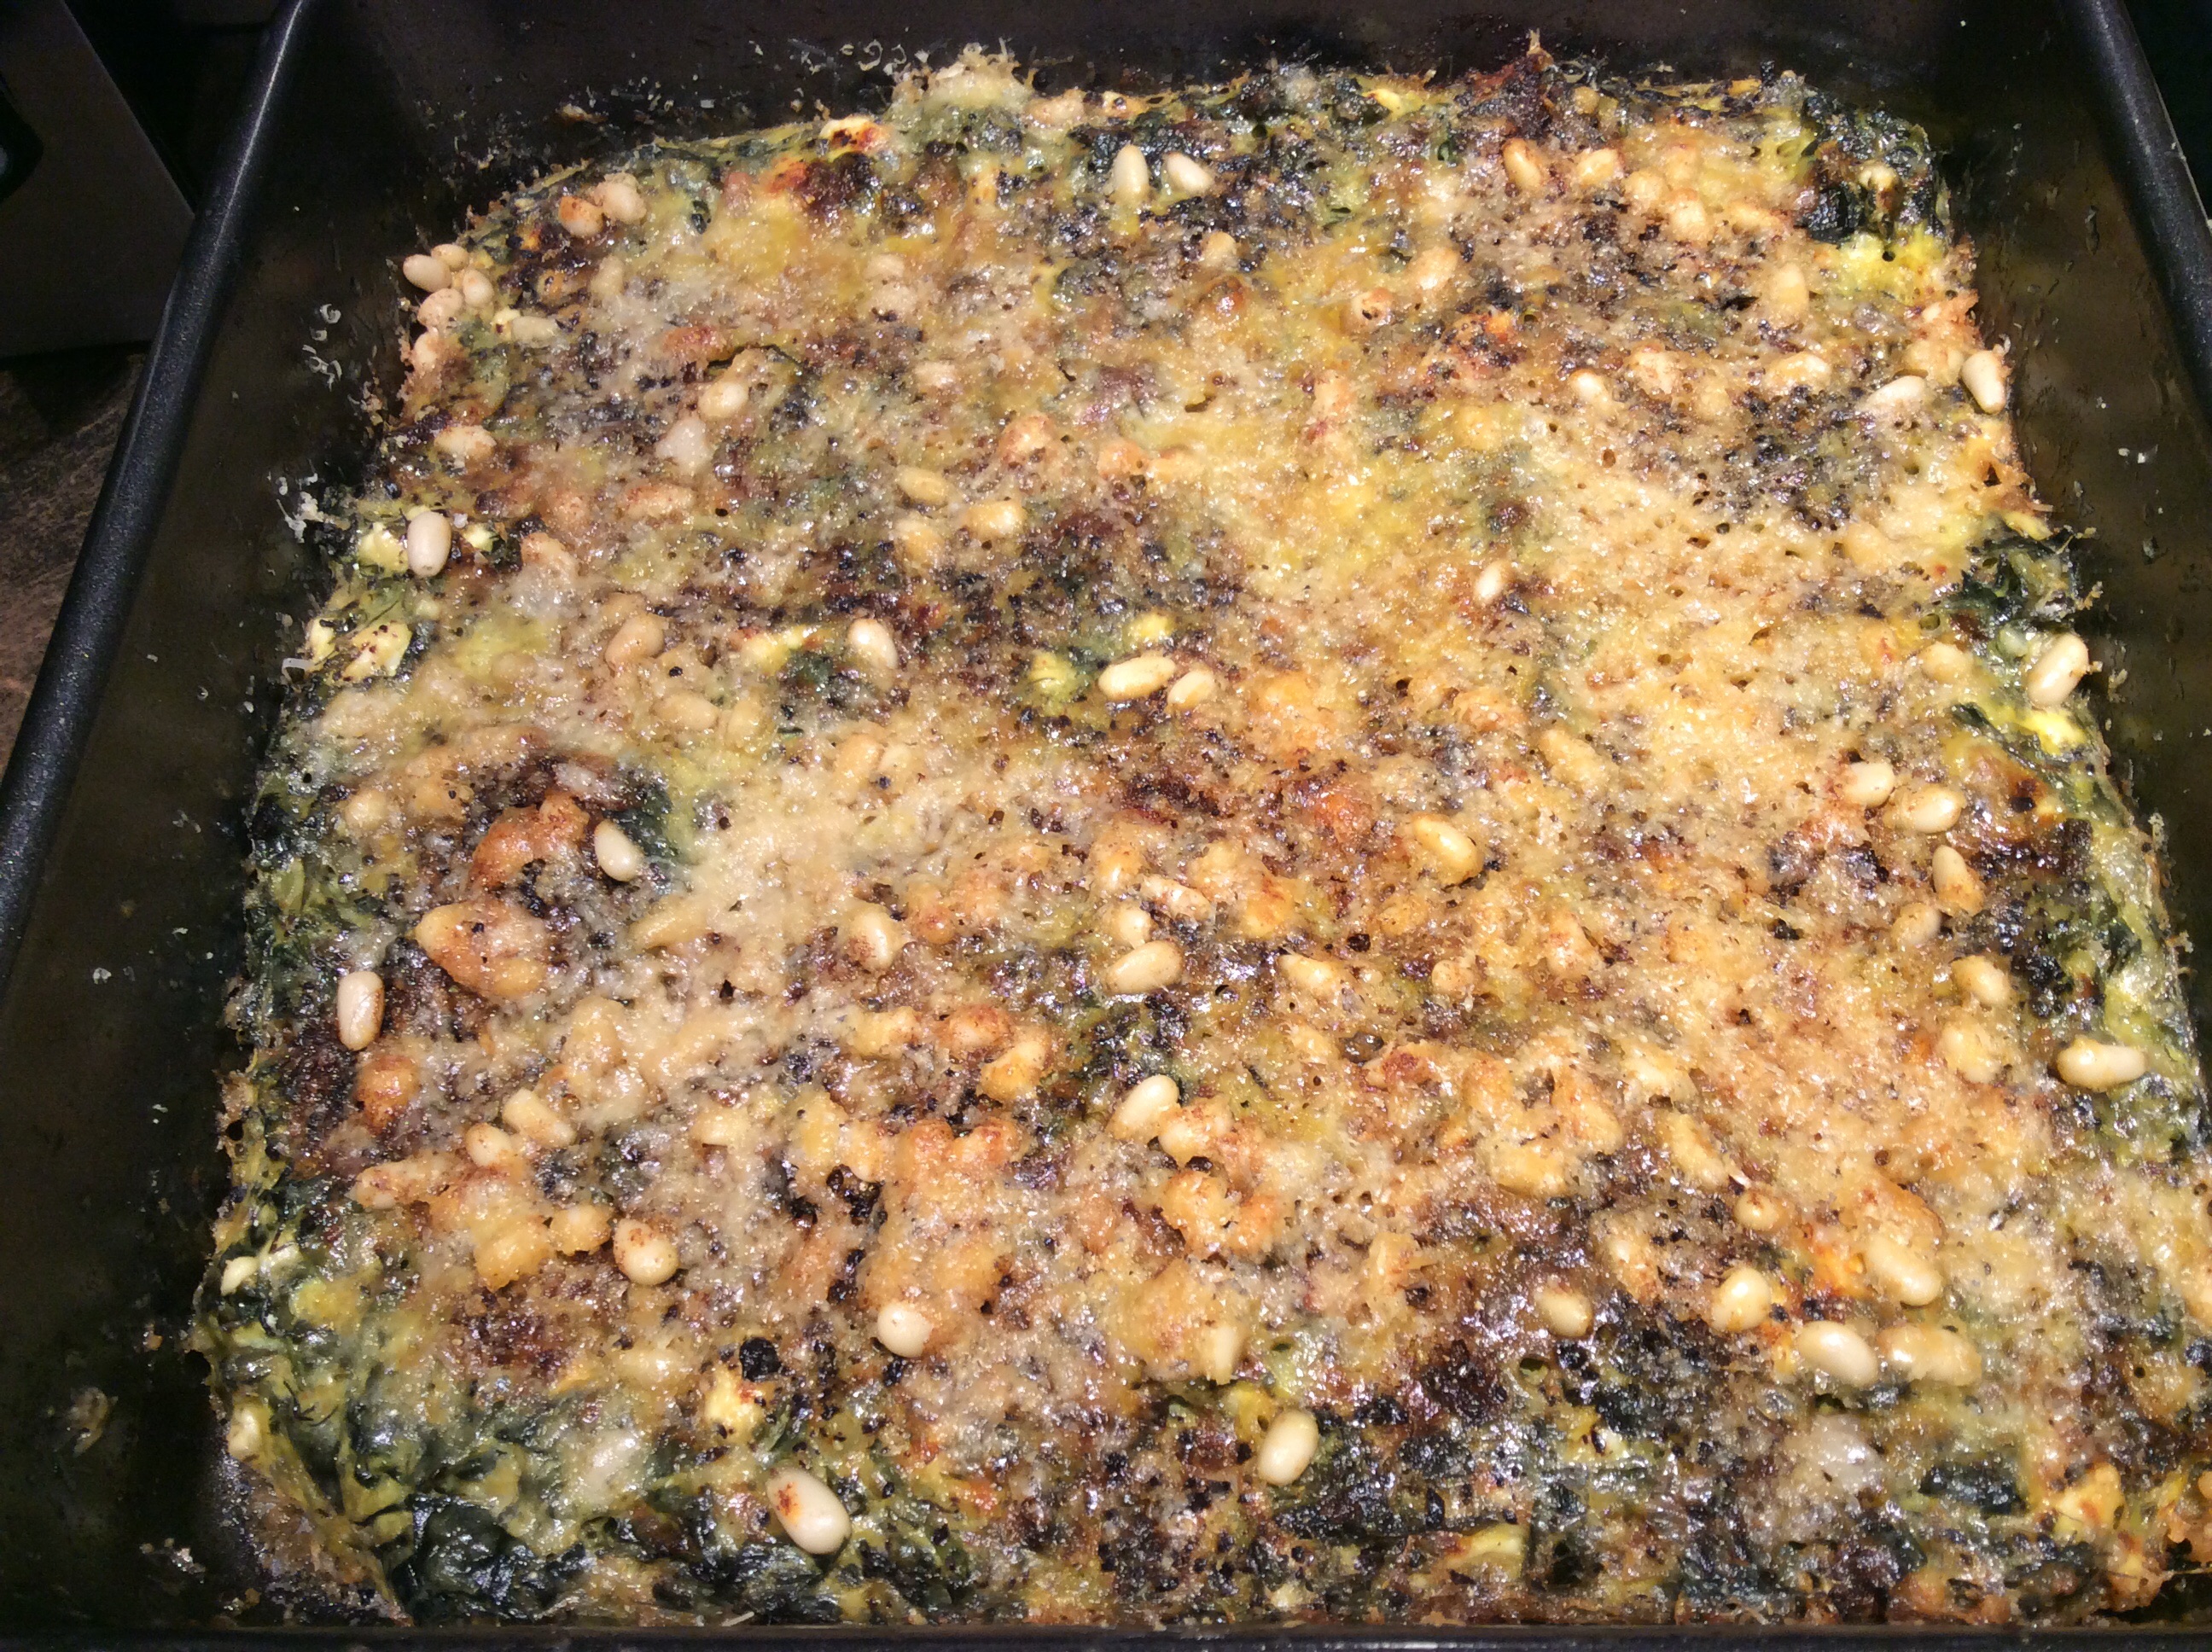
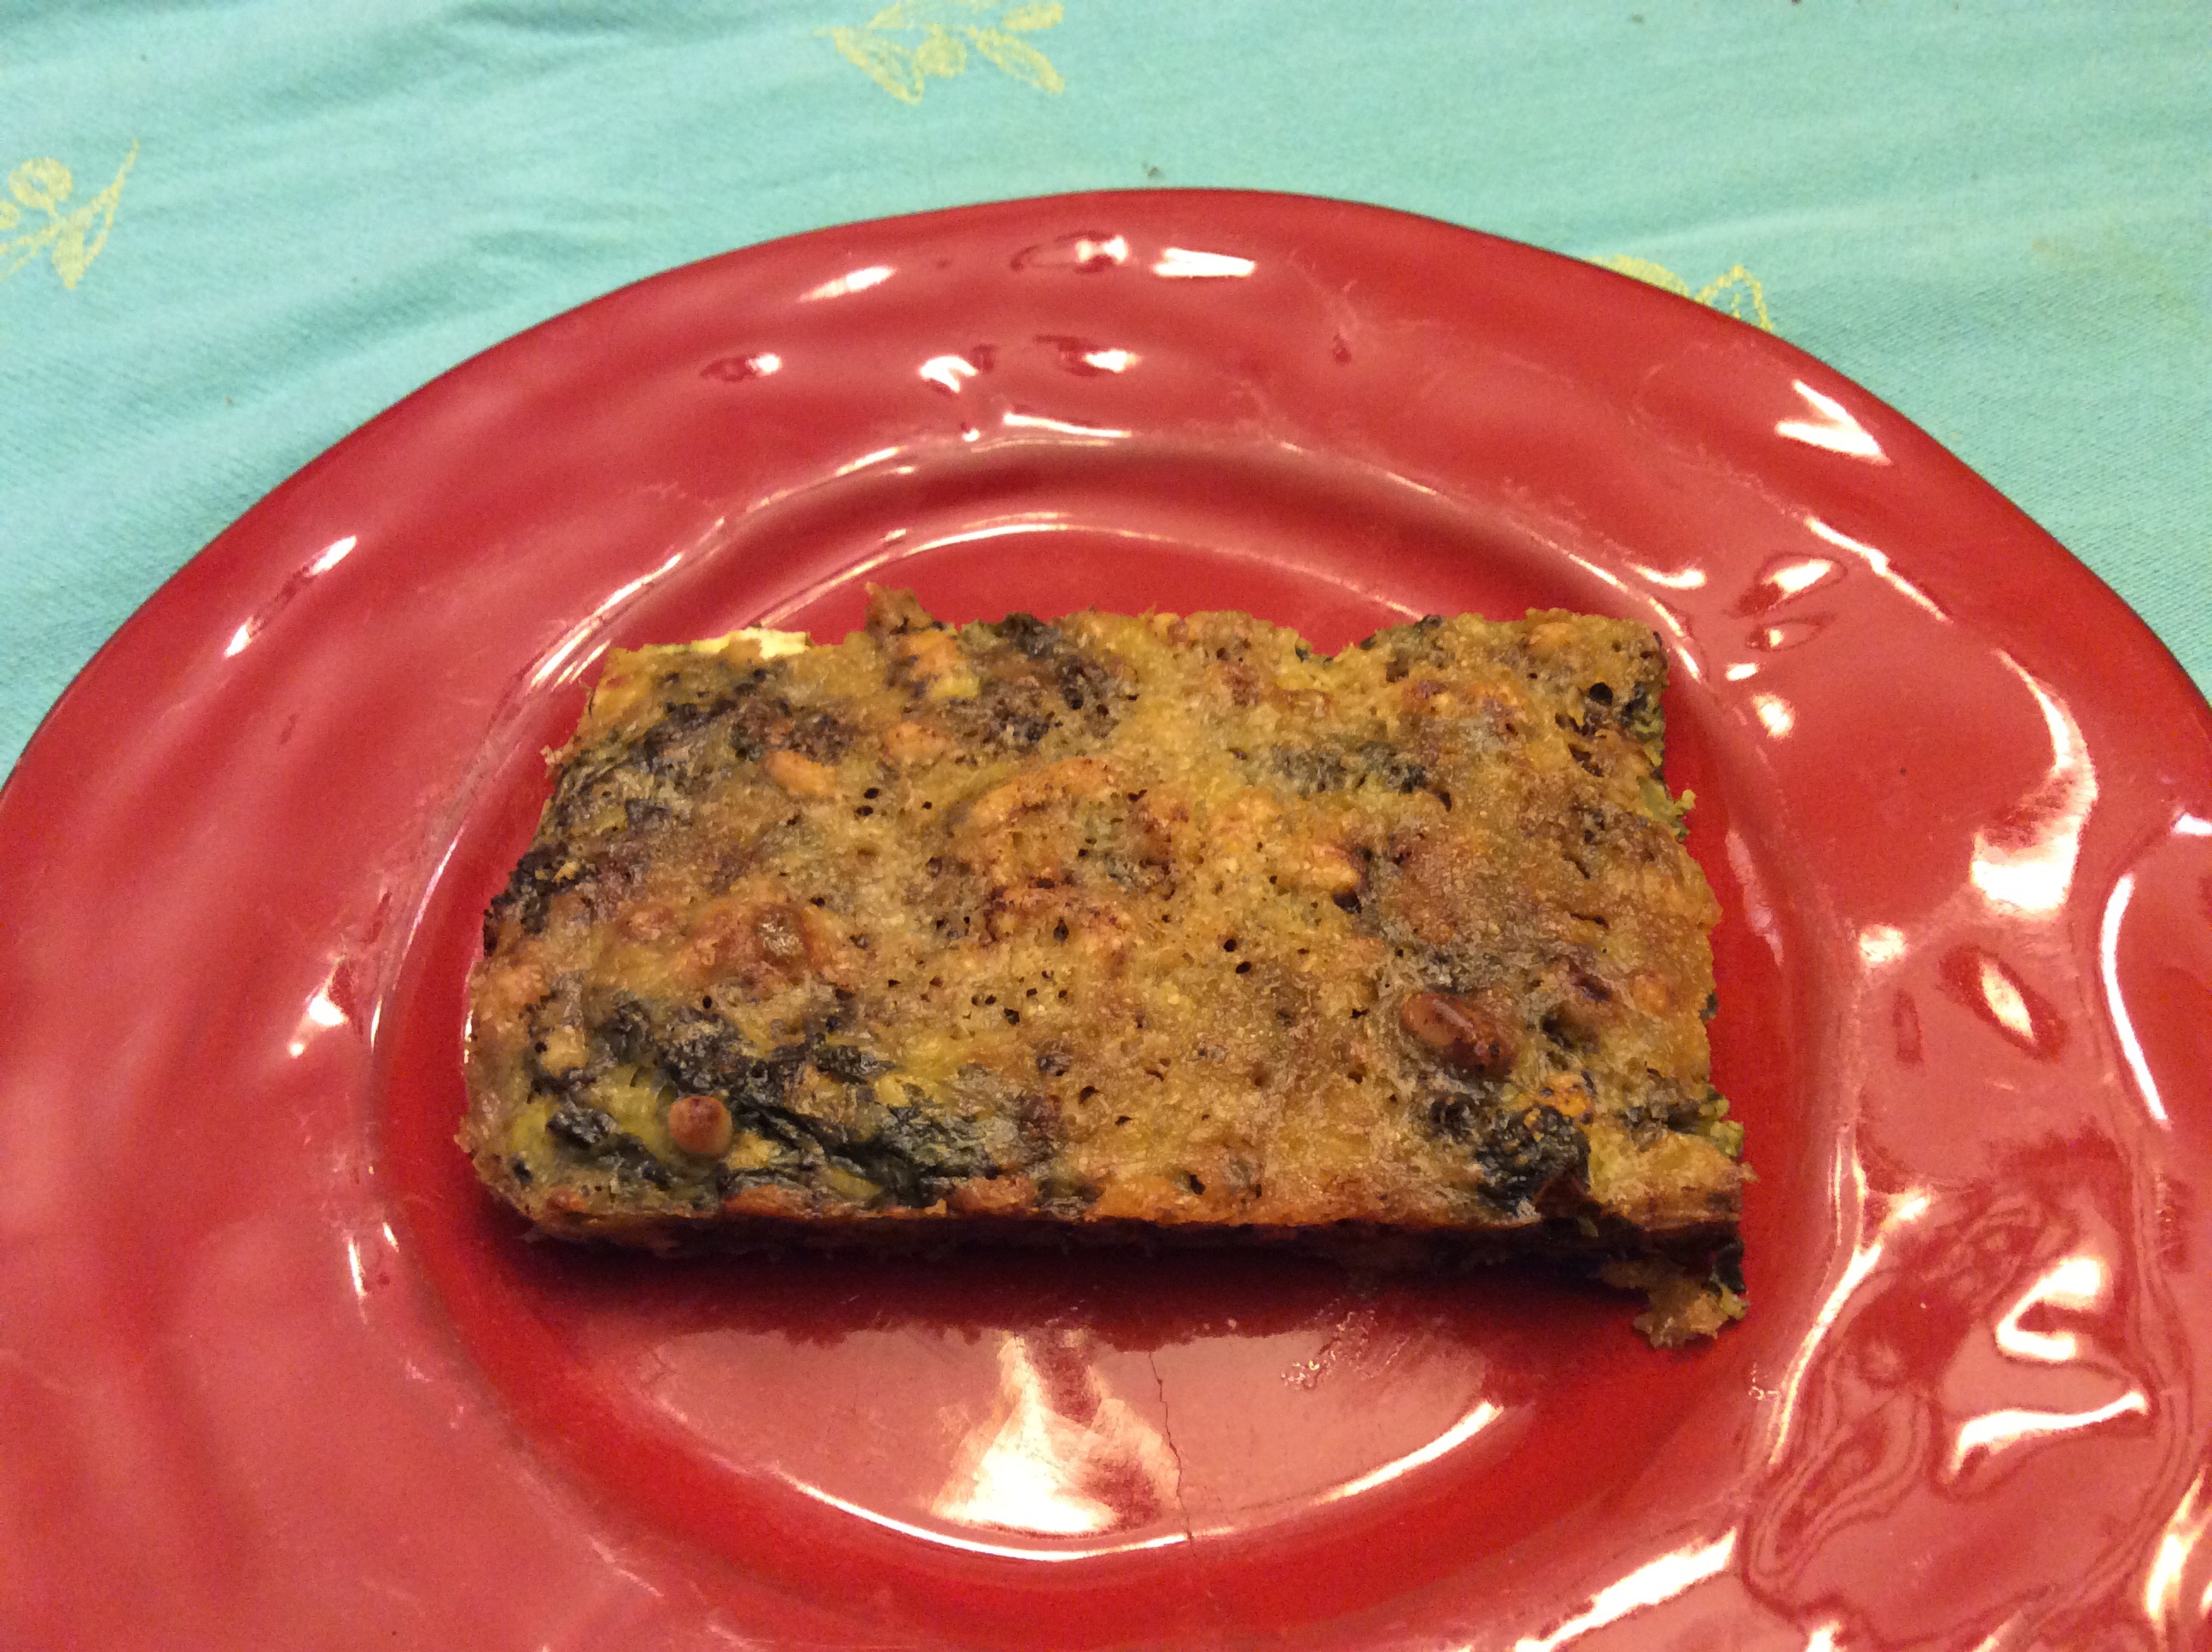
When the greens are just cool enough to handle, stir in the crumbled feta and then the beaten eggs and yolks. Spoon the mixture into the greased cheesed pan, smooth out a bit with a wooden spoon, and sprinkle with the red pepper and Urfa pepper flakes. Then sprinkle on the pine nuts, or whatever nuts you chose.  Top with the rest of the Parmesan (I like to drizzle on a bit more olive oil, too) and bake at 375 until the mixture is firm and a knife tip comes out clean, about 18-20 minutes for me. then, if you like, run under the broiler until the top crisps a bit. Be careful not to burn the nuts. Let it cool a little and serve in generous squares, jam-packed with nutrition. Smaller squares could be used as a finger food.
image

A Glory of Greens, and notes on Turkish greens soup

image


There is nothing more vibrant than a garden full of greens in the spring, all growing like mad, offering you a million healthy possibilities. During the two unfortunate years that I couldn’t garden, I did at least rogue out all the weeds that weren’t edible, and now nearly everything that sprouts in my beds is delicious, whether I planted them intentionally or not. And everybody, every one of us, would do well to eat more greens. Our health would improve and we would feel so damn good. Remember, the REAL Mediterranean diet, the one that was originally studied on Crete and that produced a long-lived and healthy population, was based on a huge variety of cultivated and wild greens.

Today I noticed nettles, spinach, and lambs-quarters that needed to be harvested pronto. I also had lively green garlic ready to harvest. I picked a three-gallon pail to the brim, but loosely filled as I threw the bounty in, not packed down. I washed them ( it goes without saying that when nettles are in the mixture, you use gloves whenever handling them and stir in the washing water with a big wooden spoon, not your hand,) and decided to make a Turkish greens soup for dinner.
image
This is a soup that I have been making variations of since a lovely trip to Turkey nearly thirty years ago. It is based roughly on a soup that my guide described his wife making, but it’s interpreted by me and changes every time I make it, so I don’t vouch for its authenticity. This time it was a thick velouté; other times it’s a rough potage, and sometimes it resembles gumbo z’heirbes. So here’s how this one happened:
Prepare and wash three gallons, loosely packed, of assorted greens. No bland store-bought baby spinach! If you don’t have a garden, consider chard, adult spinach, and Tuscan kale, one bunch each.
Pull a quart of good rich chicken stock out of the freezer (it is in there, isn’t it?)or procure a quart of good chicken stock from somewhere.
Set the chicken stock to melting over medium heat in a gallon pot.
Chop three large stalks of green garlic, stems, leaves, and all, and sauté them in a quarter cup or so of excellent olive oil in a sauté pan. OR use a small onion and two cloves of garlic, chopped, for the sauté step. Make sure they are cooked through, and soft but not colored, before proceeding.
When the garlic mixture is ready and the stock is boiling, begin adding the greens to the stock, stirring, and remembering not to touch those nettles. Boil for about a minute after the last of the greens is added. Now add the garlic mixture to the soup pot and simmer for five minutes.
Now purée with a stick blender. Add salt to taste (I think it needs to be on the salty side)and add a teaspoon of Urfa pepper flakes, Aleppo pepper flakes, or mild red pepper flakes. I like a bit of oregano and thyme. Taste and correct the seasoning carefully.
Mix some full-fat Greek yogurt with salt to taste and have it ready.
Put six egg yolks in a bowl, whisk them up, and slowly add a cup of the hot soup, whisking furiously all the time. Slowly pour the egg mixture into the soup over lowest heat, and whisk another minute or two until it’s lightly thickened and smooth.
Serve into bowls, pile a half cup of salted yogurt in each bowl, drizzle lavishly with your best olive oil, and sprinkle heavily with more Urfa or red pepper flakes. Eat, and flourish.
image

image

image

image


Kitchen Staples: homemade Worcestershire sauce


Many years ago, chef Emeril Lagasse published his recipe for homemade Worcestershire sauce, and although some pretty perverse versions of it have made their way around the web, the original was awfully good. Over time, though, I’ve come up with a version of it that I like even better. It’s great as a sauce for burgers or roast chicken, used to season vegetables, or used to cook vegetables. It also has a lot of healthy stuff in it and is a rich amalgam of all things umami. In many ways it’s like the old “mushroom catsup” of an earlier America, a potently flavored brew that has nothing in common with the bright red ketchup we know today. Winter is fading away, so make it now, when simmering something all evening still seems like a good idea.
The bad news is that, if you don’t grow horseradish, you will have to locate some fresh horseradish root. Many upscale groceries and food co-ops have it or can order it. There is no substitute, and without it the sauce is banal and bland and you’d be better advised to spend your evening doing something else. When you do locate some, buy twice as much by weight as you need, hack the root you bought in half, and plant half. Water it well. Simple as that. Horseradish can get big and invasive, but if you keep using the roots, that won’t happen. Also, the anchovies aren’t optional, so this sauce is not for vegetarians and vegans. This is a time when I have to give up all pretense of flexibility and ask that you please, just once, make it exactly the way it’s written. After that, fool with the recipe all you like. This makes a lot, and you can cut it in half for the first try, but if you want to have some to give away, the larger amount is no extra trouble to make.
You will need:
8 ounces of anchovy fillets in olive oil (for reasons of economy, I buy the Roland anchovy fillets from Spain in 1 pound cans to make this sauce.They can be found at restaurant supply warehouses and are both inexpensive and good.)
1 gallon of decent red wine (5 standard wine bottles.) The Mondavi Woodbridge reds work well. You are going to concentrate it, so you don’t want anything that you’d be unwilling to drink a glass of.
1/2 pound of fresh horseradish, peeled and finely grated.
3 cups of dark or amber agave nectar
10 dried shitake mushrooms (from an Asian grocery)
2 lemons
1/4 cup coarsely minced garlic
3 large onions, sliced
1/4 cup olive oil
6 whole cloves
5 sprigs fresh thyme
2 whole chipotle chiles in adobo
1 tablespoon sea salt, plus more to taste
1 tablespoon fine black pepper, freshly ground

Pour the red wine into a large pot, bring to a boil, and boil fast until reduced by half, to 2 quarts. I stick a wooden spoon in the wine while it’s heating, mark the level with a pencil, and then can measure roughly when it’s reduced by half. While it reduces, heat the oil in a large skillet and saute the onions. When they turn translucent, add the agrlic and saute until the garlic is somewhat cooked but don’t let it color. Grate the zest off the lemon, squeeze the juice out, and discard the pith. Pat the anchovies (as a mass, not one by one) with a paper towel to get any excessive oil off them. Use a large mortar and pestle to break up the dried shitake mushrooms into chunks about half an inch across.
When the wine is reduced by half, add the sauteed onion mixture, the anchovies, the broken shitake mushrooms, the chile, the lemon zest and juice, the horseradish, the agave nectar, the salt, and the thyme and cloves. Simmer over low heat for about 2 and a half hours, stirring and tasting periodically.When it’s slightly thickened and tastes right (by which I mean “tastes really good,” strain out the solids, pressing as hard as you can on the mass in the strainer to get out all the liquid. Add the fresh black pepper to the strained fluid, starting with about half the tablespoon and tasting as you add until you find the amount that you like. I don’t like it too sweet, but if you want yours sweeter, add a little more agave nectar. Pour the sauce into clean old wine bottles, cork tightly, and store in the refrigerator. It won’t keep at room temp unless you heat=process it in canning jars, which I think is too much trouble. I have sometimes made a hasty meal of cooked rice or grains from the refrigerator, heated quickly and dressed with a little butter and a few dashes of this sauce. Yum.
If you find that you want it a little more sharp, you can boil the wine down to 1.5 quarts and add two cups of best quality red wine vinegar, then continue as above.

Southwest Cassoulet


There is an odd mystique about cassoulet. There are online butchers who will sell you the ingredients to make authentic cassoulet for eight people for 85 dollars. To me, this is bemusing. It’s a peasant dish, and like most such, its original intent was to nourish people well with minimal labor and cost. The magic combination is a lot of legumes with a small amount of very flavorful meat, plus seasonings. Nearly every society has some equivalent, from split pea soup to the red beans and rice that was eaten by the quart in Louisiana when I was growing up. So at first I thought of calling this post “Bean Pot,” but then I decided that it was time to demystify cassoulet and make it clear that this is a great dish for times when weather is cold, dollars may be short, and a meal that feeds abundantly and warms from the inside is called for. Let’s make this dish our own and adapt it to our needs.
For a great big dishful, you will need a pound of dried beans, two large onions or three small ones, 4-5 cloves of garlic, some olive oil, 2 cups of good rich stock or broth, a large carrot, a small bunch of thyme, a cup or two of homemade bread crumbs or small chunks of bread if you want to gratinee the top, and about a pound and a half of very flavorful meat. A combination of types is preferable. Some possibilities are duck confit, good sausage, ham, fatty cuts of pork already cooked for some other purpose, smoked hocks (no more than one,) or whatever your taste dictates. If you have any marrow from a ham bone, it’s a great addition. If I have a couple of pork ribs left over from experiments with my smoker, I’m apt to include them. I would not use anything with strong distinctive seasoning that will stand apart and not amalgamate itself; chorizo is a good example, as much as I love it. Don’t use anything very lean; there is little meat in comparison to the amount of beans, and it needs to lend some unction to the beans. Small raw sausages can be cooked whole in the beans, but anything large and raw should be cut in chunks or precooked, such as panfrying a thick raw sausage until nearly done before including it. If you do this, remember to save the fat to add to the beans. If you insist on using a ham hock, it will add a wonderful flavor and texture but does need to be slowly simmered for a couple of hours in the stock before use, which is a drag. Ham shanks are easier in that they are more tender and can be put directly in the dish.
First, catch your beans. I used a local New Mexico product, bollita beans, but I would happily use pinto beans, cannelini beans, or any other bean that cooks up soft and plump without falling apart. I started with a pound of beans and cooked them in my solar cooker the day before I wanted to make the dish. You can cook them any way you like. There’s a lot of mystique about cooking beans, too. Here at 5000 feet above sea level with very hard water, I do presoak and then cook in filtered water, and I don’t salt them until they are almost done, and then I salt generously. In Louisiana, with very soft water and an altitude just a smidgeon above sea level, beans cooked to perfection in a few hours with no special considerations. Know your conditions, and cook accordingly. If you aren’t cooking them a day ahead, they need to be ready at least 90 minutes before you want to eat. Make sure they are salted to your taste!

Preheat your oven to 350 degrees. While the beans soften to perfection, or reheat if cooked the day before, chop the onions and garlic finely. I do all the cooking in the big La Chamba clay casserole in which I will finish the dish, largely because it’s a thing of beauty and I love to handle it. You can use a skillet if your casserole won’t take direct heat. Heat the olive oil over medium heat, saute the onions until they are becoming transparent, add the garlic, and saute until thoroughly cooked and maybe coloring a little (I like the richness of flavor this adds, but don’t burn them.) Drain the beans, saving the broth for something else, and mix with the onions and garlic. Add the chopped thyme and 1.5 to 2 teaspoons of freshly ground black pepper (very important to the final flavor.) Taste the beans and make sure they are salted to the level that you want. Now stick the meat into the beans. If you are using raw sausage or any raw pork, keep it near the top. I used some sections of smoked spareribs and stuck them well down into the pot. I always plop a leg of duck confit on the top. If you’re using duck make sure the skin is a little above the beans to that it can get nice and crisp. Pour a cup and a half of rich hot stock over all, and save the rest of the stock in case you need it later. Stick the dish into the preheated oven for an hour, then carefully haul it out and poke around a little. Since everything was hot when you started, any sausage or pieces of raw pork should be cooked at this point, but if not, keep them on top where you can fish them out for extra cooking if needed. Make sure there is some fluid near the bottom, and add more stock if the beans seem too dry. If you want a gratineed top, as I always do, cover the top with breadcrumbs or little pieces of bread, making sure not to cover the duck skin if you’re using it. Stir the bready stuff lightly into any fat that has appeared on the surface so that it gets deliciously golden and crisp rather than hard. If there is no surface fat, dot the bread generously with butter or drizzle it with olive oil. Bake another half hour. Take it out again, and check the sausage to make sure it got cooked. If the top hasn’t gotten crisp and gold, run it under the broiler until it is, but make sure not to burn it. Serve, making sure that everyone gets some of the crisp bready bits on top, and a fragment of the duck skin if they want it. The taste of the dish is simple and pure, and can waken ancestral memories of the farmhouse table. A green salad on the side is nice, but fussy vegetables are just not needed.
This makes a lot of hearty food. My clay casserole is about 11 inches long, nine inches wide, and four inches deep, and this fills it to the brim. Leftovers are likely, and welcome.