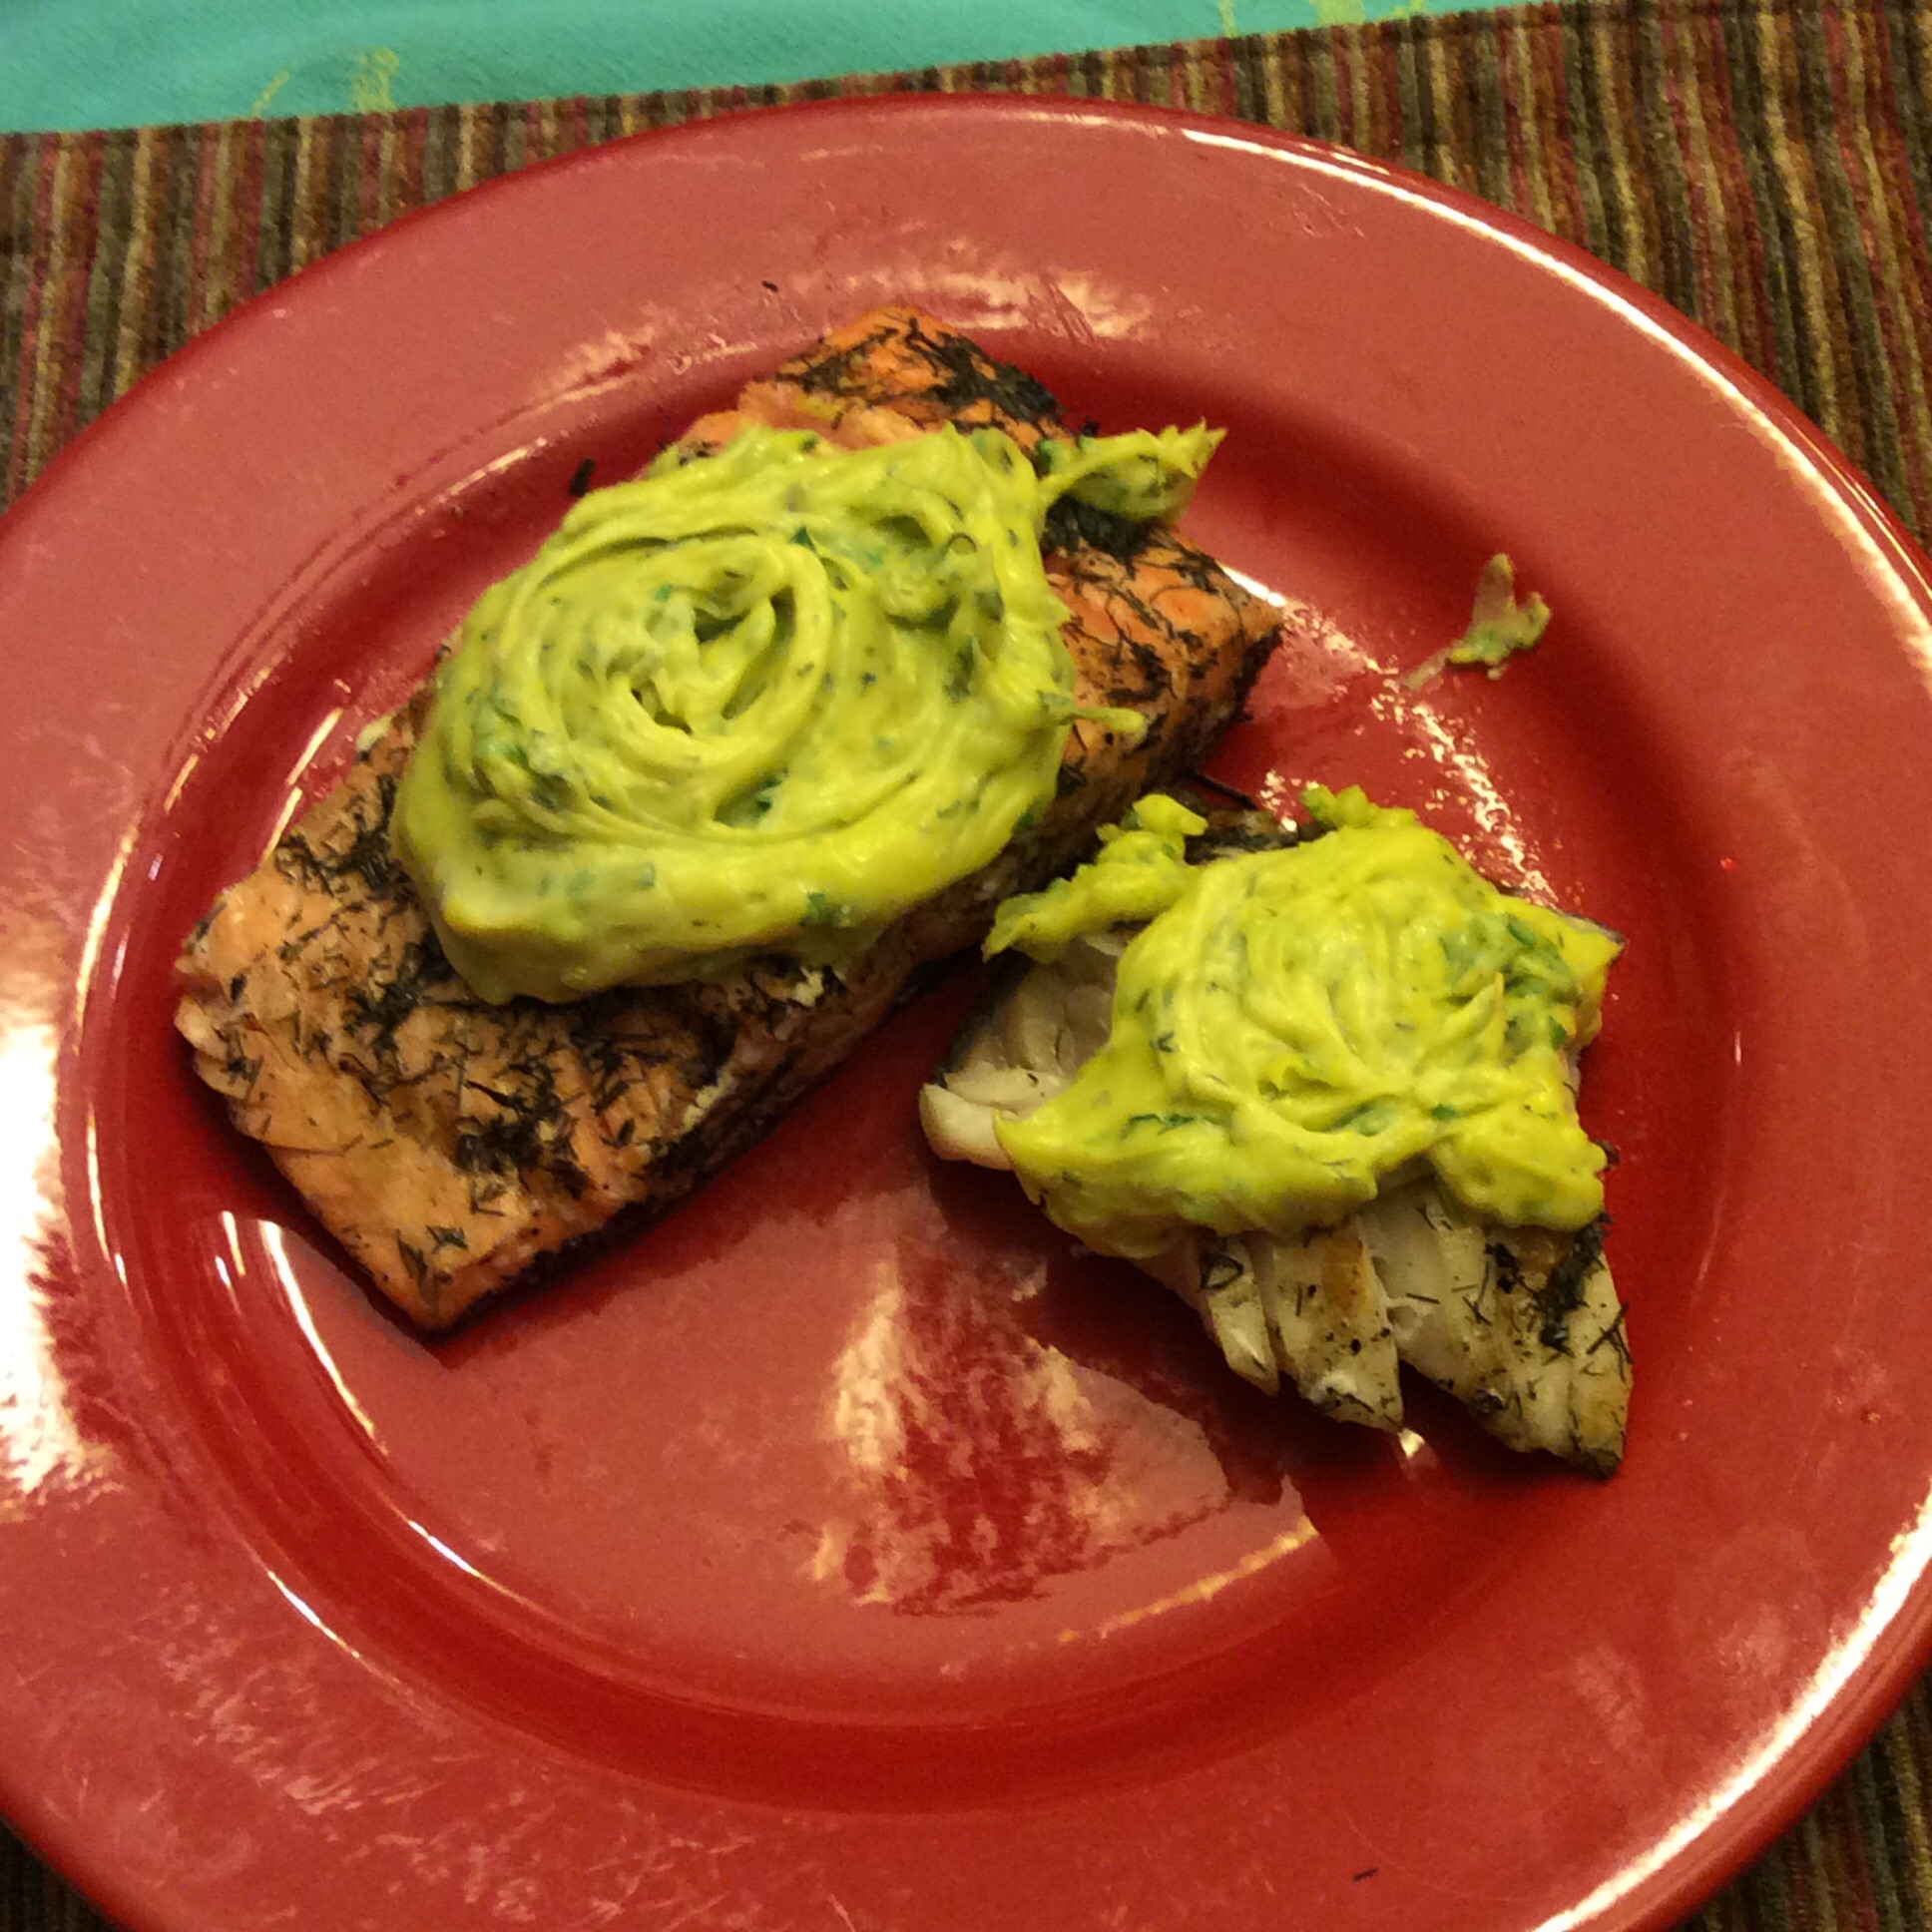
Many of us who eat ketogenic diets refer to homemade mayonnaise as “ketonnaise.” It is one of the luxuries of our very-low-carb style of eating that we can have this beautiful stuff. This time of year, the garden is full of wonderful ways to flavor it, and one of my favorite things to do with it is put a luxurious dollop on top of grilled sockeye salmon, as you see above.
You will have to make your own decision about eating raw eggs. I use my own backyard eggs, and if I am expecting to feed others, I either pasteurize the eggs in my sous-vide cooker or let my visitors make their own choices with full disclosure. Don’t ever feed raw eggs to the elderly, children, immunocompromised people, or the unsuspecting in general.
In my opinion this is best made with a Mini-prep. It gets so thick that stick blenders can’t handle it.
The basic mayo is very simple. Have 1.5 cups of oil ready. I use a light-flavored olive oil or equal parts each of full-flavored olive oil and MCT oil (a fraction of coconut oil that’s liquid at room temp.) Put four egg yolks and a teaspoon of salt in your Mini-Prep food processor. You need a small one so that the mixture reaches the blades. Start the food processor running, and very slowly drizzle in the oil. The Cuisinart Mini-prep has a little runway and hole in the lid for exactly this purpose. You will start to hear the thickening mayonnaise slap against the sides of the bowl. Last thing, put in two teaspoons of fresh lemon juice. When it’s done, turn out into a colorful bowl and put in the refrigerator for now.
Now the fun starts. What do you want it to taste like? For standard use I love a handful of chopped parsley, some tarragon, cutting celery, and a little thyme, a handful of chopped chives, a few large arugula leaves chopped, and the white part of a good-sized stalk of green garlic chopped finely. I usually add a smashed anchovy filet too. A meal that leans Mexican might want lots of cilantro and a little epazote and garlic. Somewhat Southeast Asian? Consider a little green curry paste and a goodly amount of chopped rau ram and a chile, chopped. Add your chosen herbs and fold in well. Taste to correct seasoning. The large amount of oil blunts flavors, and you may need more herbs and salt than you think.
You can put it on broiled meat, chicken, and fish, spoon some on top of grilled shrimp, dip veggie sticks in it, or if you aren’t ketogenic it is superb smeared on chunks of baguette.
Eat happily. This is an occasion for high-class piggery, not portion control. It will last a day in the fridge but, in my view, not more than that. I have read one cook online insist that it will keep safely for over a week when chilled, but I wouldn’t chance it.
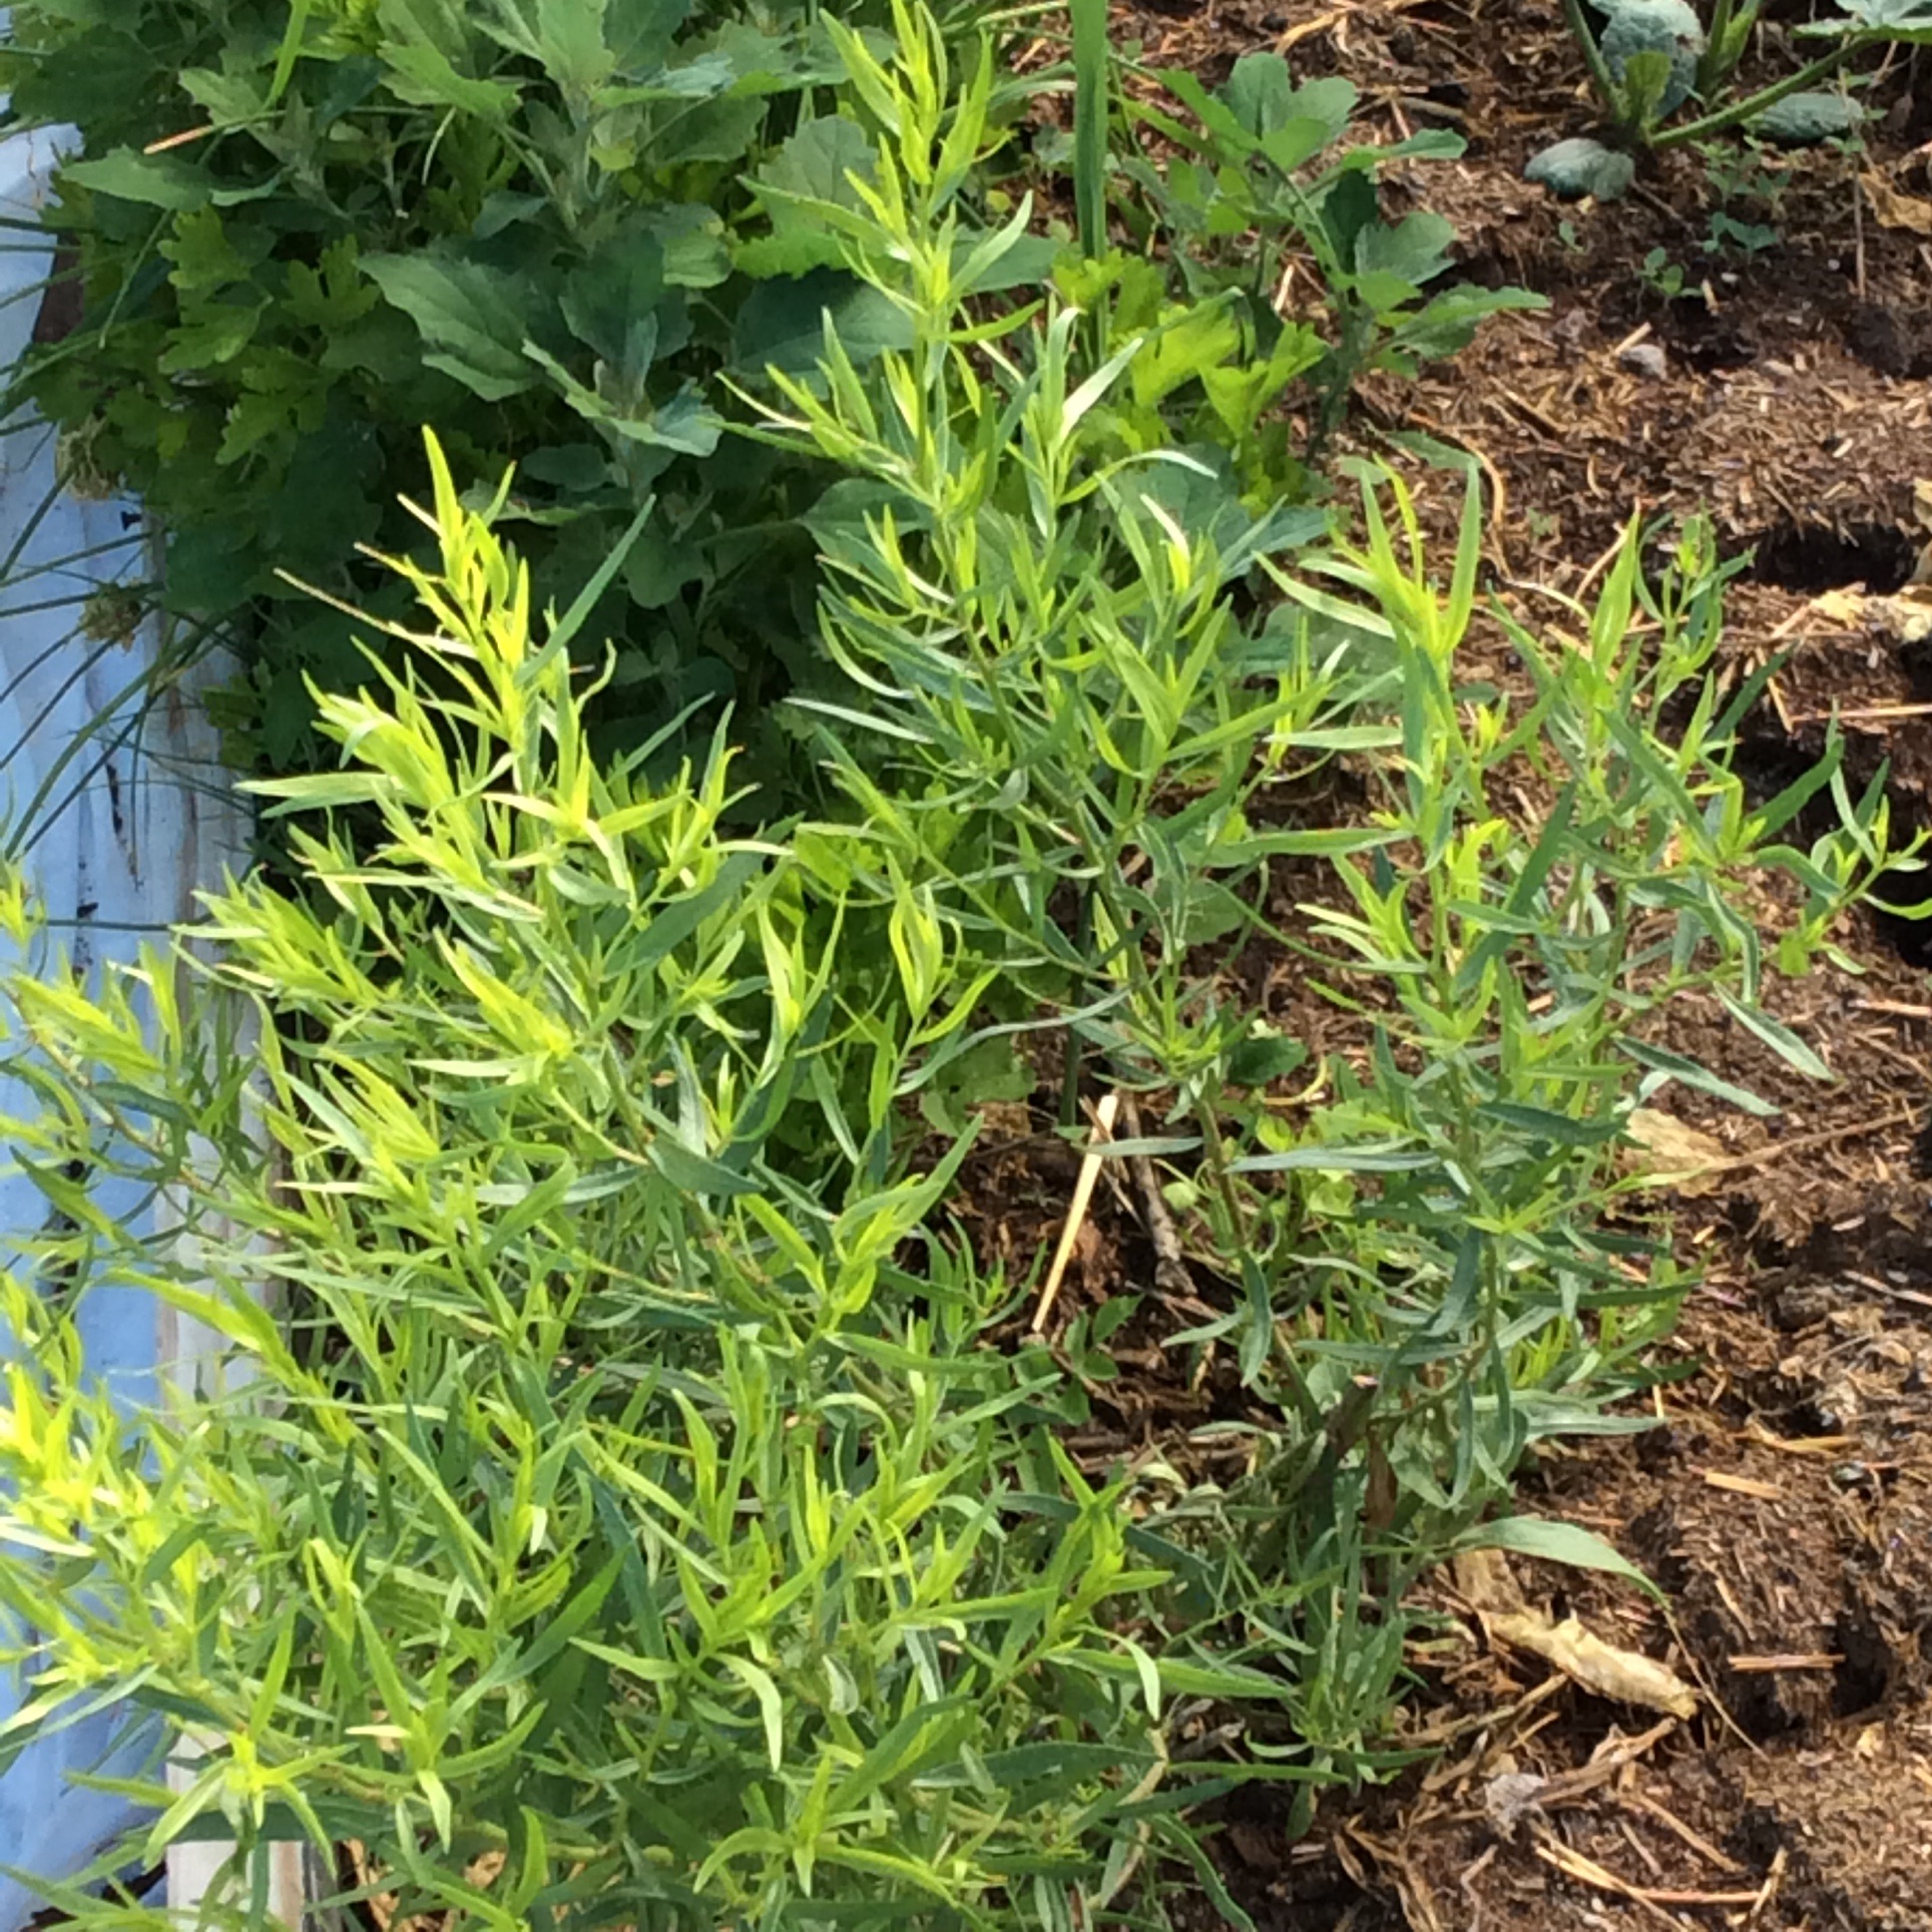
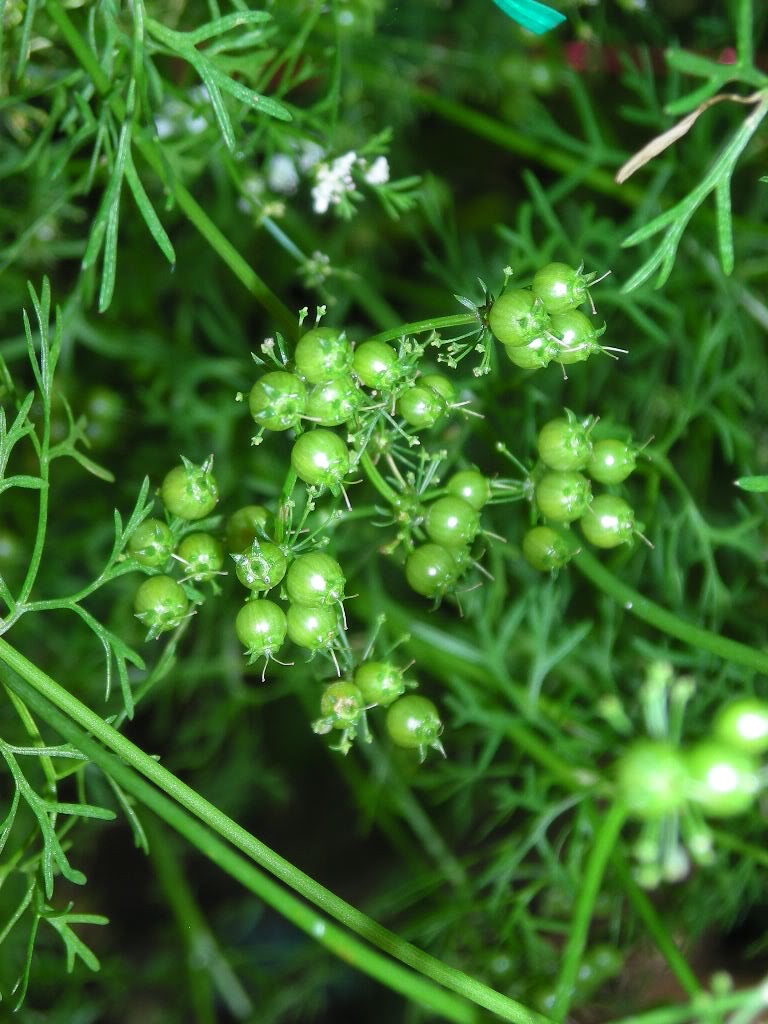
Tarragon goes crazy in late spring so let’s make use of that tender growth.
Archive for the ‘cooking’ Category
2 Jun
Green Mayo
1 Jun
A Veggie Cookbook Worth Owning

There are a lot of vegetable cookbooks on the market currently,most of them much of a muchness and pretty forgettable as far as I’m concerned, but now and then I come across one that must be bought. I bought this one. Then I bought another copy for a friend. It’s of special interest to anyone who grows their own vegetables or gets a CSA box for a few reasons:
1. The organization is by vegetable type, so if you have leafy greens in the garden you can turn to the leafy greens chapter and consider some cooking options.
2. It offers suggestions for vegetables, or parts of vegetables, that aren’t usually eaten. Broccoli leaves, for example, which are good to eat and highly nutrient-dense ( be careful how many you harvest, though, or your broccoli-bud crop will be significantly reduced.) Ms. Ly’s improvisational kale-stem pesto gives you a flexible way to use up the “nasty bits” of your kale. Tomato leaves are used well as a seasoning, and no, they aren’t poisonous. There are numerous other examples: I am looking forward to trying her chard-stem hummus later in the season. The recipe for pan-charred beans with bean leaf pesto looks like another winner.
3. The recipes that I have tried work and taste good. This does not go without saying. I have come across recipes, especially no-waste recipes, that look lovely in the picture but aren’t really edible. Ms. Ly’s recipes are good.
Oh, and 4. It’s available on Kindle if you need to save space on your cookbook shelves.
I don’t accept review copies of cookbooks. I buy them at my local indie bookstore, paying the same price that you will pay. That’s the only way that I can judge whether the value/ price ratio is really favorable. I think this one is worth the money. Even an old hand in the kitchen will pick up some new ideas for using vegetables.
30 May
Nose-to-tail Cilantro
Cilantro is a lovely and evanescent thing. It is a major seasoning herb in Thai and Indonesian cuisines, is widely used in China and Southeast Asia, and fills me with wellbeing whenever I eat it. It was a few years, though, before I learned how to make it pay for its garden space.
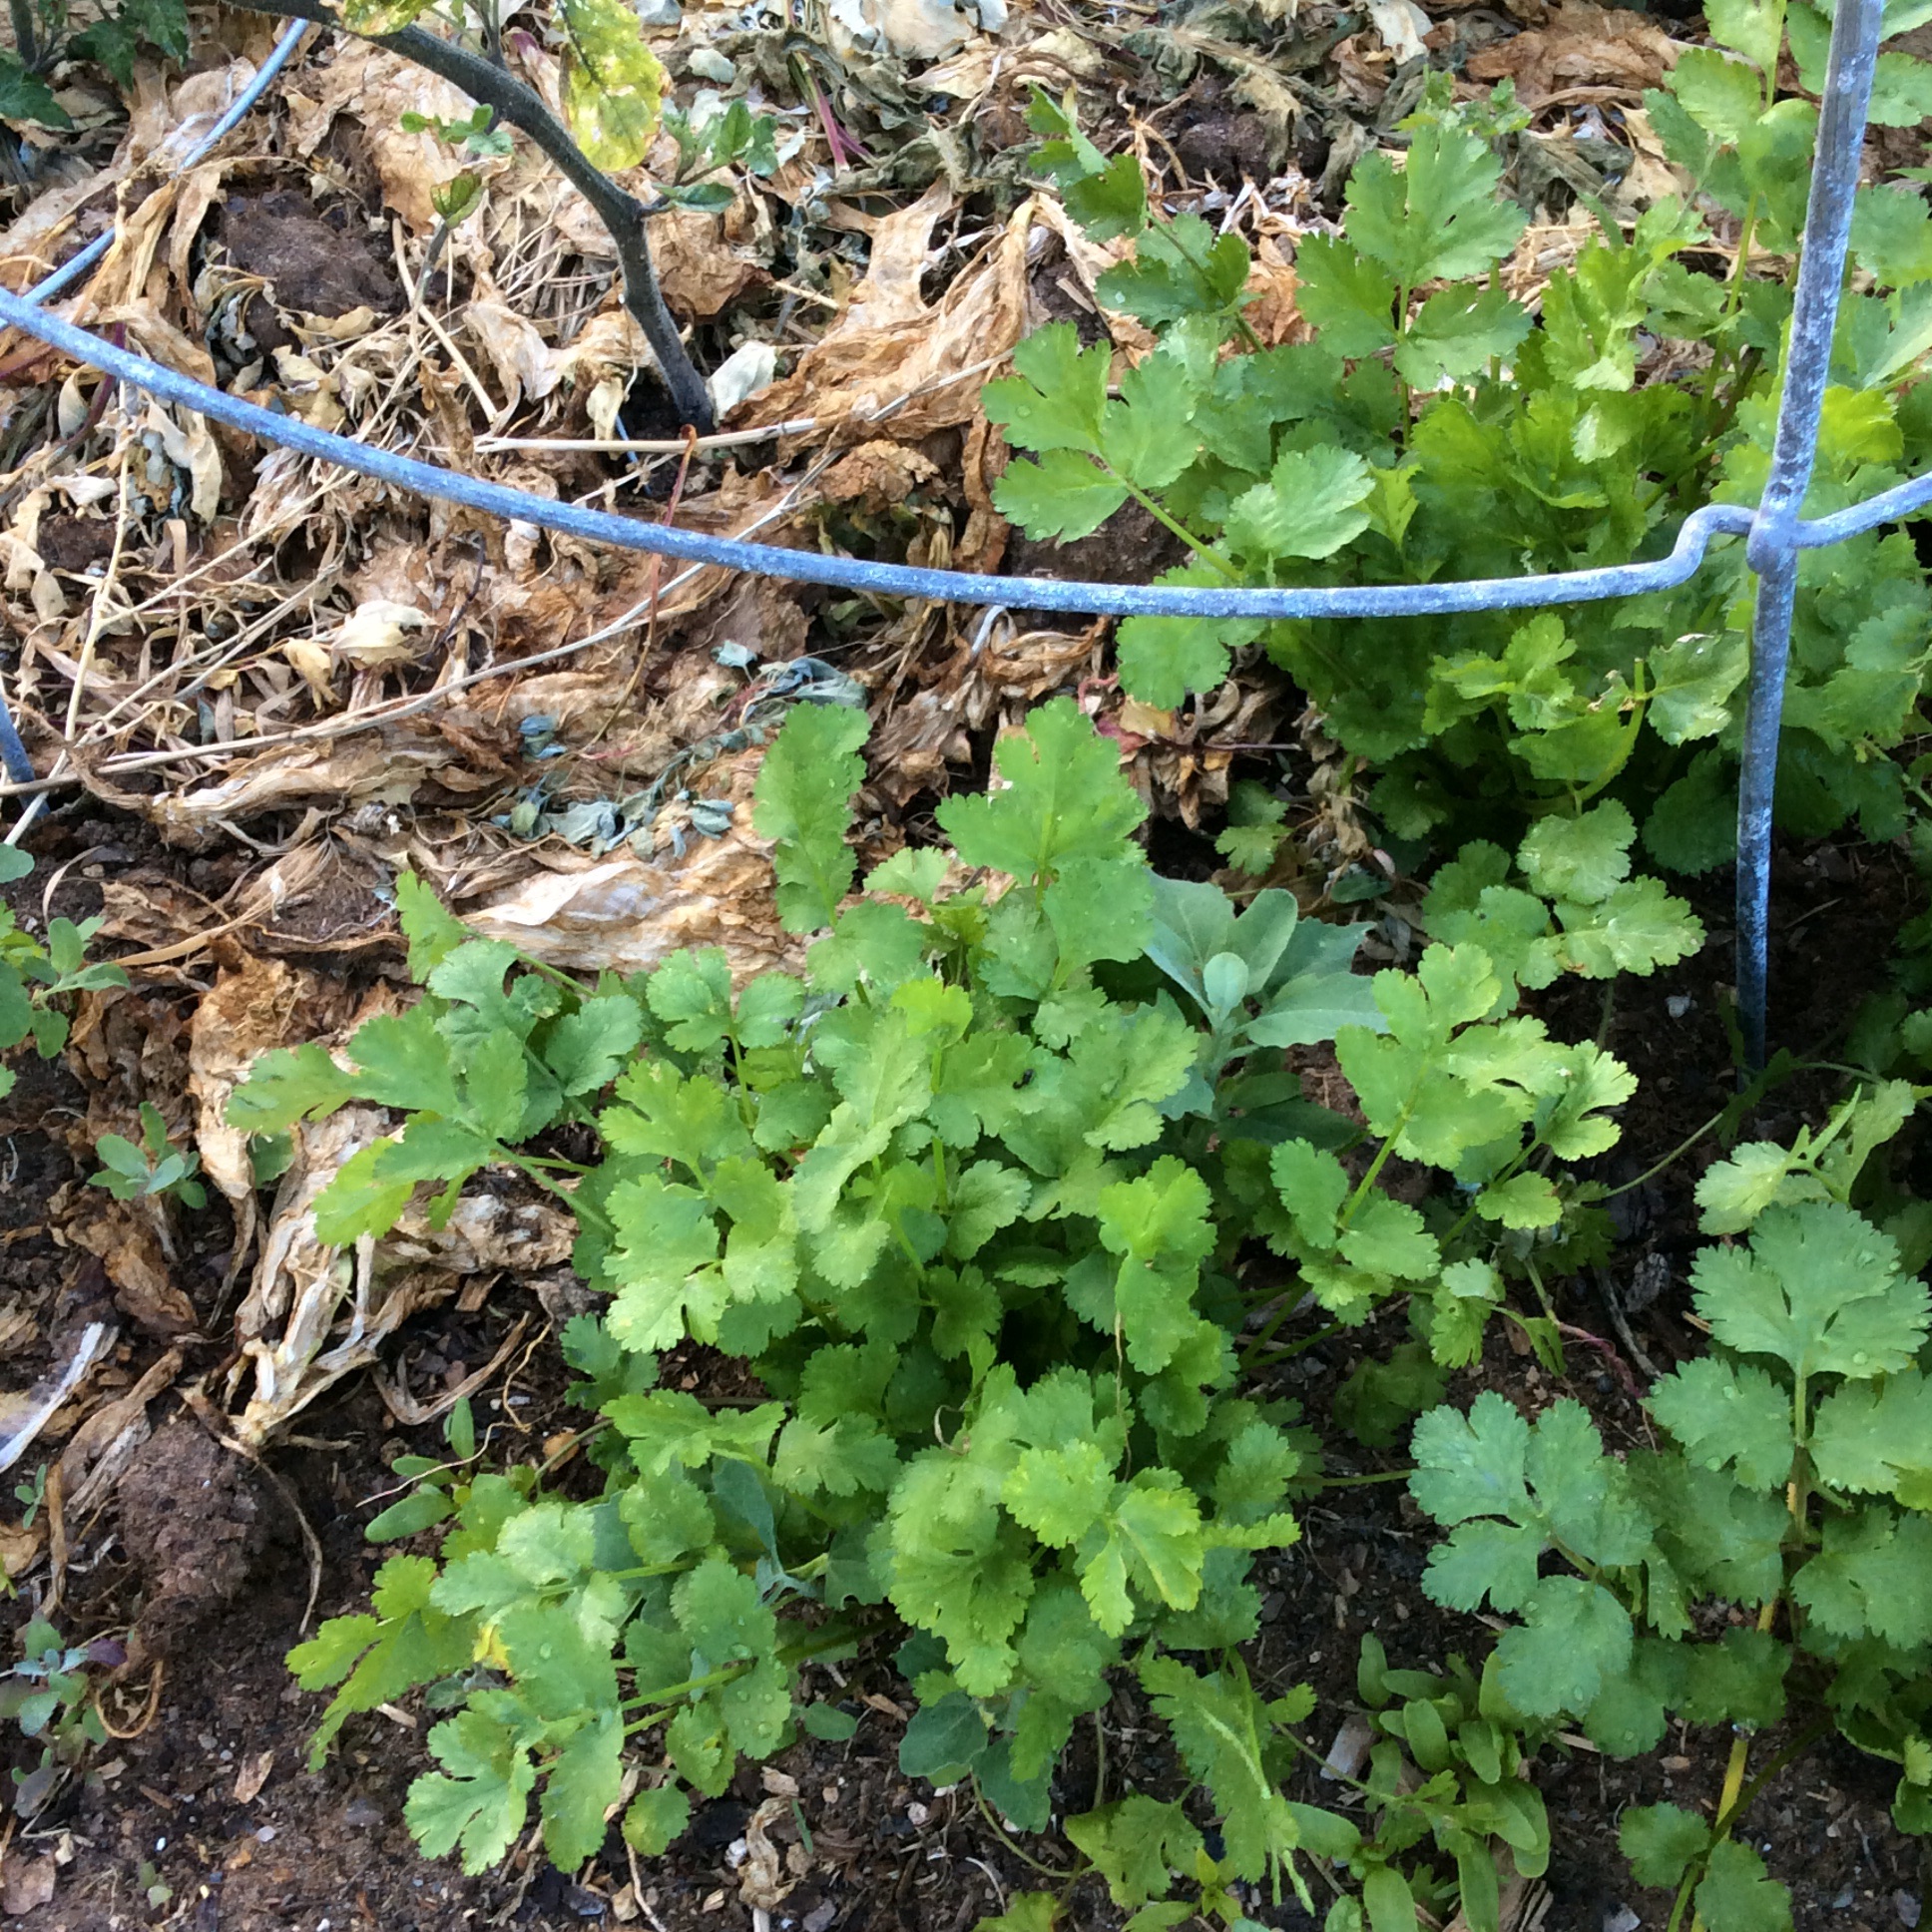
First, choose your variety carefully. You need a bolt-resistant type that can be bought in ounces, not packets. Don’t plant the seeds sold as spices. Currently my favorite is Calypso. Second, forget rows. Plant it in bunches that you can harvest all at once, and only have as many bunches maturing per week as you will actually use. I like the bunches to be spaced 8-10″ apart each way, and I plant 15-20 seeds in each bunch, all clustered into an area about 2″ in diameter. I plant 4 bunches a week, every week that I remember and have some bed space available, starting well before the last frost because cilantro likes cool weather and stopping as the days heat up. They will not occupy their real estate more than a couple of months, so I plant them in places where big heat-loving crops like tomatoes or zucchini will take over the space. In the picture above, you see the stem of the young tomato which will spread out when the days heat up. You may also note the early lettuce that occupied the tomato’s space over the winter, now serving as a light mulch.
When the plants are 7-8″ high, I harvest the bunch by cutting about two inches above the ground. They are quite clean because the crowded plants hold each other up, and just need a quick rinse before being used in your favorite way. Cut the bunch rather than pulling, because those stems will keep on working.
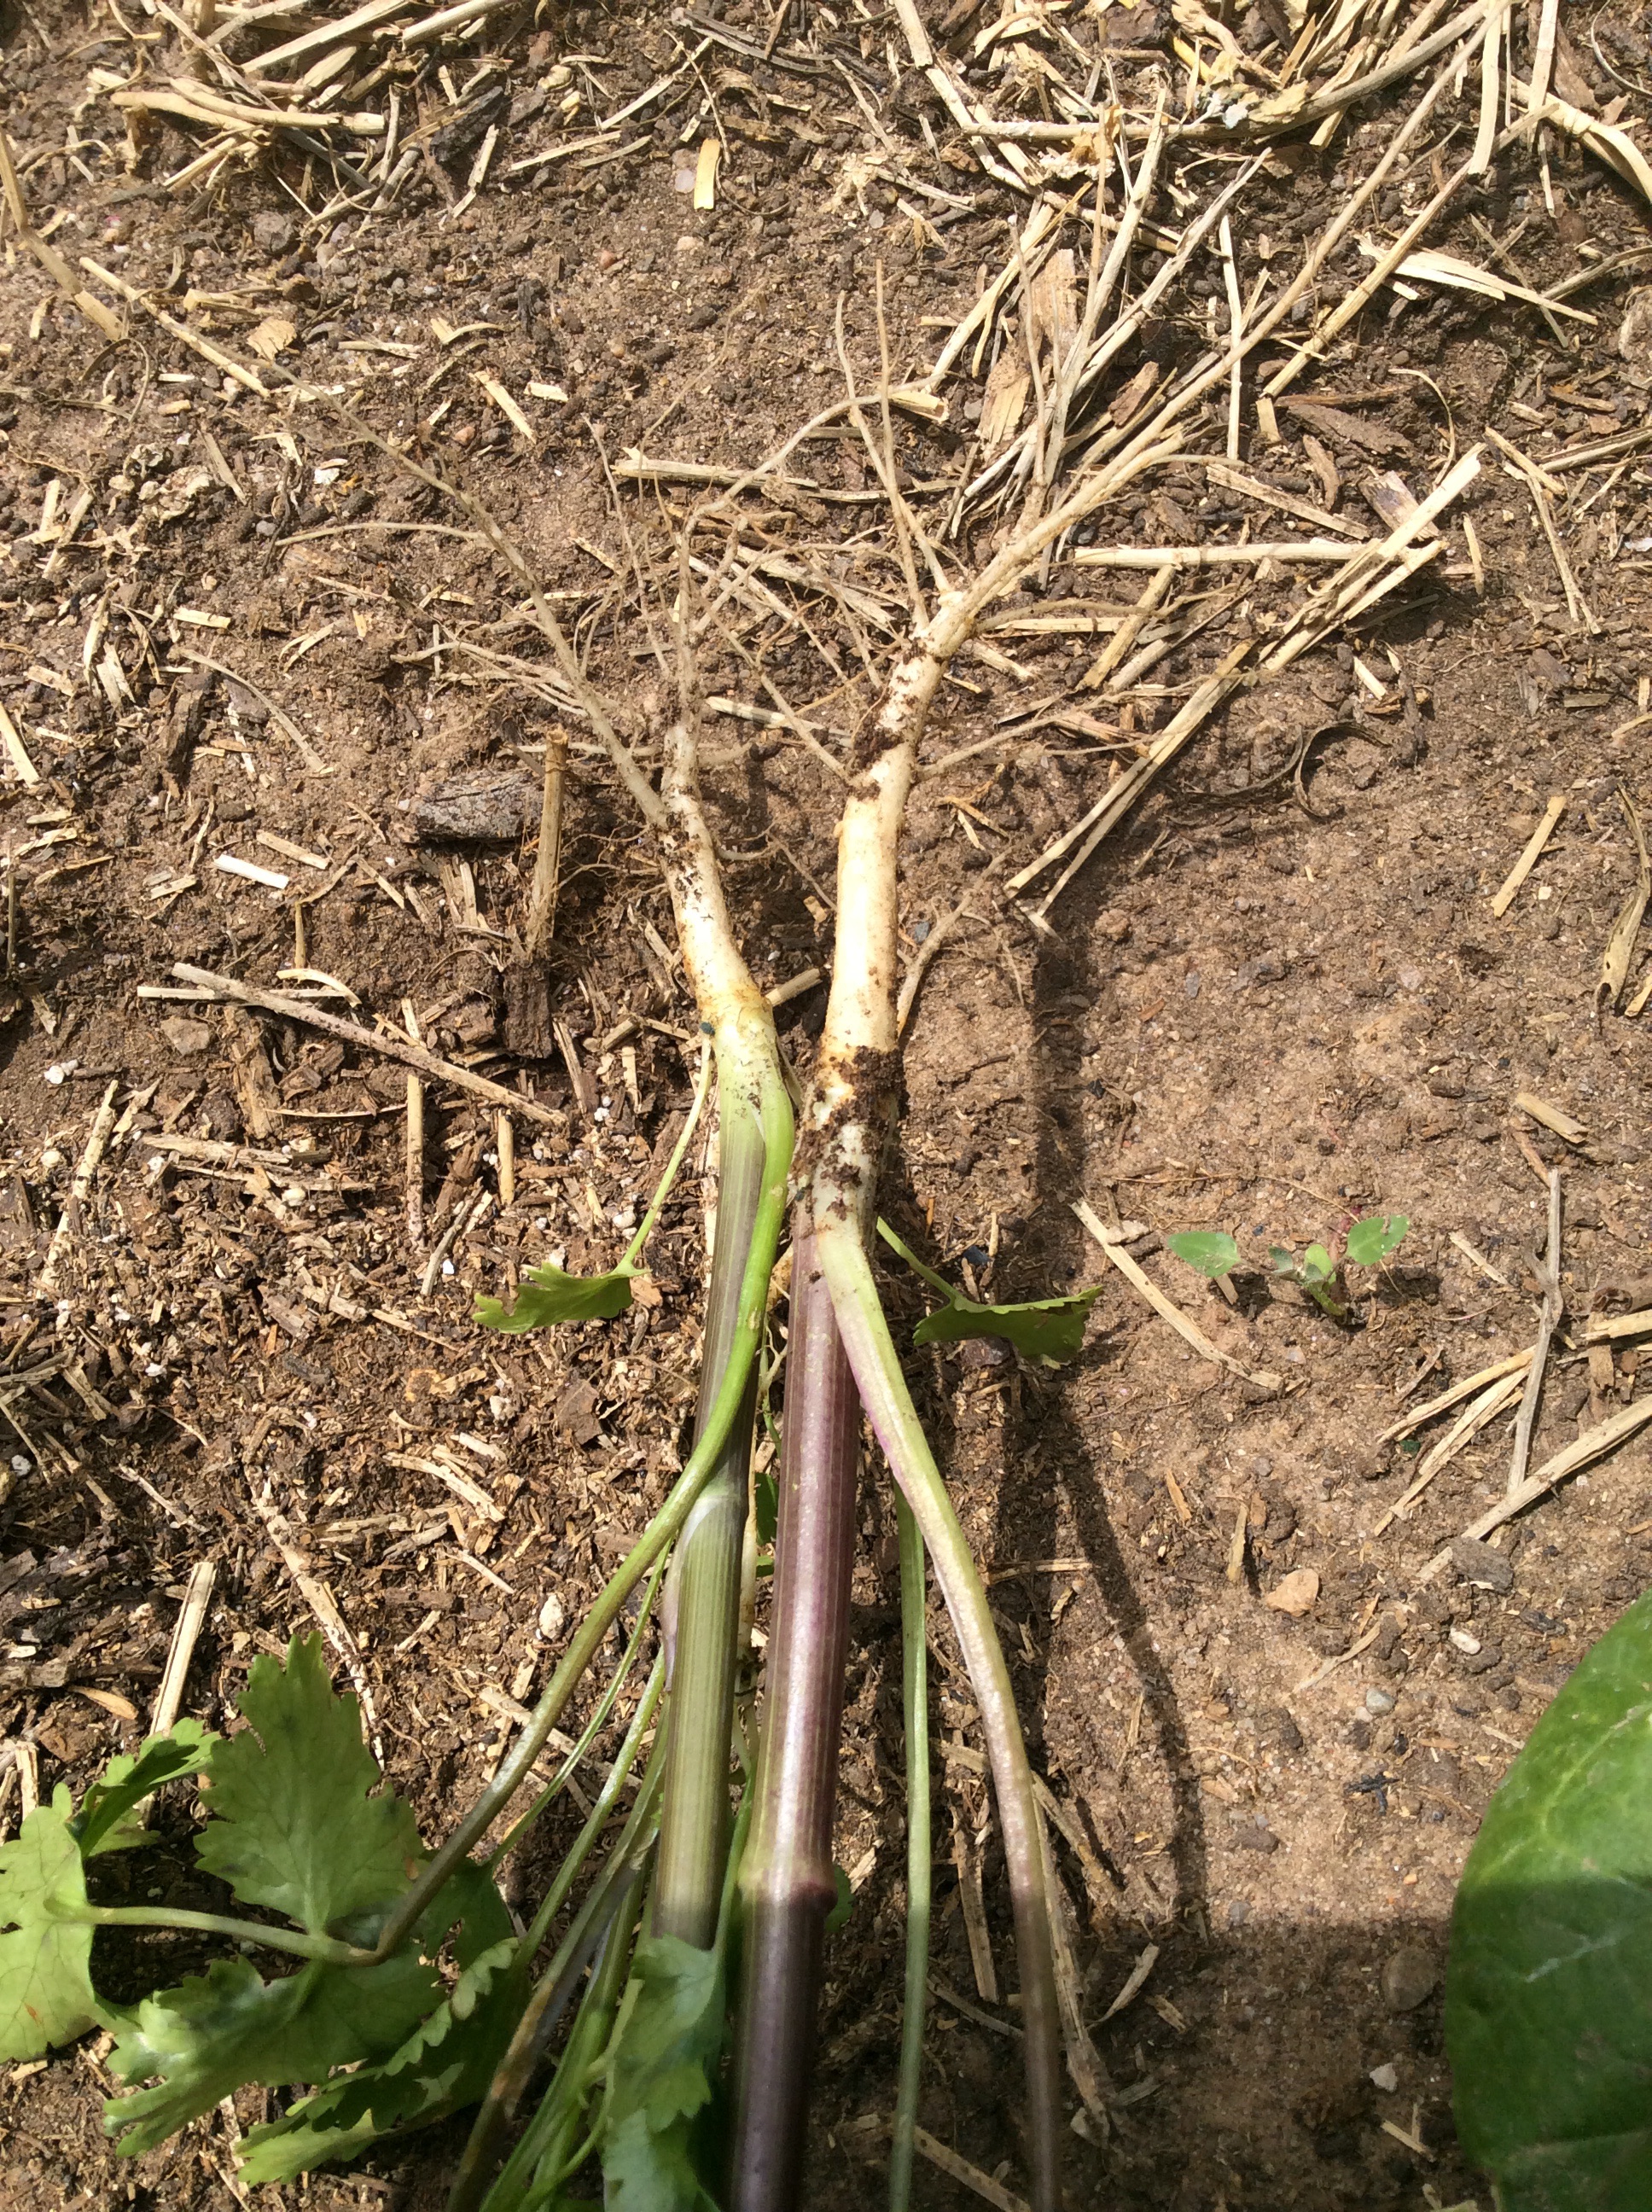
Leave the cut stems in place. When they show a good amount of new growth,you will notice that the leaves are finely cut and feathery rather than looking like grocery-store cilantro. This new growth doesn’t have the full cilantro flavor by any means, but I still like to throw chopped handfuls into salads and pounded green herb sauces. But what we are really after at this point is not the leaves. When some of your bunches are tall and starting to bolt, pull them for the roots and lower stems. Scrub the roots and thick lower stems well, cut off the finer roots and discard (into the compost, of course) and chop the roots and stems thinly crosswise. This is your supply of cilantro root, which is used extensively in classic Thai cooking, while the leaves aren’t used in authentic curry pastes etc. In fact, make sure that no leaves get into your root, because the flavor is different and not right for this use. Thai cooking aficionados refer to it as the “unobtainable, mythical coriander root,” but it is highly obtainable if you have a garden. Now you can pound your roots and stems in your faithful mortar and pestle to make curry and seasoning pastes, or freeze them in little plastic bags in quantities of about 4 tablespoons. I tend to use mine up during the summer, which is when southeast Asian cuisine tastes best to me.
But don’t pull every bunch. Let some bolt, because you want the green seeds.
These have a flavor in between the leaves and the dried coriander seed and are delicious sprinkled over salads, used as a garnish on grilled meats, or tossed over bulgur or rice dishes.
Now you are finally done with your cilantro plants and can pull them and compost them, unless you want to let some set and dry seeds to use as coriander seed. I don’t dry and save seeds, personally. I can buy seeds easily, and prefer to use my own seeds green, when they are a fresh treat that can’t be bought.
For more on using the roots, check out David Thompson’s huge and highly addictive “Thai Food,” the best Thai cookbook in English in my opinion, although it does assume a scary amount of kitchen time😉
28 May
The Cook’s Treat: Lambs-quarters

I am the cook in our household, and one of the reasons that I love my kitchen work is that I can have cook’s treats, little experimental dishes that I cook up while working on something else and eat standing up in the kitchen. They are something like impromptu tapas for one.
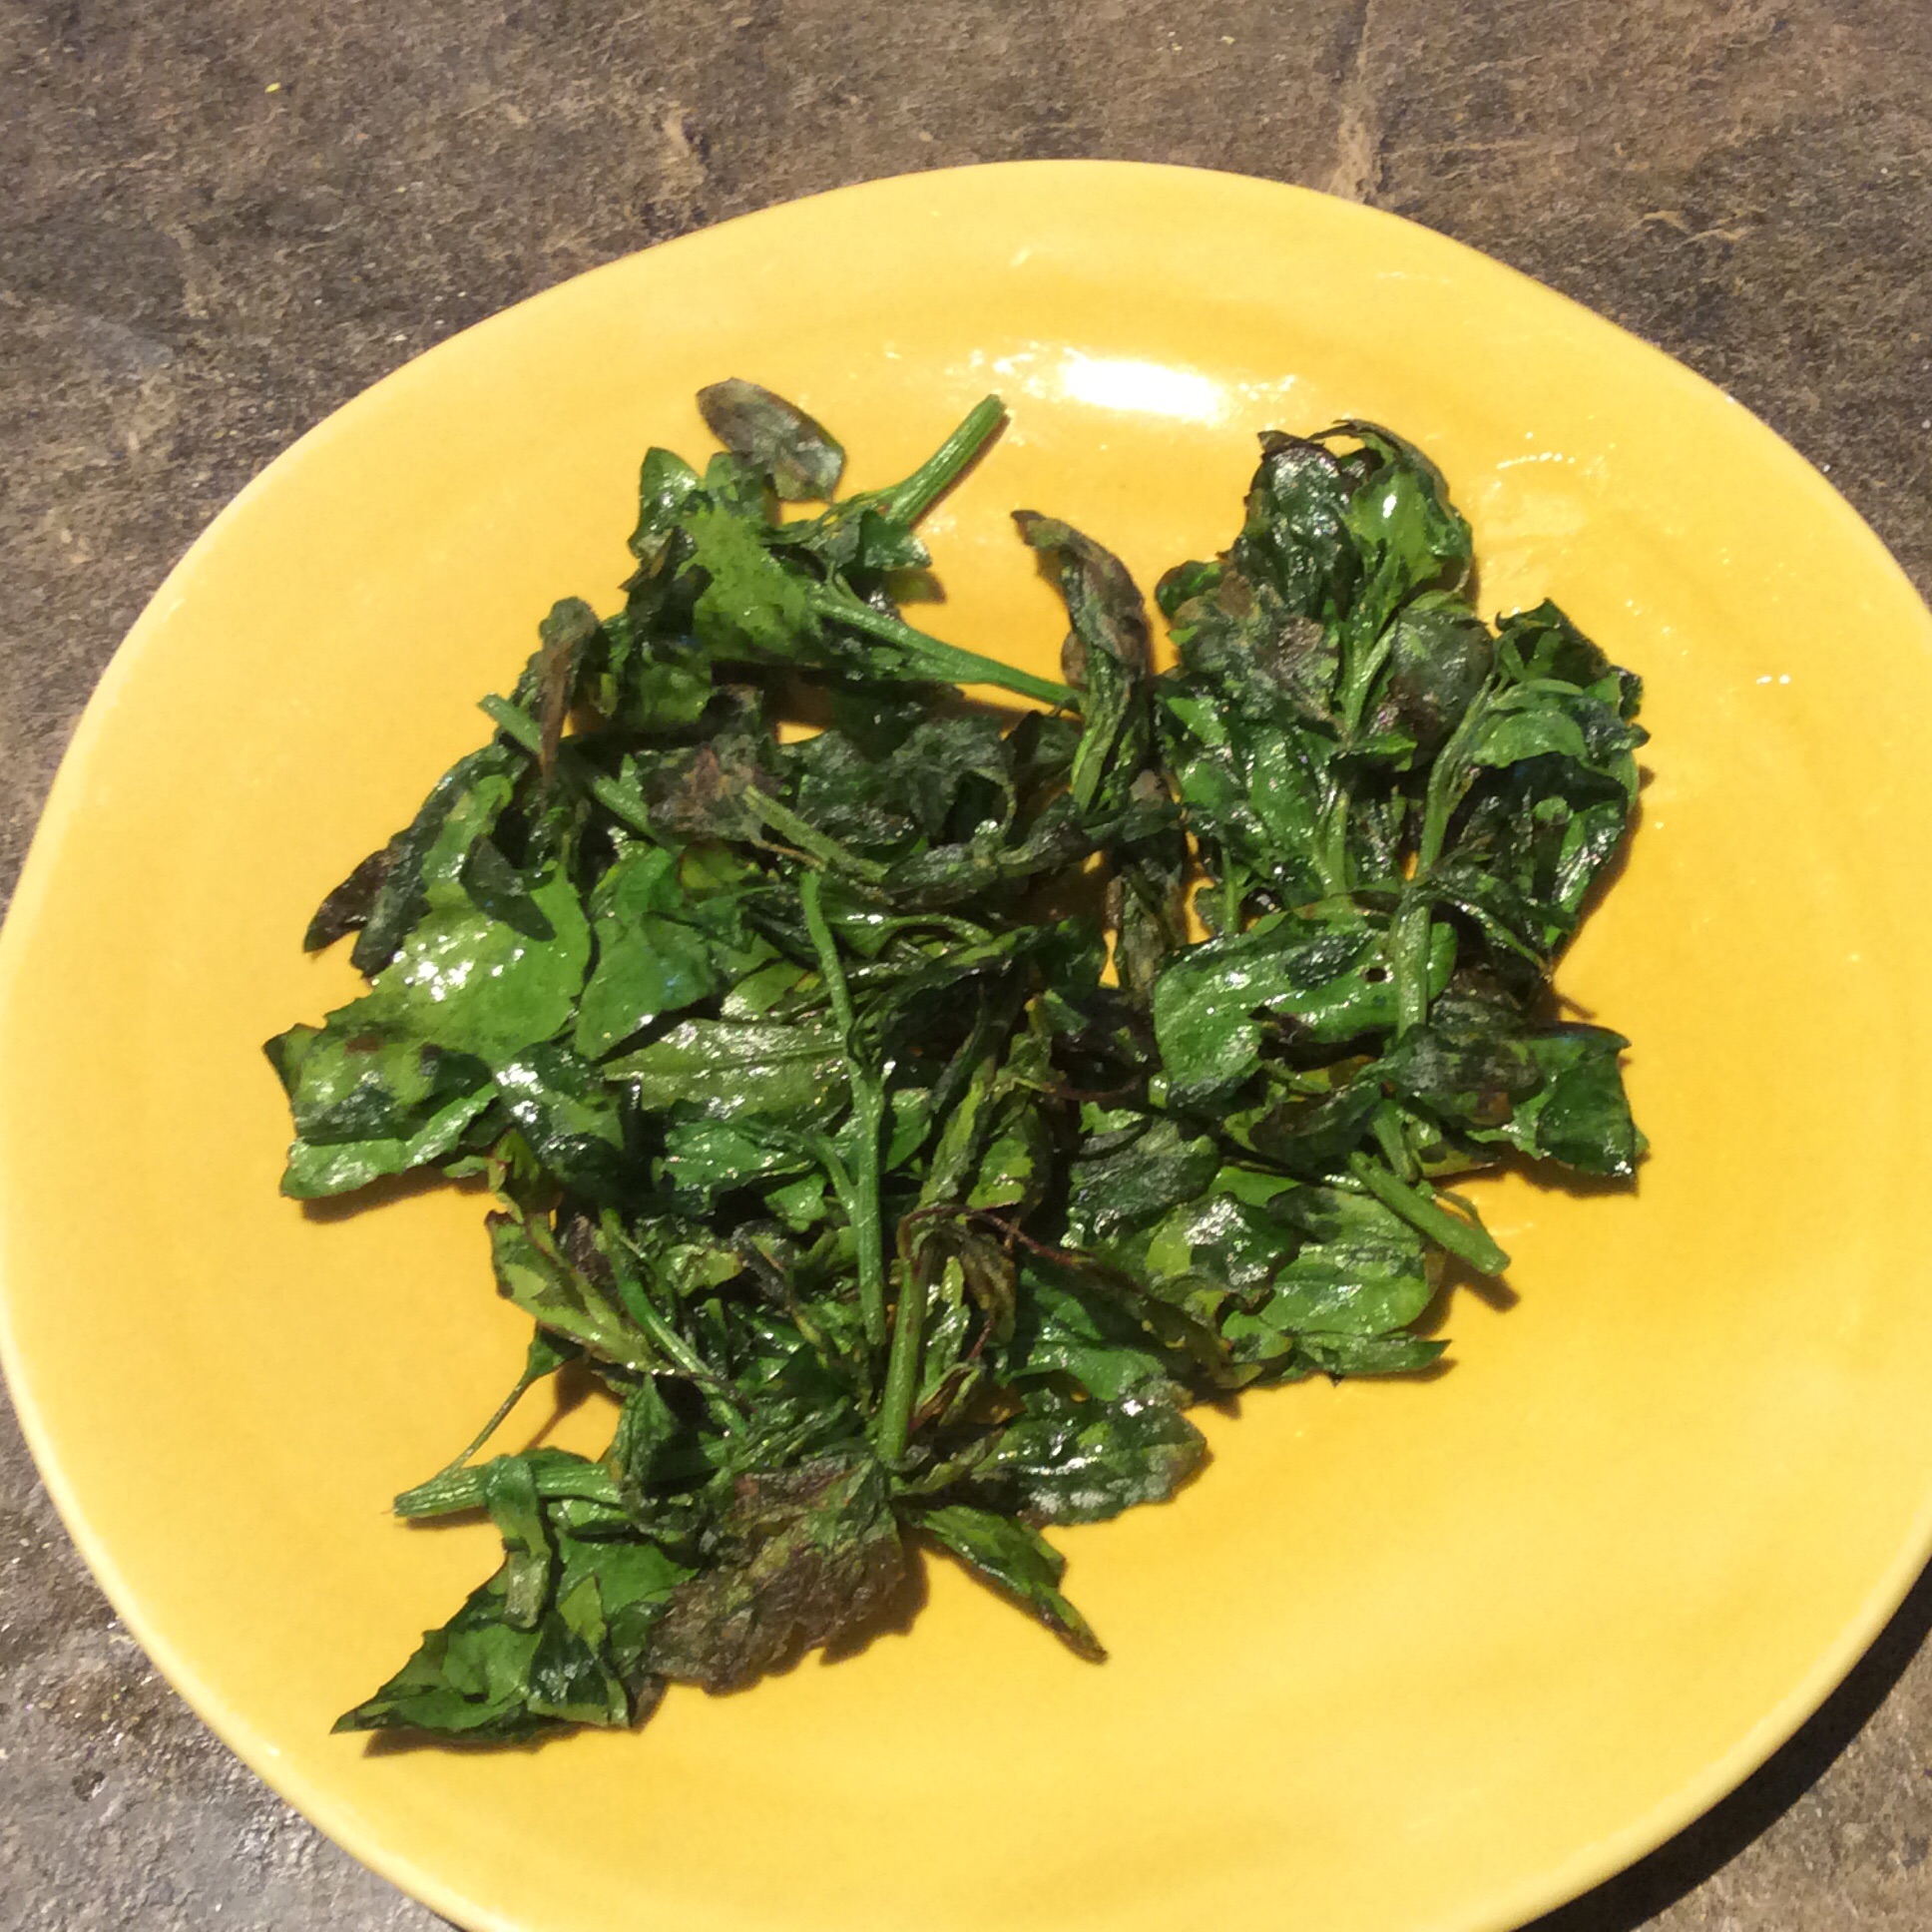
Recently I was preparing large quantities of tender lambs-quarters tips for the freezer, and began to speculate about how a handful of the tops could be turned into a cook’s treat. I have been very happy with some recent experiments that involved pan-frying hops shoots or scorzonera shoots over medium-high heat with just olive oil and salt, but hadn’t tried it with a leafy green vegetable.
I was delighted with the results. I chose about a dozen small tender tips, maybe three inches long on average, and washed them but didn’t make any special effort to dry them beyond setting them on a towel to drain. While washing them, I set my little 7 inch skillet over medium high heat to heat up. When the pan was hot, and my greens were washed and drained, I put in a glug of good olive oil. I never measure olive oil, but I would guess that the glug that looks right in my small skillet is about 2 tablespoons. You do need enough oil in the pan for the greens to be able to fry in spots. Wearing an apron and standing back a bit from the stove, I threw the greens into the skillet. They spat and hissed ferociously. After a minute, I sprinkled on a generous pinch of salt and turned them roughly. After another minute I turned the heat down to medium and continued to turn them over every minute or two until the stems were tender enough to eat and many ( but not all) of the leaves were browned and crisp. I turned them out onto a small plate, sprinkled on a bit of Fleur de Sel, and ate them hot in between other kitchen tasks. Yum. The flavor is fuller and maybe slightly more bitter than mild lambs-quarters can usually reach, and the crisped leaves crunch delicately between your teeth, like very thin ice.
They have to have enough space in the pan to crisp up and not steam each other into softness. I think that my large skillet would probably hold enough for three people, but not more. To serve more people, possibly one batch could stay hot in the oven while the next was frying, but I haven’t tried it yet. I do know that from thought to finished cook’s treat took about seven minutes, and that the cook, thus treated, returned to her kitchen tasks very happily.
Addendum: I did try making it for more people, and the hold-in-the-oven idea doesn’t work, I regret to say. The greens rapidly go soft, and taste fine in a toasty way but the delicate crunch is lost. So this is a treat for one or two people. But then, it’s very romantic to have a special treat that simply can’t be shared with a larger group.
