Archive for July, 2016

Ricotta, the Easiest Cheese

image

One day when I have loads of leisure and energy, I plan  to get really serious about cheesemaking.   However, if you have a dairy animal or any other source of good milk, there are times when you have milk on hand but no spare time to do anything fancy with it. On those occasions, make ricotta  right away while your milk is fresh. All you need is milk, a large stainless steel pot, a stirring spoon, a strainer, fine cheesecloth, and lemon juice or vinegar. Any child old enough to use the stove at all can make ricotta with a little supervision. Determine approximately how much milk you have and put it in the pot over medium-high heat.  Milk scorches easily, and it should be stirred frequently so that it doesn’t burn on the bottom of the pot.  As soon as the milk foams and is coming to a boil, remove it from the heat and add 2 tablespoons of lemon juice or vinegar per quart of milk.  I don’t recommend cider vinegar or other strong flavored vinegars, and although I prefer lemon juice, I sometimes use rice vinegar, which does not give any off flavor to the cheese.  Stir the acid in and let the pot sit for 5 to 10 minutes. Meanwhile, line the strainer with a few layers of cheesecloth and set it over a bowl it can drain  into, or in the sink, and when the milk in the pot has definitely separated,  pour gently into the cheesecloth lined strainer. Let drain a few hours. Squeeze it a bit in the cheesecloth to get excess whey out,  salt if desired, chill, and eat.  The only reason for the milk not separating is that it wasn’t heated hot enough. If this should happen, heat again, stirring continually, until it separates. But that should not happen if you brought it to a boil in the first place.

The whey is useful and still contains a lot of nutrients.  It would be a shame to waste it. I feed it to my chickens, and they enjoy it.

When I mention cheesecloth I am talking about the real thing, specifically marketed for cheesemaking, and you can get it at New England Cheesemaking Supply along with a variety of other entrancing supplies and gadgets.

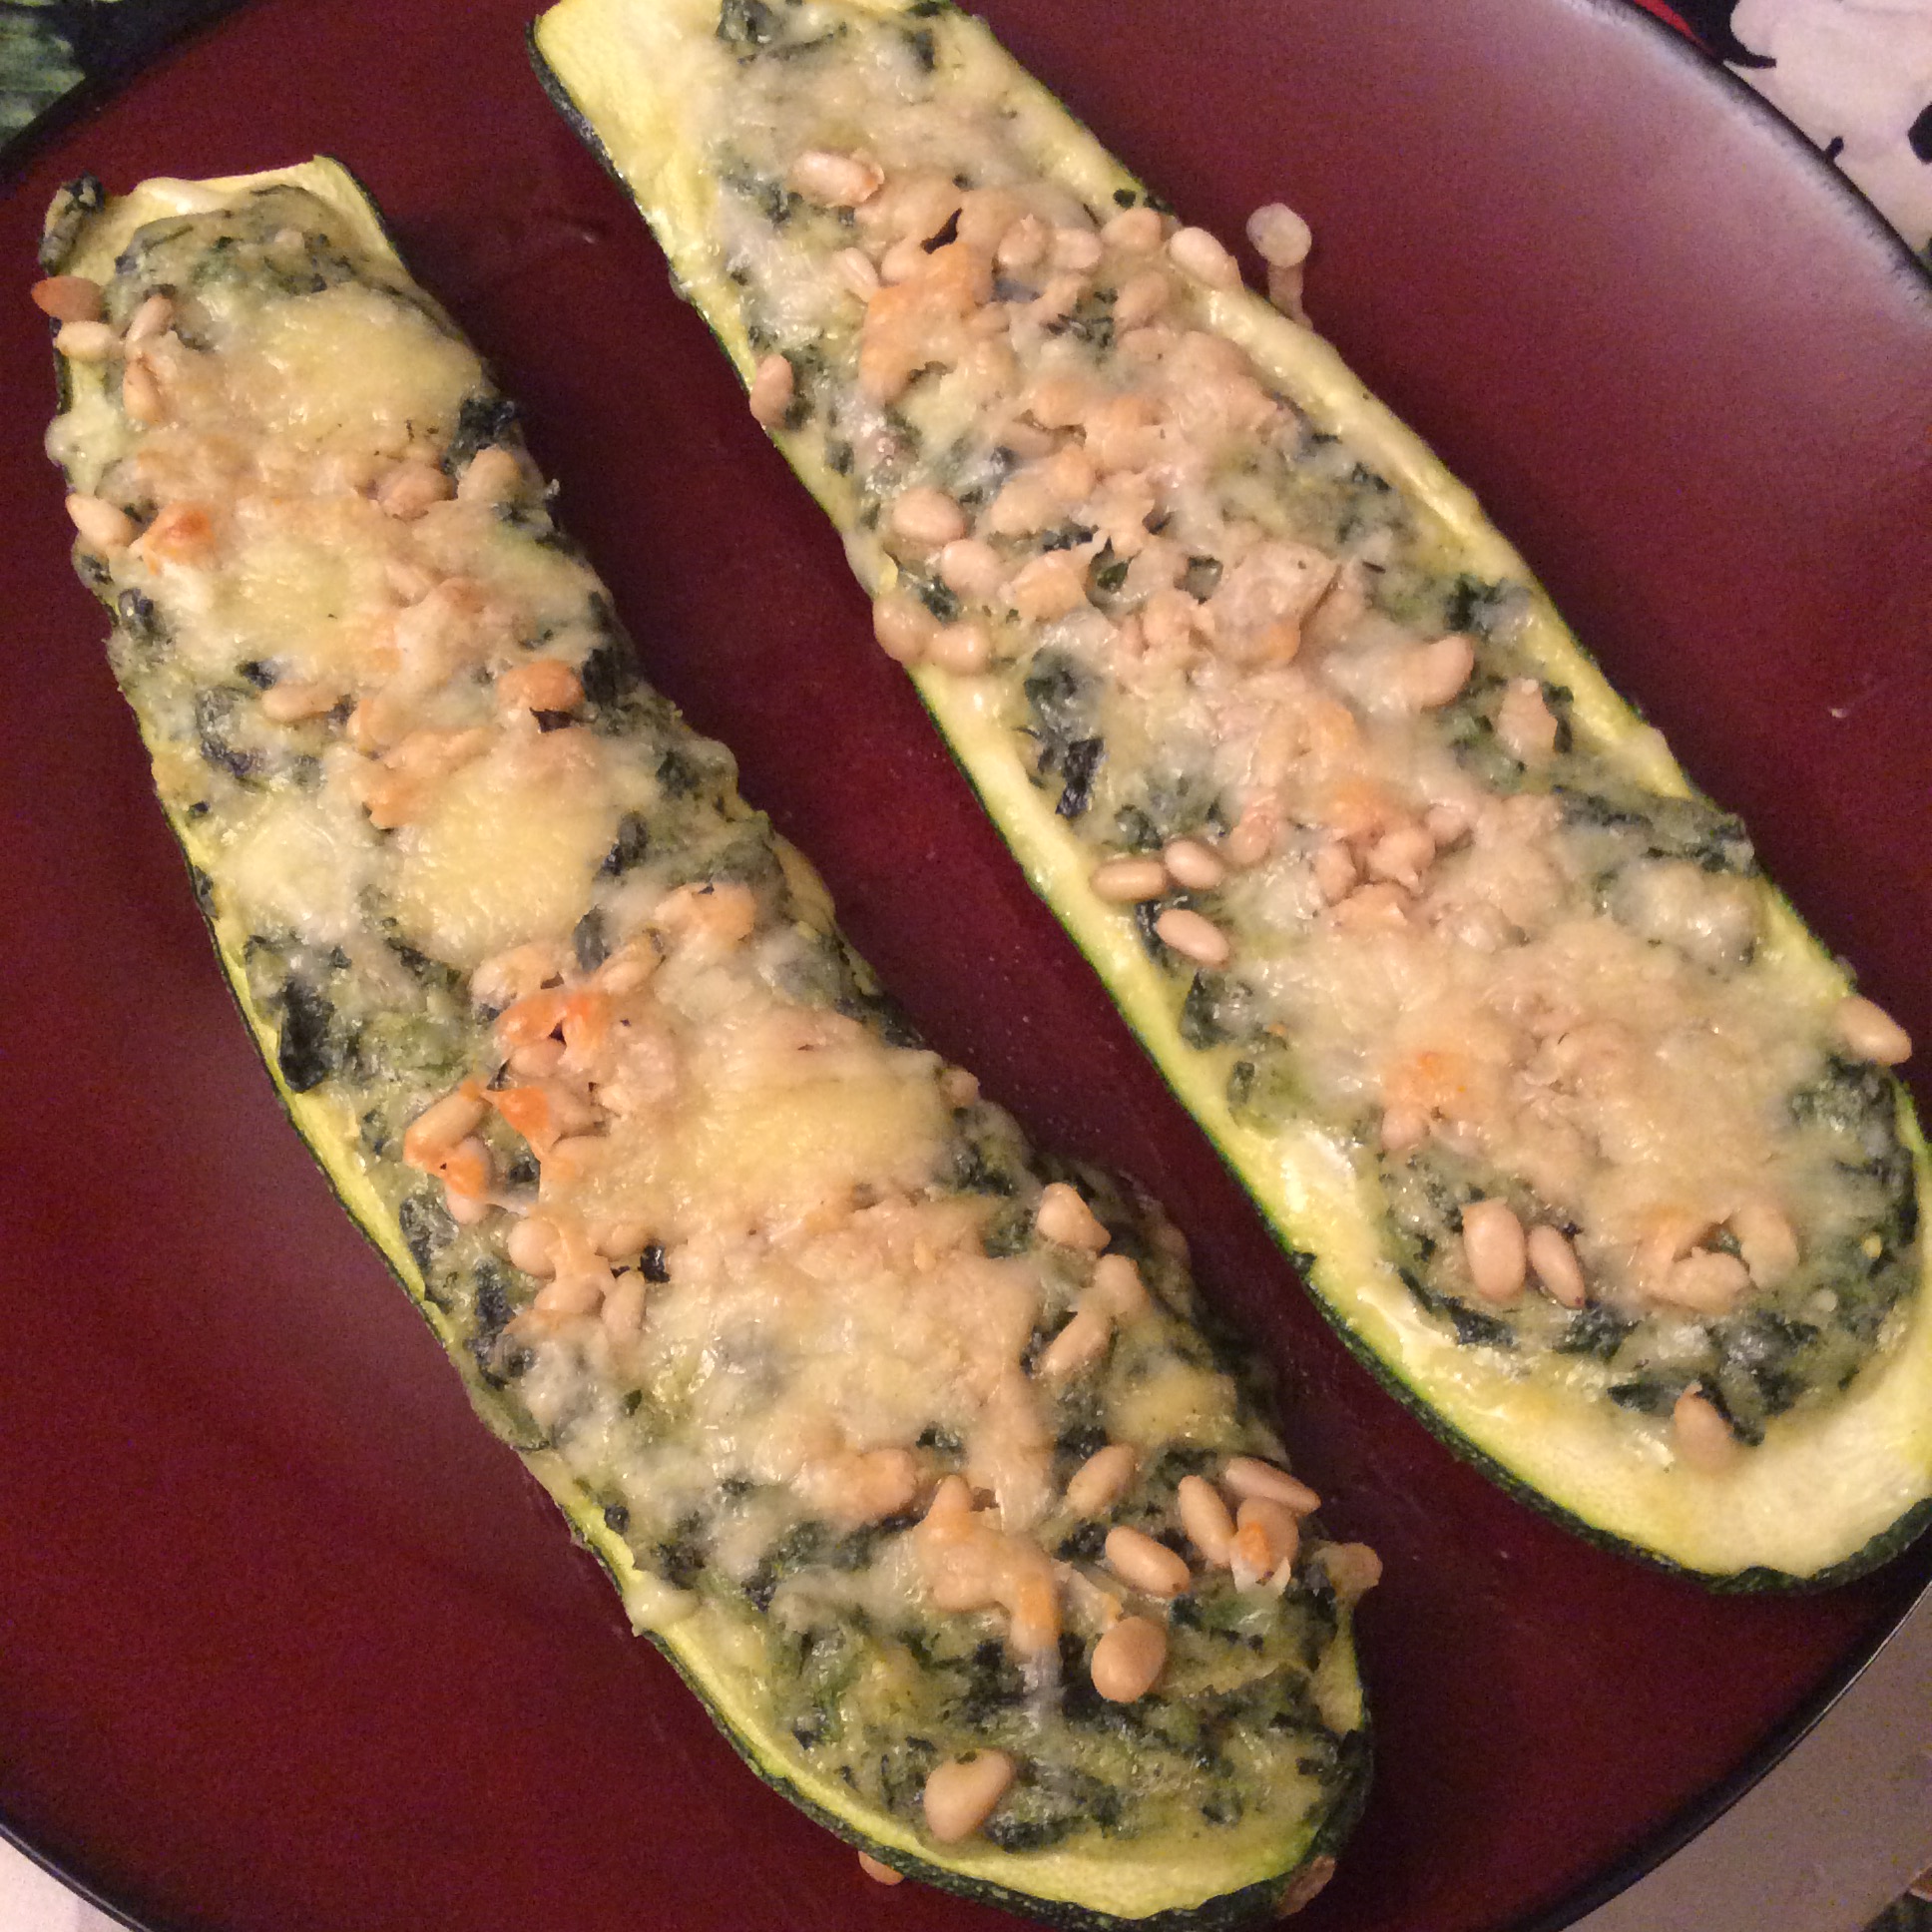
Besides just eating the ricotta itself with herbs stirred in, or sweetened and topped with fruit, it makes a good basis for a lot of other delicious meals.  I especially like it as a fill-in for stuffed vegetables. To make the zucchini above, get some good sized zucchini about 10 inches long. Cut them in half and hollow them out into boats.  Sprinkle very liberally with salt and put them in a bowl to drain for at least half an hour. This step is important. Meanwhile, preheat the oven to 450.  When ready to cook the zucchini, dry them off thoroughly with a kitchen towel. Rub with a little olive oil on the inside, put on a parchment lined baking sheet, and put them in the oven until they are fairly tender, which is about 25 minutes for me.

Meanwhile make the filling. Blanch about 2 quarts loosely packed of mixed greens; I used amaranth and lambsquarters. Drain and press the greens dry. Chop them thoroughly.  Chop one onion and two cloves of garlic and sauté them in a quarter cup of olive oil until they are thoroughly cooked but not colored very much. Stir in the chopped greens, and cook all together at least 10 minutes.  Turn the greens mixture into a bowl and mix in a heaping cup of goat ricotta (or any well-drained ricotta) and a cup of grated Parmesan cheese  or crumbled feta. Toss in a handful of chopped herbs. I used about 2 tablespoons of sweet marjoram, a scant tablespoon of winter savory, and a heaping teaspoon of fresh thyme.  Now start tasting the mixture and add salt until you feel the seasoning is perfect.  I like to add a good squeeze of fresh lemon juice at this point as well. Add more herbs if they seem indicated. Once you have the seasoning the way you want it, mix in two raw egg yolks. Pile the mixture  into the cooked zucchini canoes, top with pinenuts and more grated Parmesan, and bake at 400 until they are thoroughly done and the top is just starting to brown.  I like to serve them cooled off a bit, drizzled with a bit of extremely good olive oil.

image


Disaster Preparedness: what do sunchokes have to do with it?

image
Recently somebody checking out my garden over the fence asked if I was a “prepper.” My first response was “No, of course not,” because I don’t care to be associated in any way with the mindset that not-so-secretly longs for the end of civilization. I love civilization.

I do think, though, that a functioning urban homestead is in a good position to survive emergencies. And here’s the thing about emergencies: they happen. My own home state had a potent reminder of this some years back, when Hurricane Katrina broke the levee and New Orleans was flooded. Evacuees poured out of New Orleans and filled surrounding areas, and food and water supples were strained while roads were bumper-to-bumper and accommodations were scarce to nonexistent. All of this came under control with passage of time, but there were some grim weeks for all concerned. It can happen anywhere. Drought, epidemic, loss of power, you name the emergency and a well-supplied urban homestead is well on the way to getting through it and being able to help others. Nobody’s survival is guaranteed, ever. But we can improve the odds.

Urban homesteading is a mindset of reasonable self-sufficiency. I have no ambition to be a nation or a law unto myself. But reasonable forethought about emergency power, medical, water, and food strategies is, in my view, the responsibility of every citizen who has the luxury of a future to look forward to.

With that in mind, I’m keeping some plants around that I have no real desire to eat, and sunchokes (Jerusalem artichokes is another name) are a good example. They are perennial and, as far as I can tell, indestructible. The tubers taste good either raw or cooked. They are loaded with inulin, a prebiotic nondigestible sugar that keeps them from raising blood sugar. The inulin also accounts for their GI effects, including gas for many people and uncomfortable cramping for me. If food were scarce, though, a little cramping would be the least of my worries. More important, if my supply of commercial feed for my livestock were interrupted, they could last a while on weeds and sunchokes, which could be cooked in my solar oven to make them more available to the chickens. The goat could eat the stems and leaves as well as the tubers.
image
Besides their uses in disasters, they make a nice healthy green patch that I don’t have to fool with very much. In my desert area they need some supplemental water but not a lot. They are healthy and vigorous, by which I mean that you can’t kill them, and I confine them to one patch that can be mowed around to foil their plans for world domination.  They don’t play nicely in mixed plantings. The flowers are cheerful and have nectar for bees late in the season. They need to be dug and thinned in the fall. Don’t make any special effort to replant. Plenty will grow from the little bits that you missed. There are a number of different kinds that you can find with some trouble, but I planted a few tubers from the grocery store and they serve well enough.

Here’s an interesting post from Purdue with more details:

https://hort.purdue.edu/newcrop/afcm/jerusart.html


Elephant Garlic in the Semi-permaculture Garden

image

Last fall was the first time that I ever planted elephant garlic. This enormous bulbing  garlicky-tasting leek came from Nichols Garden Nursery. I planted in early fall and scattered lettuce seed over the bed to use the floor space in the spring. The garlic made fall top growth, but I left it to grow.

image

This spring I had a bed full of thick, sturdy, radiantly healthy green garlic, or rather green leeks in this case. I pulled some to use as green garlic, and was delighted by the warm, mildly garlicky flavor when sautéed in butter or olive oil with a little salt. I like all green garlic, but this one was my favorite. I didn’t let myself eat much of it, though, because I had my eye on a good bulb harvest. The bloomscapes care along in early May, and they make a nice subsidiary harvest if picked right away. Cooked at this stage, they are crisp, oniony, and sweet. Leave them more than 2-3 days after first appearance and they develop adamantine, unchewable fibers in the outer layer. Then come the flowers, and the few that I let bloom were very pretty. I forgot to take pictures so here are some borrowed shots:

image image

I have verified to my own satisfaction that if they are allowed to bloom the bulbs will be much smaller, so keep that in mind. The individual flowers make a tasty crunchy garnish, and are adored by bees, so they help carry pollinators through the hottest part of our summer, which is much appreciated.

Finally the tops started to yellow and bulb harvest began. Digging them is great fun; the enormous bulbs give you a sense of buried treasure. One must be quite a gardener, one feels, to produce a plant like that. So much of the time gardening is humbling that a little ego-aggrandizement does not come amiss.

The kitchen use is another matter. After a few tries, I can’t take to elephant garlic cloves either raw or cooked. The flavor is weakly garlicky with a bitter edge whether raw or cooked and does no dish any good, in my opinion. One online gardener has suggested that I need to hold it for a month or two, until this quality subsides. We’ll see.

image

The greens are so good that I’ll continue to grow a lot of it, and next spring I’ll let myself harvest a lot more greens. I plan to divide my elephant garlic patch in two, and try two different growing methods. In one half, I’ll continue to grow it in the standard garlic fashion, digging and dividing and replanting each fall, and in the other half I’ll just let it perennialize and pull green garlic at will and see what happens. Of course I’ll be reporting back.


Pollinator Independence

image

When I think about our country’s independence, I think about personal independence and how important food supply is to that. In maintaining a steady home food supply, one of the things you need is a steady supply of feed for your pollinators. I have been paying a lot of attention to trying to have a steady supply of nectary plants throughout the summer, and in our hot desert summer that can be difficult. Currently, the poppies are pretty much finished blooming, and I find that cardoons and artichokes are extraordinarily attractive to bees when allowed to flower.  I have a number of cardoon plants that grow beautifully in our hot summer and alkaline soil but have not turned out to be much good for eating; one day soon I will post on that depressing topic.  But the plants more than earn their keep by feeding my bees in fiery July.

Keep the pollinators in your thoughts when you do any yard planning and planting. Remember that they are extremely sensitive to sprays, and in my opinion there is not a good justification for a home gardener to use insecticide sprays in the garden.  Look around your neighborhood in July and August and see what is blooming or ready to bloom, and think about providing some of it for the bees and wasps.  Right now cardoons are front and center in my garden, cutting celery that I allowed to bloom is drawing beneficial tiny predatory wasps in large numbers, and sunflowers are just starting.  I planted a few cannas this year in order to do kitchen experiments with the bulbs in the fall, and as long as they are kept well mulched and given some water they sail through the heat, and those flowers also seem attractive to bees.

Bless our bees, because oh, how we need them.

image