Archive for the ‘vegetable gardening’ Category

The Seeds You Need

image

Here in the high-desert Southwest, our cold-weather vegetables need to be planted by mid-March, and so late February is my last good chance to review my seed box and order what I need. This resulted in my sending off a frantic order for sugar snap peas. My attachment to them is strong, largely because I love English (shelling) peas but never find time to shell them. My favorite snap pea is the original Sugar Snap. This variety has some disadvantages: it climbs 5-6 feet and has to be provided with support, the pods have strings and need to be de-stringed before cooking, and it doesn’t have much in the way of disease resistance (although I have had no problems with disease.) It has a single incomparable advantage: flavor that none of the newer, neater varietals can live up to. For best flavor, the peas inside the pod have to be allowed to develop. Don’t pick them in the flat snow-pea stage. Then rinse and string the pods, which is a very quick job, and steam them to eat with butter, stir-fry with some scallion and ginger, or cook them in your own favorite way. Yum.

In my opinion they develop a soapy taste when frozen, so I don’t recommend “putting them by.” Eat mountains of the fresh article and give any extra to people you really like.
The important thing is, order those seeds now.

And don’t forget to plant extra so that you can cut pea shoots. Cut when they are 6-8 inches high, pea shoots are delicious in salads and stir-fries.

Welcome back, and notes on the Ketogenic diet

image

I’ve been MIA for a long time, and I appreciate the kindness of those readers who tactfully enquired about my whereabouts. The main reason was a series of deaths among my nearest and dearest that made 2013-14 seem like The Years That Everybody Died. Change and death are inevitable, and so are grief and railing against fate. Many thanks to those of you who are still with me.

Another change had a happier outcome. I developed clear signs and lab results indicating that the inexorable progression to type 2 diabetes had begun, and this started me wondering whether it really was inexorable. The answer, almost three years later, is an enthusiastic “No way!” After fooling around with various unsuccessful interventions, I finally took the plunge and went on an ultra low carbohydrate (ketogenic) diet, and after the first awful month of withdrawing from all my beloved toxins, it’s been great. Good energy, bubbling good health, and freedom from food cravings don’t come from medications, they come from consciously made lifestyle choices. Even more than I thought before, we choose our health. My menu of food choices includes meat, poultry, fish, seafood, green vegetables and some others, mushrooms, cheese, cream, strained yogurt, coconut milk, and nuts. Plenty to choose from, and plenty to season it with.

So some of my recipes will be a little different now, but the role of home food production is even more important than before. Green vegetables are an even bigger part of my diet now, and I want the best deep-organic stuff that I can get. Good meats are vital, and I produce my own where I reasonably can. I probably couldn’t afford to buy foods of this quality in the amounts that I eat them. This is the perfect time of year to plan your season of growing and foraging, so in the next post we’ll start thinking about what to grow and what to read.
image

Oh, and don’t forget:

image

The Very Composed Salad, and notes on vinaigrette


For the most part I make simple salads when I make salads at all, relying on top-quality greens and a well-made vinaigrette for effect. But the salade composee, or composed salad, will always be dear to me because I can remember when Salade Nicoise was the very height of Manhattan foodie chic and Nocoise olives were hard to find. The urge to make a greater spectacle of my salads comes over me in midwinter, when short days and long nights give me more time to fiddle. In my opinion, this salad is one worth fiddling with.
For two people, I started with a small red onion, half a head of purple cauliflower (probably 5-6 ounces, or a heaping cup of trimmed florets) , a very firm red-skinned pear, and a small head of castelfranco raddicchio from the garden. A small head of round or Treviso raddicchio from the store would work just as well. I had on hand a third of a cup or so of red-wine-vinegar vinaigrette (see notes below) and a bottle of truly superb olive oil.
First, heat 1.5 cups of water to boiling, adding a tablespoon of salt and the juice of half a lemon. The lemon juice is essential to keep the red/purple veggies from turning an awful muddy grey. Trim the cauliflower florets neatly, slicing the stems where needed so that all pieces are about the same size. Drop them in the boiling acidulated water, cover tightly and turn the heat down to medium, and poach at a fast simmer for eight minutes. While it cooks,slice half of the onion very finely (save the other half for something else) and put them in a bowl. After eight minutes, drain the cauliflower, pouring its poaching liquid into the bowl with the onion slices. Run cold water over the cauliflower pieces to chill them, and set them aside to drain thoroughly. Stir the onions around a little, then let sit for half an hour. Drain the onion, press out excess moisture but don’t rinse, squeeze on a few more drops of fresh lemon juice, work them through the soft onion strands with your fingers, and set aside. Wash the radicchio thoroughly and spin it dry or whirl it around in a kitchen towel (outdoors, please) until reasonably dry. Put it back in the refrigerator. Rinse the lemon juice off the onion slices and squeeze them dry in a towel. You can do all this up to two hours before dinner. Everything should be at room temperature except the radicchio, which is used cold from the refrigerator.

When ready to eat, use a very sharp knife to cut thin slices off the pear. Choose your salad plates, preferably red ones, but black looks equally good and very dramatic. White will do. Arrange some torn radicchio leaves artistically on two plates. Toss the thin pear slices around over them. Pile half the cauliflower florets on each plate, keeping them toward the center so that the radicchio and pear show clearly. Place some onion slices (which will now be soft and magenta in color) over and around the salad. Drizzle with a tablespoon or two of the vinaigrette, and then drizzle lightly with your very best olive oil, taking care to get some gleaming golden drops on the pear slices. Grind just a touch of pepper over the top. Serve.
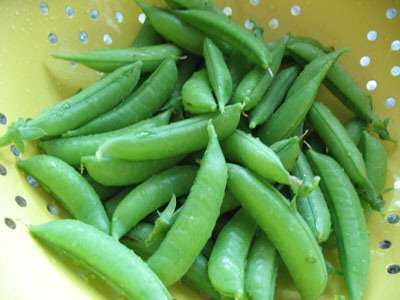
Purple cauliflower is widely available in this season. Check your favorite food co-op if it has a good produce section, or try Whole Foods. If you can’t find any, the yellow Cheddar cauliflower will give a different but still nice effect. A light scattering of toasted pine nuts or walnuts would be a great addition to this very autumnal salad. Don’t be tempted to throw in any cheese, no matter how fine a cheese it is. The pure flavors will get muddy, and the result will be undistinguished. Half the art of the composed salad is being able to stop before you ruin it with over-elaboration.

I have strong, even violent, opinions about vinaigrette. Each vinaigrette has to be made to suit the materials it is meant to enhance. In my opinion, this is the right one for this salad. Nothing that came premixed in a bottle is going to work. I have noted the steps that I consider especially important.

Opinionated Red Wine Vinaigrette

Start with really good olive oil and the best red wine vinegar you can lay hands on. I make my own wine vinegar, so I can’t help you with brands, but it’s essential that it be aged in oak and have a full flavor. The steps fit into general kitchen preparation, so you can do lots of other things while marinating the alliums.
Chop allium: 1 clove garlic chopped very finely, or one small shallot sliced finely, or half a small onion sliced finely. Put the prepared allium of your choice in a small bowl and add half a teaspoon of salt and 3 tablespoons of red wine vinegar. Stir around, and let sit at least 15 minutes. The “sit” is essential to get the right flavor. After this brief curing, add a teaspoon of fresh thyme leaves chopped and half a mashed anchovy fillet or a dash of colatura (my preference.) If you are vegan, or an irredeemable anchovy hater, you can substitute one or two pitted oil-cured olives thoroughly mashed in a mortar and pestle to give the meaty-umami undertone that helps tame bitter leaves like radicchio. Grind in fresh pepper, about 6 turns of the mill, and stir in half a cup of really good olive oil and a tablespoon of roasted walnut or roasted hazelnut oil. Taste and check for salt (remember, it should be on the salty side to season the veggies properly) That’s all there is to it. For other uses you may want to add a little Dijon mustard, vary the herb(s), use lemon juice instead of vinegar, or any of a million other variations, but this is the basic. The worst offenses that I taste in vinaigrettes are mediocre olive oil, bad wine vinegar, and a general excess in seasoning. No amount of herbs will make up for poor basic ingredients. I also dislike drippy, overdressed salads. As I see it, if you can’t taste the leaves and florets, why have them on the plate?
Since young adulthood I’ve cherished a story someone told me about seeing Alice Waters dining out in San Francisco; the eager voyeur insisted that she ate a large salad with her fingers, and then licked them. I have no idea whether it’s true, but if it is, more power to her. I’ll bet that was a good vinaigrette.

How to love Your Carrots


I’m doing a blog series for our local newspaper this month, but some readers had trouble accessing those posts, so I decided to put them on my own blog as well. Here’s the third one:
Eating seasonally is a pleasure for most of the year, and fall is a wonderful time to eat carrots. We all know how healthy carrots are, so I’ll skip over that part and concentrate on how delicious they are. When I cook carrots I make a lot, because they are wonderful for at-your-desk lunching the next day. Usually I retrieve my lunch from the refrigerator at my mid-morning brief break and eat it at room temperature at lunchtime, as long as no egg yolks, mayonnaise, or other extreme perishables are involved. If I plan to eat them at room temperature for lunch I use olive oil instead of butter, since animal fats congeal unattractively when they aren’t hot, but if you prefer to use butter, no problem. Just heat your carrots a little the next day, then carry them back to your desk and eat happily, with the slightly smug glow that comes of doing the right and healthy thing and getting your work done at the same time.

First, catch your carrots. Real carrots come in bunches with the tops on, and if the tops look withered, don’t bother with those carrots. Get some fresh ones instead. Your nearest growers’ market is a great place to shop for them. Here in Albuquerque you can find several colors, including yellow, the standard orange, red, and a glowing royal-purple. I love the purple ones, but any of these techniques can be used for any carrot.

I use the word “technique” with forethought, because it is basic technique that makes it quick and easy to cook and eat lots of vegetables. If you have to read a recipe in the kitchen as you work, you will eventually get fed up, but technique lives in your brain and makes it a snap to blanch, saute’, stir-fry, bake, boil, or grill any veggie that you care to eat. No precise measurements are needed. So here are a couple of basic techniques for carrots:

Blanch, then saute’: trim and scrub four large carrots or six smaller ones of any color. Peel if needed (usually I scrub well with a brush instead.) Slice into slices about a quarter inch thick. Fill a large saucepan with about 2 quarts of water, add 2 teaspoons of salt, bring to a boil, toss in the carrots, boil 5 minutes, and drain thoroughly. If you want to, you can hold the drained carrots at room temperature for 2-3 ours, making it easy to do some work ahead of time if needed. Melt two tablespoons of butter in a frying pan, or use olive oil if you prefer. Put in the carrots, 2-3 teaspoons of honey, salt to taste, and a grating of fresh nutmeg. Saute’ over medium heat until the carrots are done to your liking, and serve. The blanching makes sure that the carrots cook evenly, and the saute’ing brings out their flavor. You can vary this infinitely: add herbs in the saute’ stage; thyme or savory are especially good with carrots. Chop a clove of garlic or half a small onion and cook in the butter or oil until just cooked through before adding the carrots. Use a tablespoon of balsamic vinegar instead of honey. Add a squeeze of fresh lemon juice for a very fresh flavor. Add half a teaspoon of grated orange rind with the honey. Add a tablespoon or two of dark rum and cook it off thoroughly before serving. Or, if you have access to some good artisanal root beer (I brew my own. Just don’t use the grocery-store glop) you can add a quarter cup of it when you add the carrots to the butter, and cook over high heat until the root beer is reduced to a syrup that just coats the carrots. A quarter-cup of dark ale produces a malty, ever-so-faintly bitter glaze that’s great with game. You can also cut the carrots into chunks about 2 inches long and then cut those into quarters at the initial prep, for a different texture. When using orange carrots, sometimes I cook a couple of purple potates separaely, slice them, and add them in for the saute’ stage.

Grilling: Usually people don’t think of grilling carrots, which is a shame, because the caramelization around the edges is delicious. Just cut them thinly. I like slices about 1/8” thick. Use a griddle or grill-wok so they don’t fall through the grill, and watch them closely so that they don’t burn. I describe a Southeast Asian seasoning here, but again the technique is key, and once you get the hang of it, you can season them any way you like. Trim and scrub 3-4 large carrots of any color, and slice them thinly. Toss with two chopped cloves of garlic, a 1” chunk of ginger grated, a tablespoon of Asian fish sauce (you can use soy sauce instead if you insist,) a tablespoon of agave nectar or coconut sugar, and 2 tablespoons of canola oil or similar. Heat the grill to medium-high and spread the carrot slices out on the griddle section or put them in the grill-wok. If griddling them, turn them in bunches with a spatula about halfway through. If using the wok, you will need to turn several times during cooking. Taste to see when the texture seems just right to you, salt a little if they need it (the fish sauce is fairly salty) and serve with some chopped cilantro on top.