Archive for the ‘Ketogenic diet’ Category

Food Diatribe II: Leafy Green Season

Medscape just published an article worth reading. The information is from a prospective study of older adults living in the community, and showed a direct linear relationship between consuming one or two servings a day of leafy green vegetables and slower cognitive decline. In fact, eating leafy greens daily offered the cognitive equivalent of being 11 years younger.

One expert neurologist asked to comment on the findings responded with confirmation: “This study adds to the rapidly evolving and convincing evidence that you are what you eat when it comes to brain health,” Richard Isaacson, Weill Cornell Medicine, New York City, said. “From a practical clinical perspective, regular intake of green leafy vegetables should be a standard part of a risk reduction paradigm to delay cognitive decline throughout the lifespan.”

Amusingly, another expert said that it was “too soon” to recommend leafy greens, and advised waiting for further confirmation from future studies, a typical recommendation for new drugs but not typically applied to foodstuffs that healthy people have been eating for millennia. I do of course see his point, which is not to jump into thinking of leafy greens as a cure-all, but really now. So here is my response as a gardener, a doctor, and an avid reader of research: don’t wait. Some of the longest-lived and healthiest populations in the world have had  markedly high  consumption of leafy greens. There is no downside and no dangerous side effect to worry about unless you are on warfarin. So just do it. You can read the article here if you want, and it contains a link to the study. Then, just do it. Grow them if you can. If you have a small garden patch, make an investment in your family’s health by filling it with greens. If you don’t garden, you can haunt your farmers market or start making foraging trips. If you prefer to eat salad, choose darker greens, not lettuce hearts or iceberg, and eat a big bowlful.

Right now I’m still eating last fall’s leafy greens from under frost blankets. The collards and Savoy cabbage held up best, and are uniquely delicious after exposure to cold. I harvested Swiss chard for people and chickens all last summer, and then put a frost blanket over half  the row.  The new leaves of spring are the meatiest and most delicious that a chard plant ever produces, and the protected ones are nearly eating size, while the unprotected ones will come in some time next month. Just be sure to get them before the central stalk starts to elongate, because they lose their sweet meatiness and get strangely dirty-tasting when the flowering stalk starts to form. Green alliums are coming up everywhere, and my nettle patch is sprouting strongly.

If you keep animals for food, feed greens to your animals (not nettles, but chickens do love the leftover cooked ones.) I have a carnivorous friend who eats supermarket meat and insists that he’s a secondary consumer of vegetables, and I keep trying to tell him that on the contrary, he’s just a secondary consumer of GMO corn. Unless you are buying animal foods known for a fact to be grassfed or pastured and not grain-finished, you aren’t consuming the nutrients of vegetables.  But if you keep your own, it’s astounding what quantities of greens chickens will eat if they get a chance, while cattle, sheep, and goats can be raised to butterball fatness on grass and greens alone if you have enough. The nutritional profile of the eggs and meat is enhanced and the animals are much happier. I’ll have more to say about meat in the near future.

Spring Egg Yolks

During the longest nights my laying hens take a rest, and if I want eggs I have to buy them at the Co-op. This is probably a good thing, because it keeps me aware that even the best winter eggs from local farmers aren’t as good as the glorious golden-yolked beauties that my hens start to lay in February. Greens and flaxseed make the yolks full of omega-3s  and carotenoids. The effort of keeping enough greens going under frost blankets to supply the chickens as well as my own kitchen really pays off now. Later on in the spring they will lay like crazy and I’ll have eggs to share and I’ll be making profligate dishes like low-carb cheesecake, which involves 16 egg yolks. But when the first tiny golden crocus crysanthus blooms in February, I begin to get the first few treasured eggs, with yolks of the same gold as the crocuses. For now, I get a couple of eggs a day and every one is cherished. Even low-carb bread becomes something wonderful when dipped into a rich creamy fried egg yolk. As far as I’m concerned, top-notch fried eggs go with everything, and I love a plate of cooked veggies and fried eggs for dinner. A fried egg or two makes any plate of vegetables into dinner.  But there are tons of other possibilities.

In celebration of earliest spring, I took a look at what other bloggers have done with eggs. Here’s a brief round-up.

First, I can’t resist pointing out one of my own favorite old posts.

https://albuquerqueurbanhomestead.com/2016/11/18/eggs-in-a-hurry/


Hank Shaw is one of the most wonderful foragers and foodies that I know of. As soon as I have more eggs, I plan to salt-cure some yolks by his method and grate them over greens.

https://honest-food.net/salt-cured-egg-yolks/

The wonderfully herbal green buttered eggs from The Nourished Caveman are a go-to recipe for me, and I vary the greens according to availability and mood.

https://thenourishedcaveman.com/green-buttered-eggs/

This one will never come out of my kitchen, because I can’t stand sardines in any form. But it is so nutrient-rich that you should have a look at it.

https://thenourishedcaveman.com/nutrient-dense-fishermans-eggs/

Crispy fried eggs are wonderful for making a salad into a meal.

https://nomnompaleo.com/post/104615214153/sunnyside-salad-crispy-fried-eggs-on-greens

And Martha Stewart adds mushrooms to an eggs and greens skillet.

https://www.marthastewart.com/852125/fried-eggs-greens-and-mushrooms

Or scramble your eggs a bit on the hard-cooked side and toss them into greens or salads as an ingredient.


Under the Frost Blankets

I have always tried to protect a couple of winter crops with frost blankets, but this year is the first time I got really serious about it at the right time of year. The right time of year is October, when you figure out which beds are going to be open during the winter and prepare them for planting.   Clean them of the debris of their previous crop, and fertilize a little more heavily than you usually would. Since I planned to grow mostly green things, I used blood meal and organic kelp meal.  If I had had more finished compost on hand, I would’ve used some of that too. Whatever you decide to use, fertilize, turn it in, water, and let the bed sit untouched for about a week.

Next, hunt your frost blankets. I cannot say enough good things about the heaviest weight of Agribon agricultural fabric, the one called Agribon 70. I got mine from Johnny’s Selected Seeds.  After a couple of years of fooling around with lighter fabric or two layers of lighter fabric, I have concluded that nothing but the 70 is worth spending my money on. The others all tear in our desert windstorms allowing the plants I have tended so carefully to be dessicated and killed.  It comes in rolls of 12 foot wide fabric, and 100 feet of it is one of the best gardening investments I ever made.

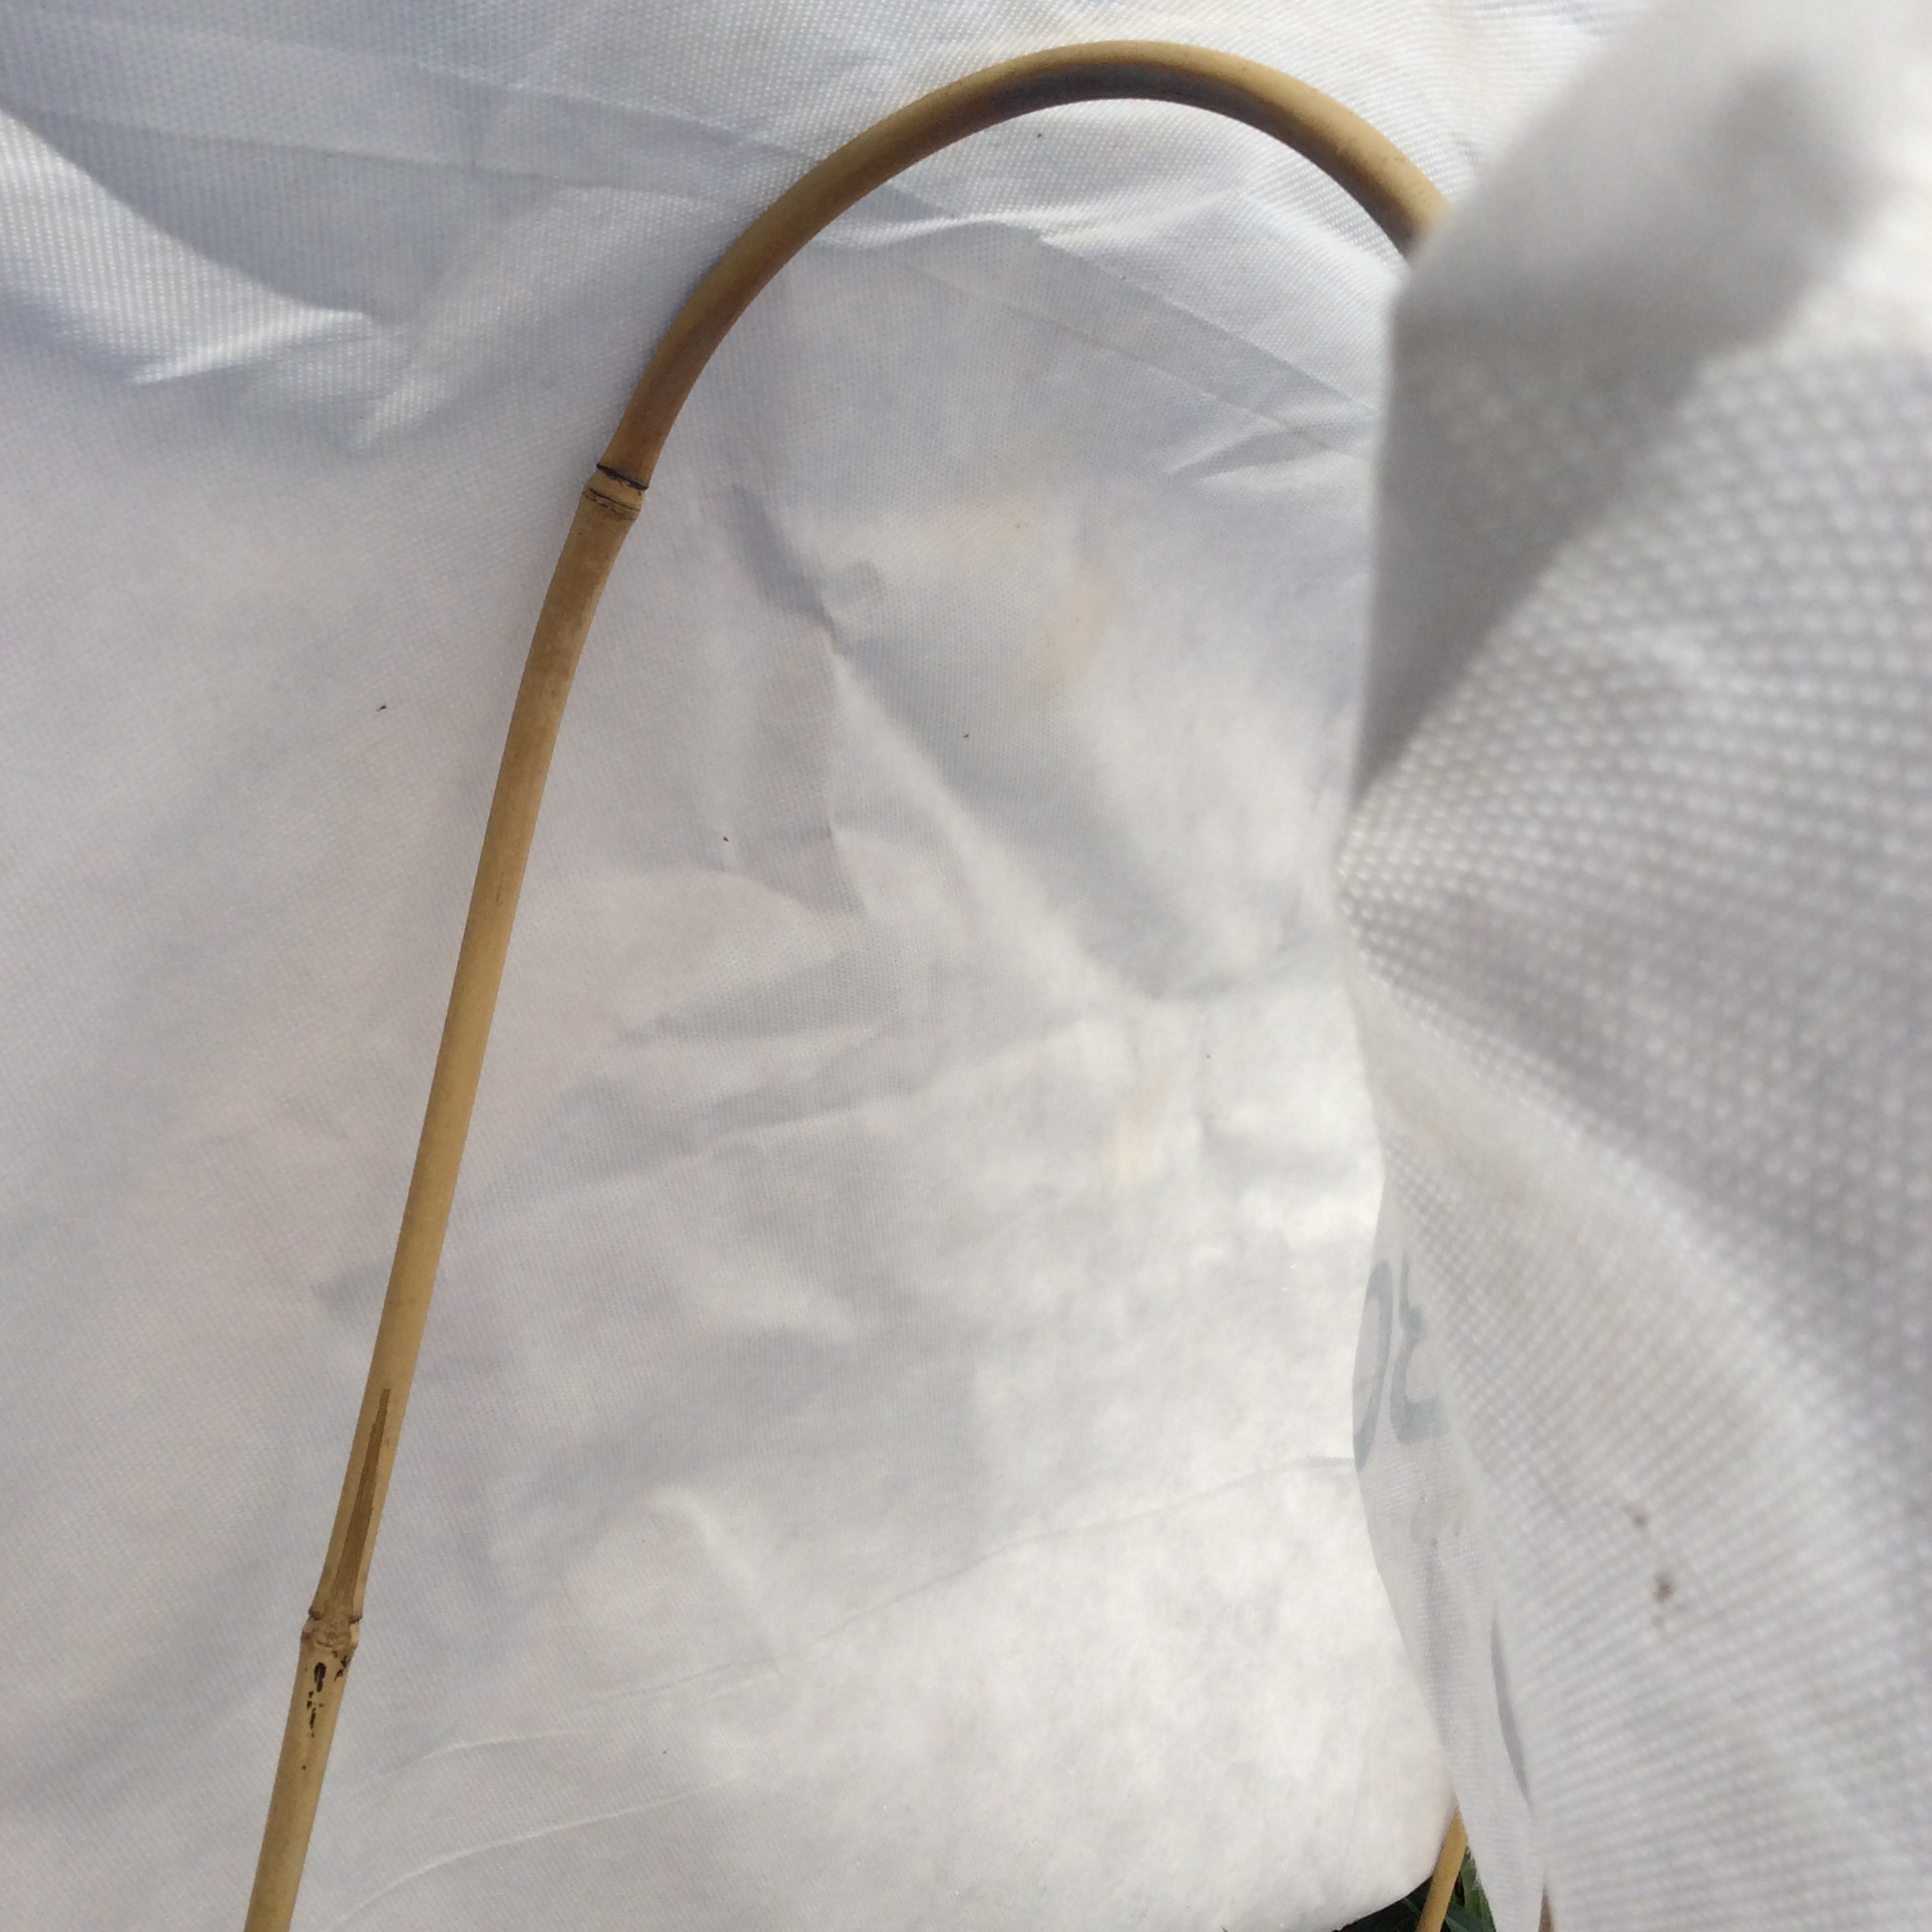
This is a heavy weight fabric and will actually smother the crops if it is allowed to just lay on top of them, so you need some kind of support.  If you are even slightly handy, no doubt you could rig something up with thin PVC pipe hoops, which I think would be the best possible solution.  I am not remotely handy, and so I bought a package of bamboo garden hoops.  These seem flimsy when you handle them but actually will do the trick.

Put the fabric over them and weight it down all around. Don’t use fabric staples, because you will need to move it a lot for watering and harvesting. I use a small load of bricks that I bought from a neighbor. They need to be placed at least one brick per foot, because otherwise you will lose it all in a real windstorm.

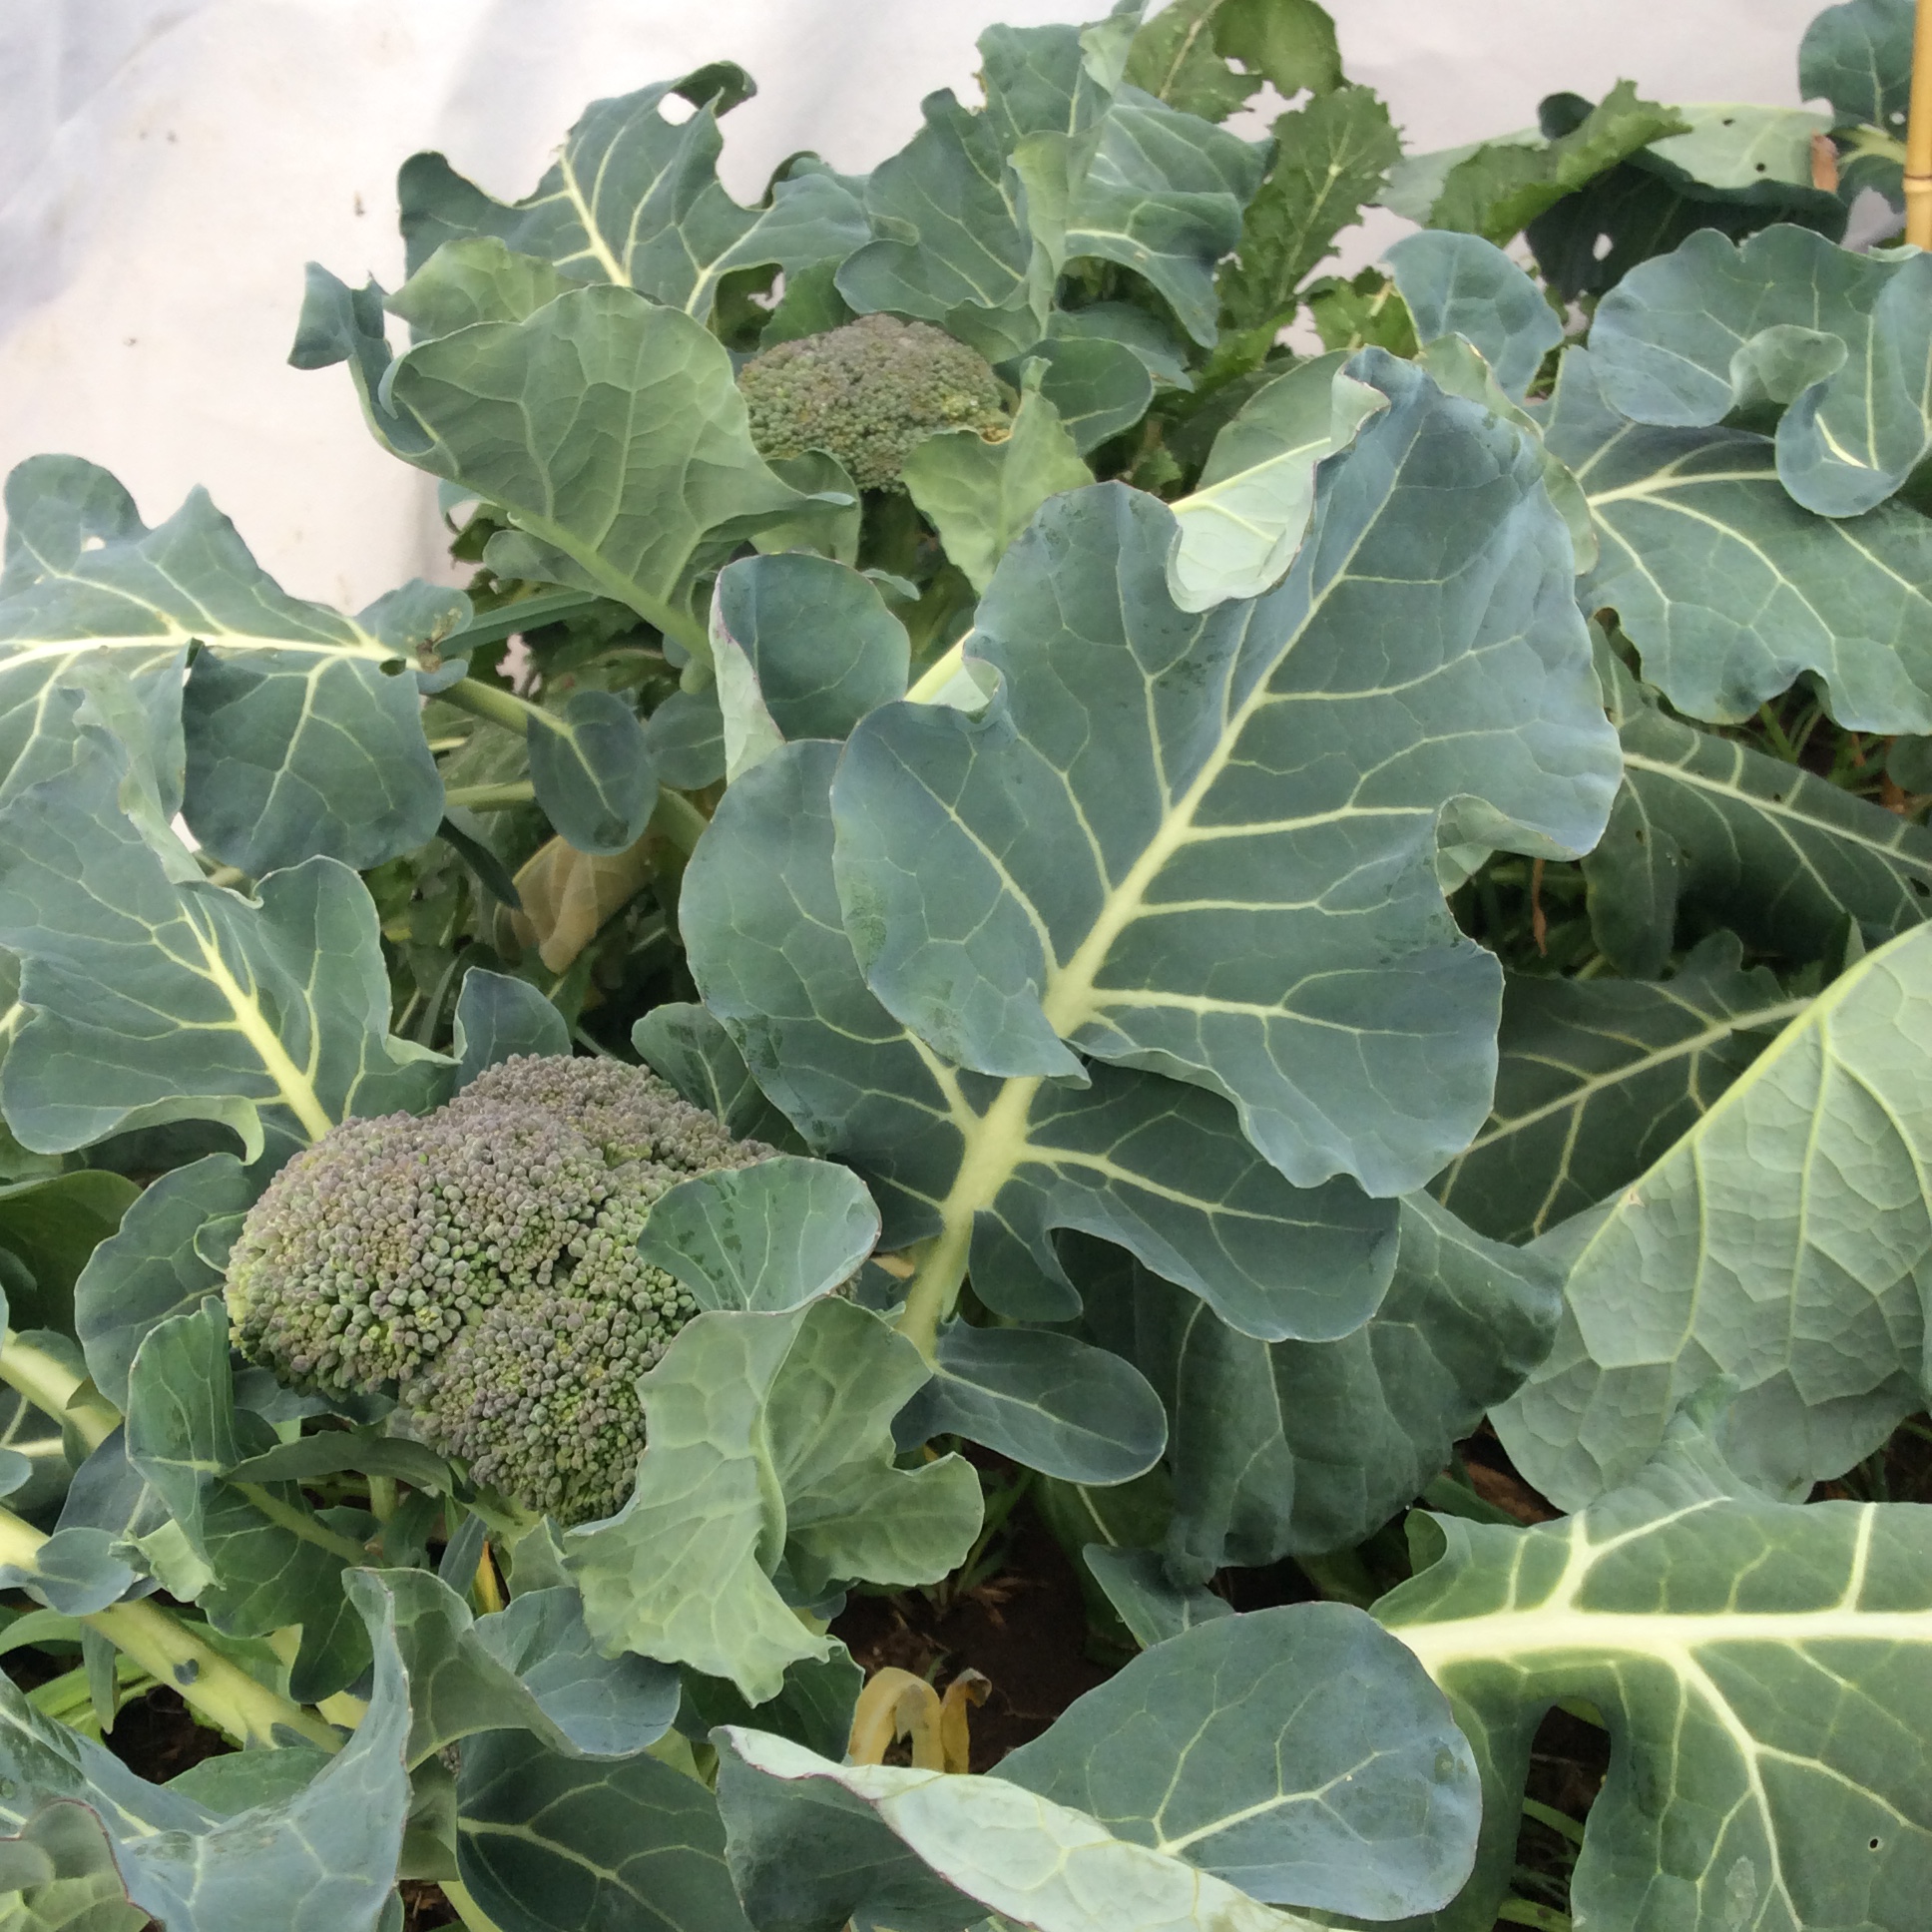
Next, decide what to plant.  Broccoli was an easy choice for me because I love it and also consider it one of the healthiest vegetables around, and the leaves and stalks are as edible as the buds.  I had planned to start my own from seed to get a known cold hardy variety, however in late October I saw some plants in my local garden center and decided to buy them because it would save time and trouble. Most of the broccoli sold in my area is chosen for heat tolerance, not cold tolerance, so no doubt I could have had heavier yields with a different variety, but this one is working out well enough.  I put the plants in 18 inches apart each way, which is pretty close, but they are not going to get quite as big as those growing in the open in other seasons.

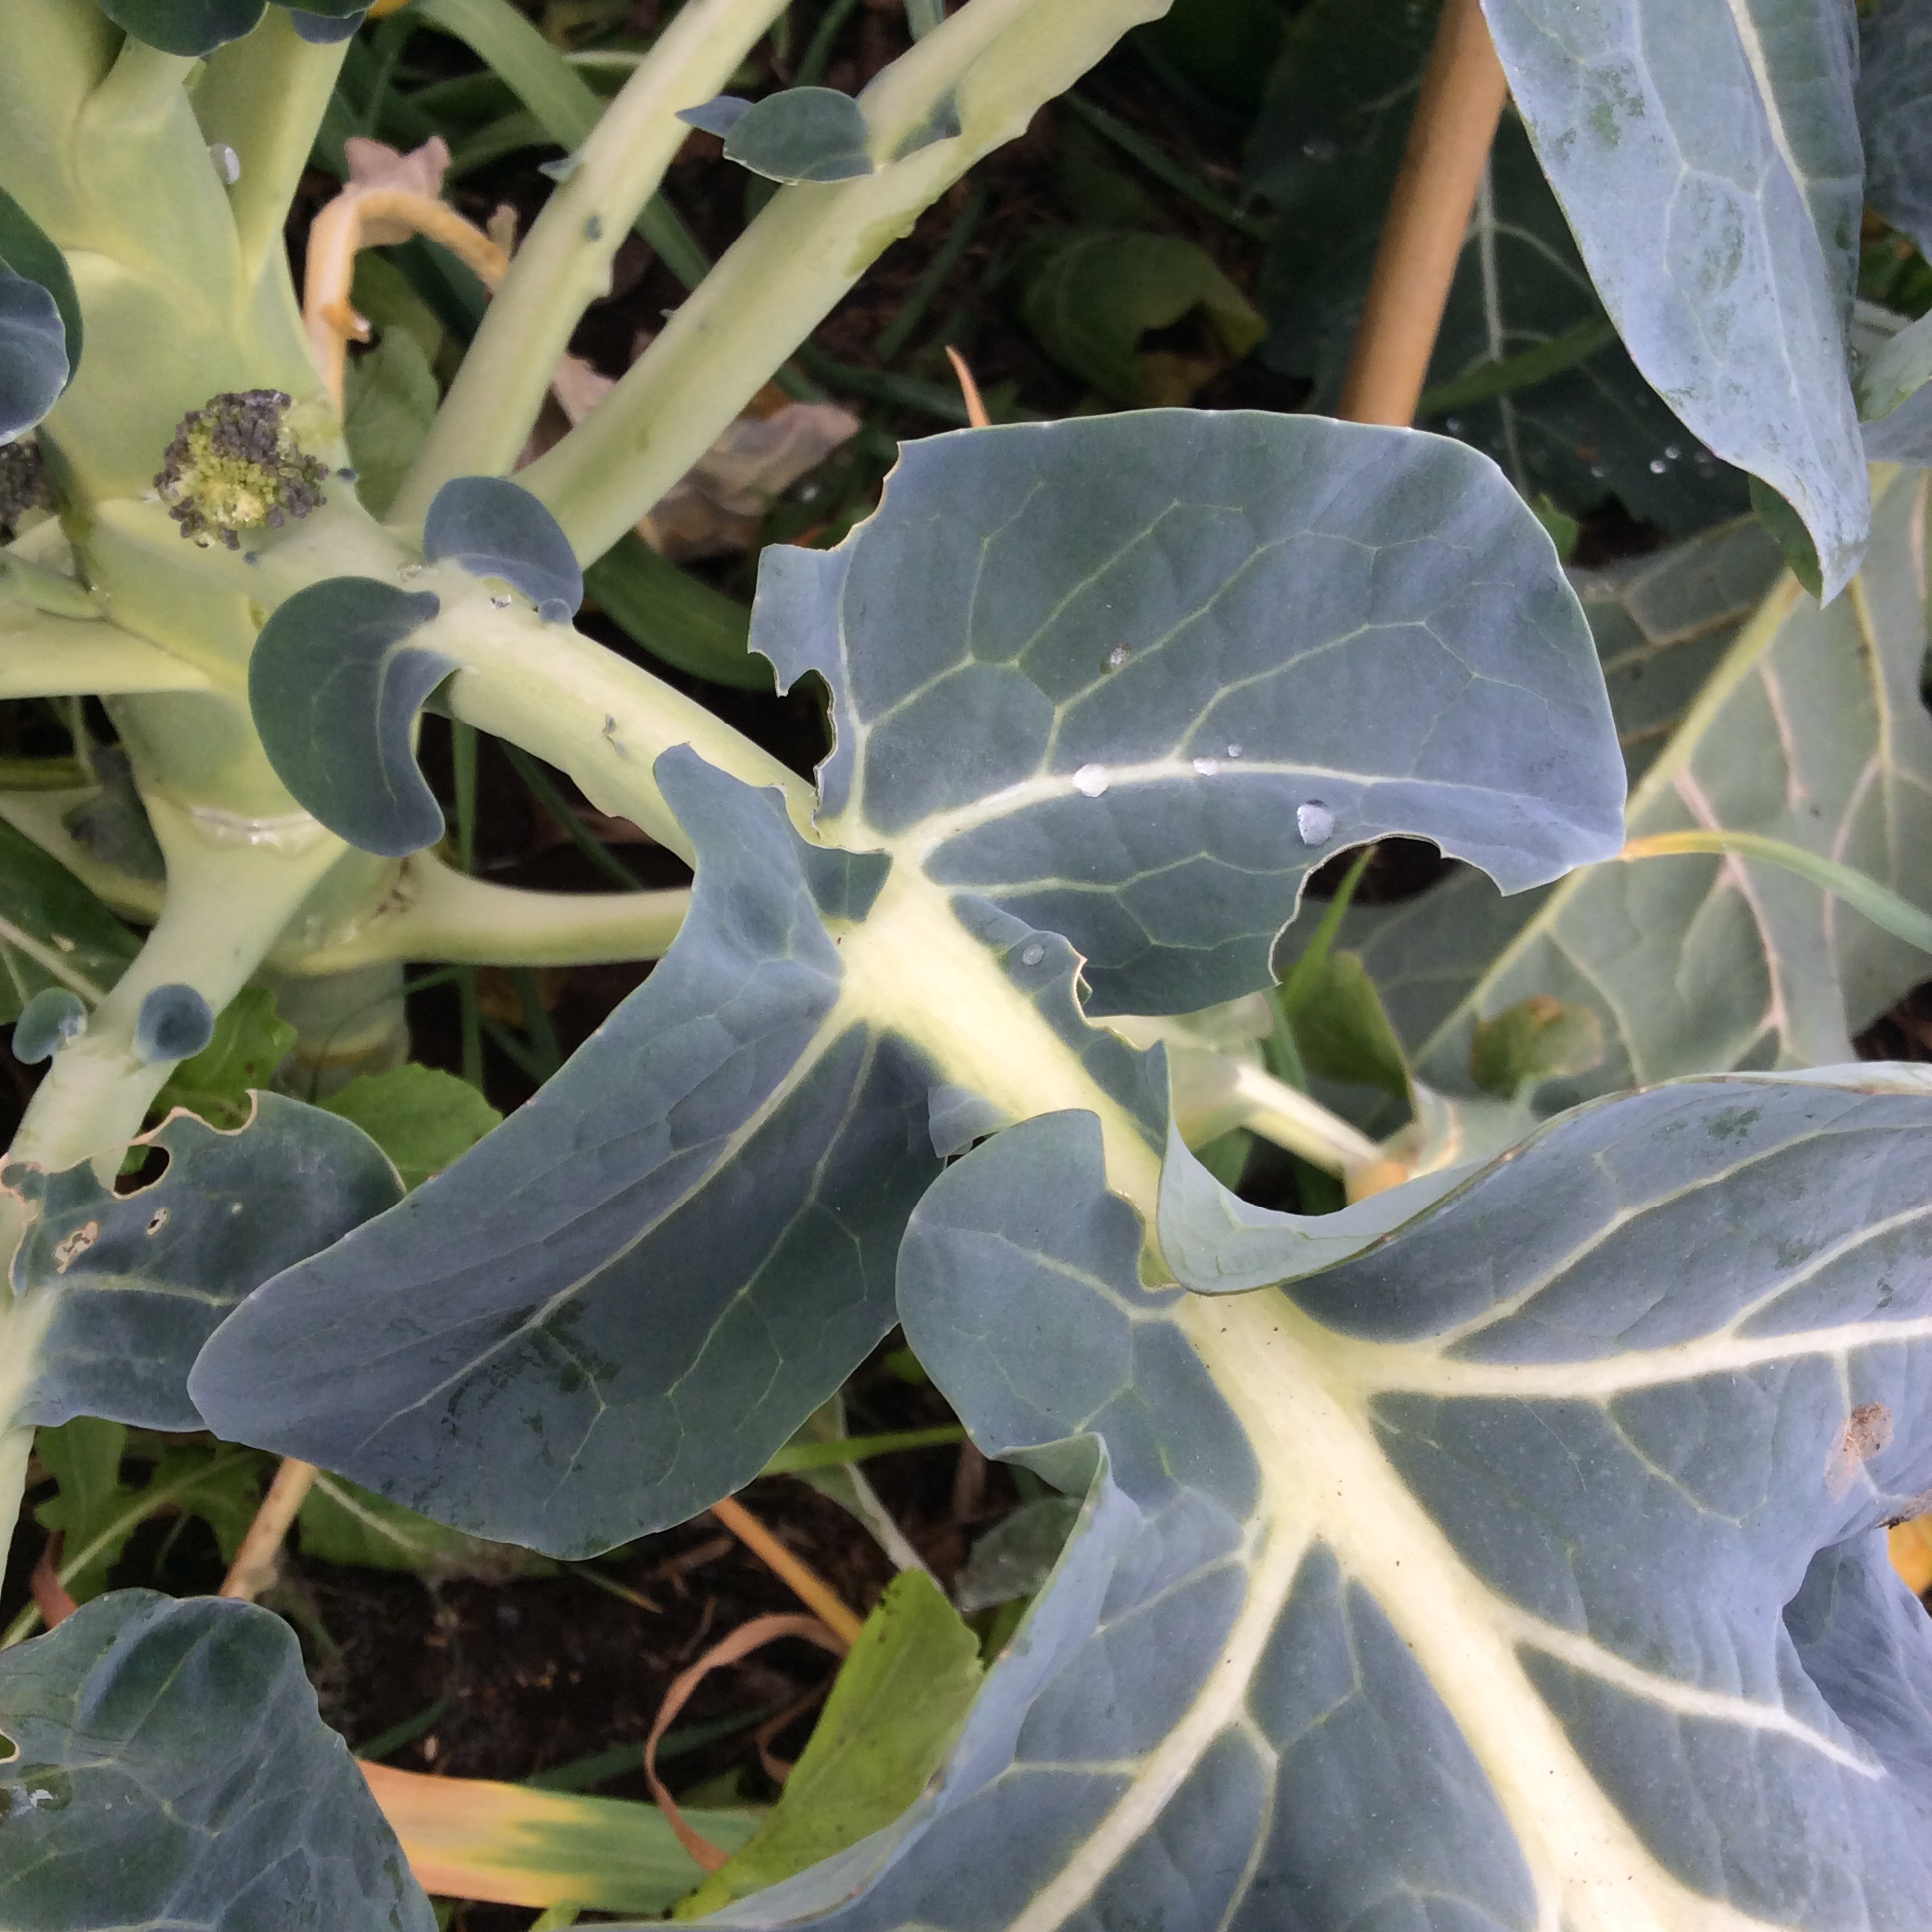
One of the joys of having a growing oasis in the winter is sticking your head under the frost blanket and just inhaling the scent of green growth. I also frequently break pieces off the broccoli leaves to eat while I’m watering. I try to restrict myself to the lobes at the base of each leaf, so that the overall appearance is a little less ratty, but as I see it nobody but me is really looking under there anyway.  Here, at the base of the leaf, you see the tiny little bud cluster that is going to become a side head after I cut the main head of broccoli.

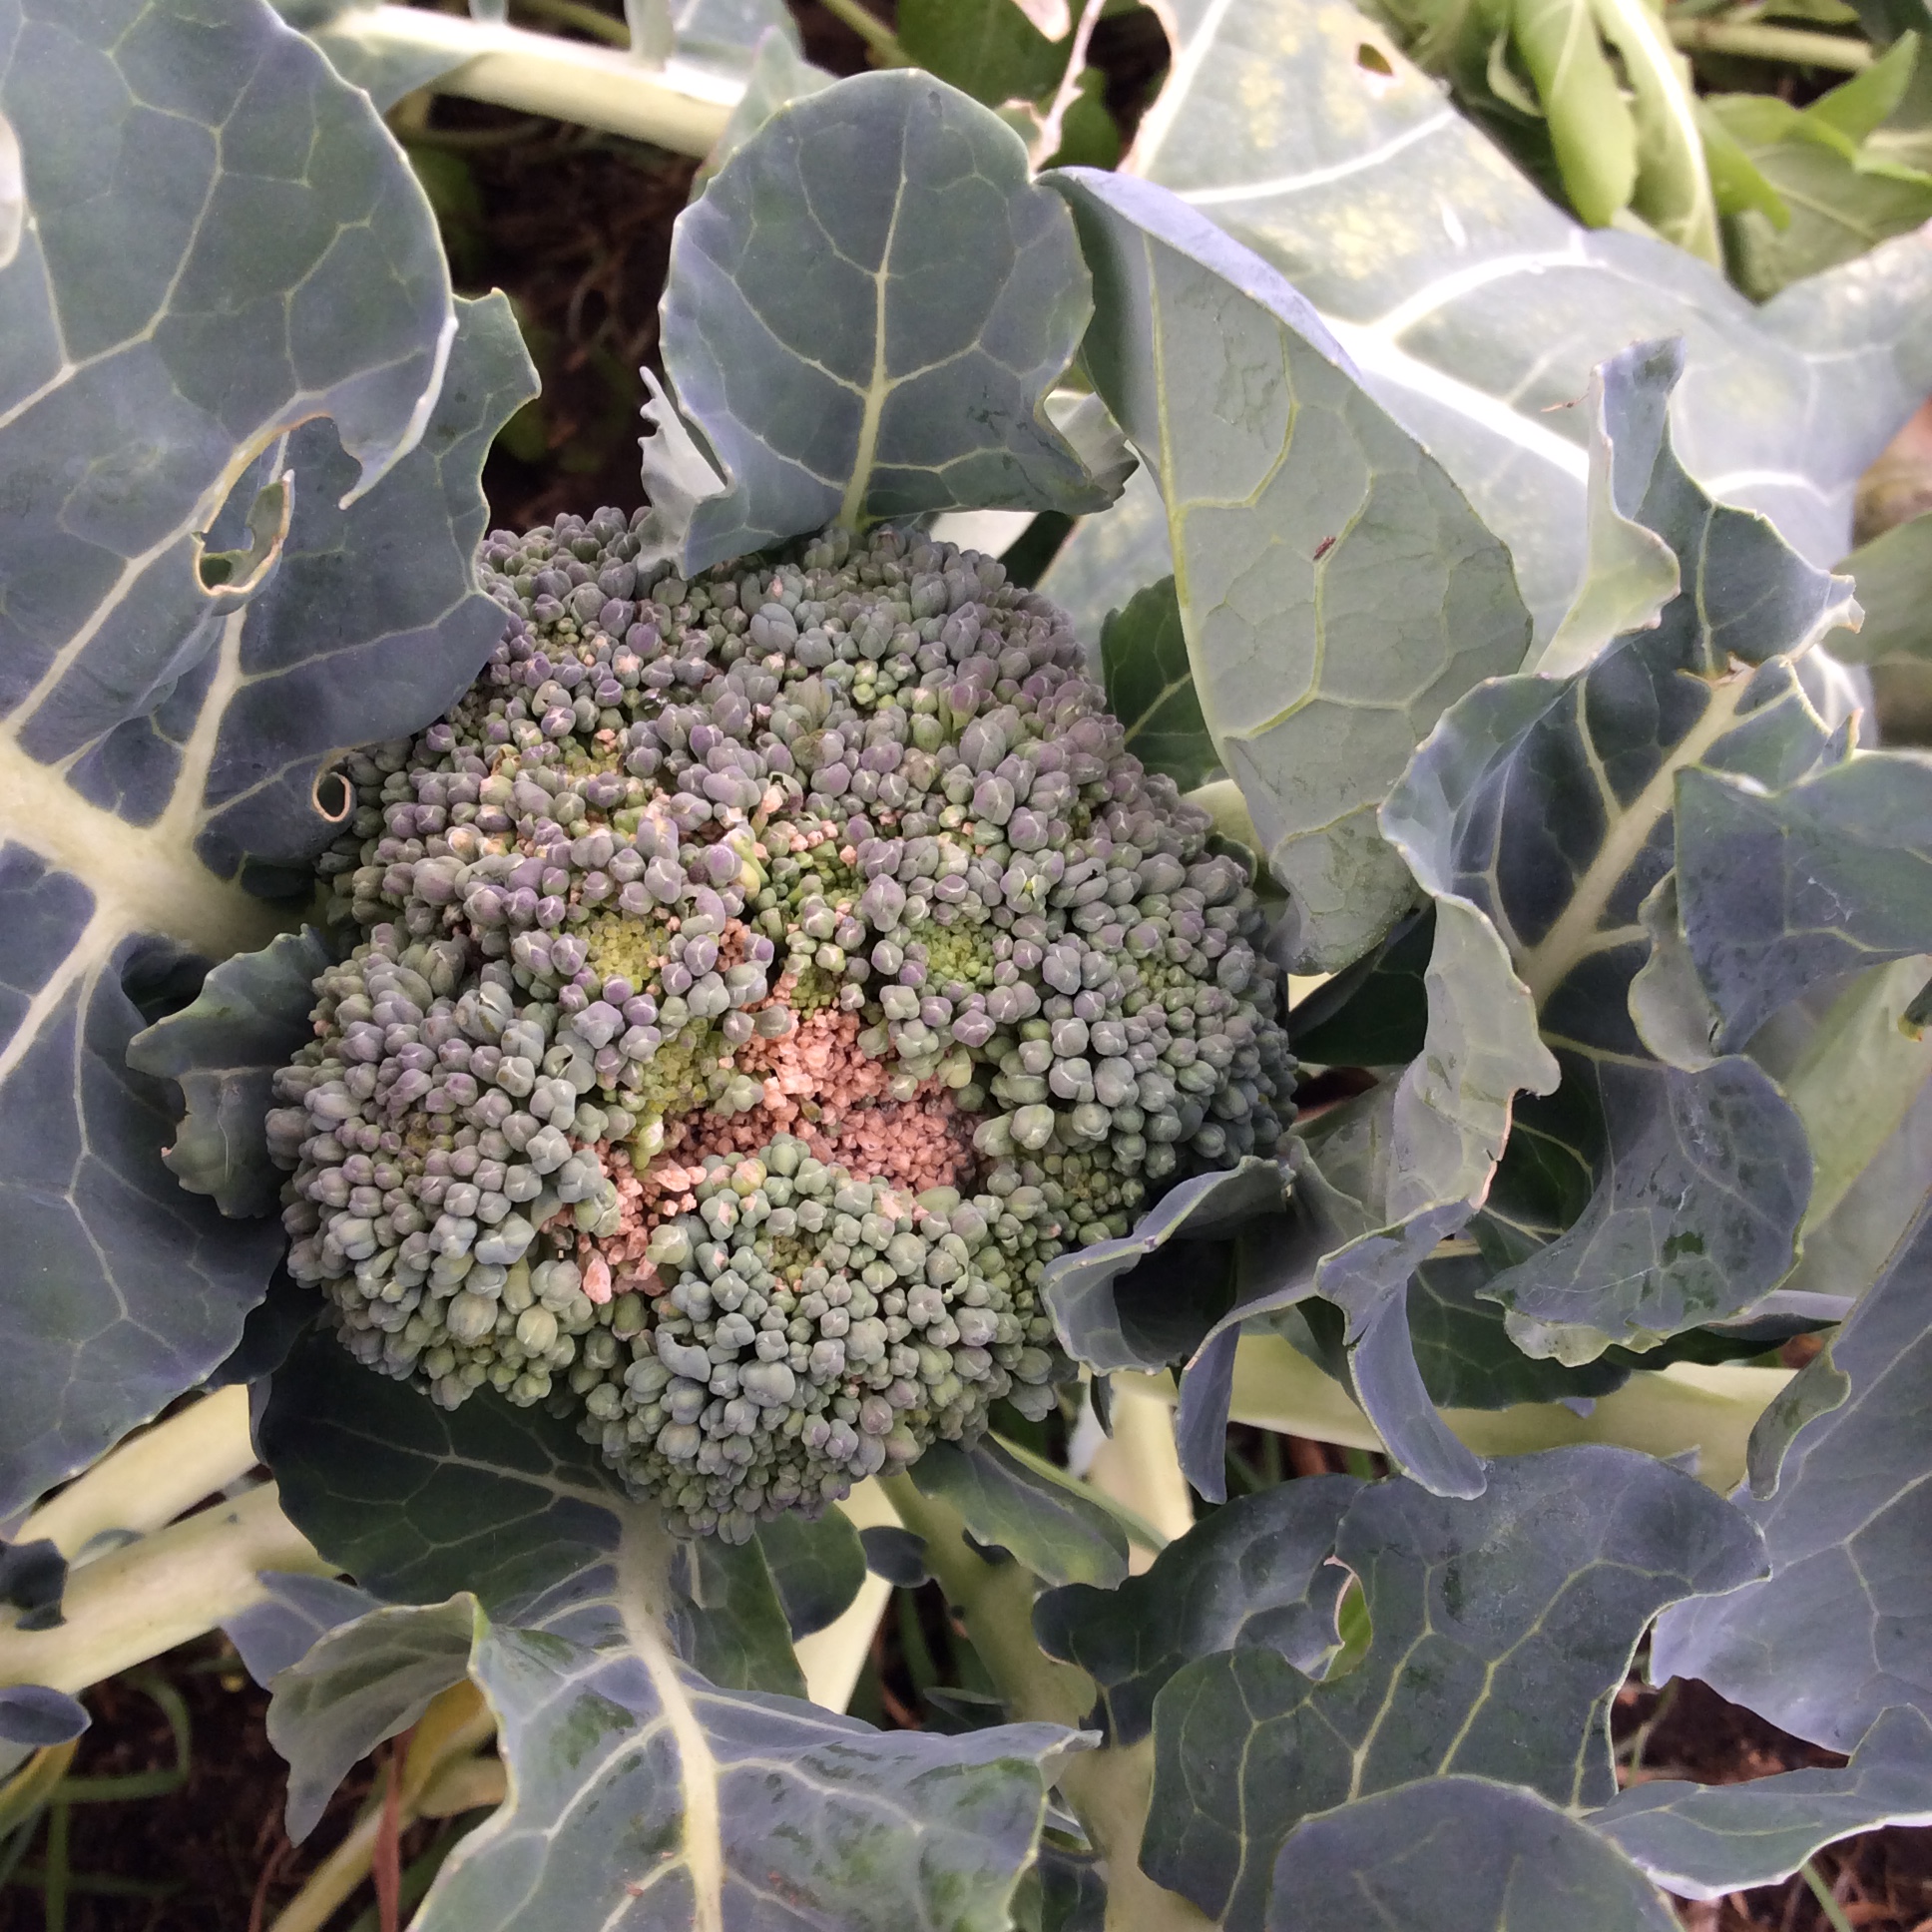
A few of my heads got brown bud, as you see above. There seems to be no real consensus about what this is, except that it probably is not a disease caused by a pathogen but related to growing conditions. I did notice that the plants that got the least water developed this condition. It also happens sometimes with my outdoor broccoli in very dry conditions. When I see this, I cut that head off and I am sure to keep that plant watered, so that it can concentrate on growing large side heads.  Overall, I still get a fairly good yield out of those plants.

A delightful part of having a winter garden is that some of the things you let go to seed in the past come back around. Here you see a particularly healthy arugula plant that will go into a salad in the next day or two.  One of the reasons that I was careful to enrich the soil thoroughly is so that a lot of things could grow without hampering the broccoli very much

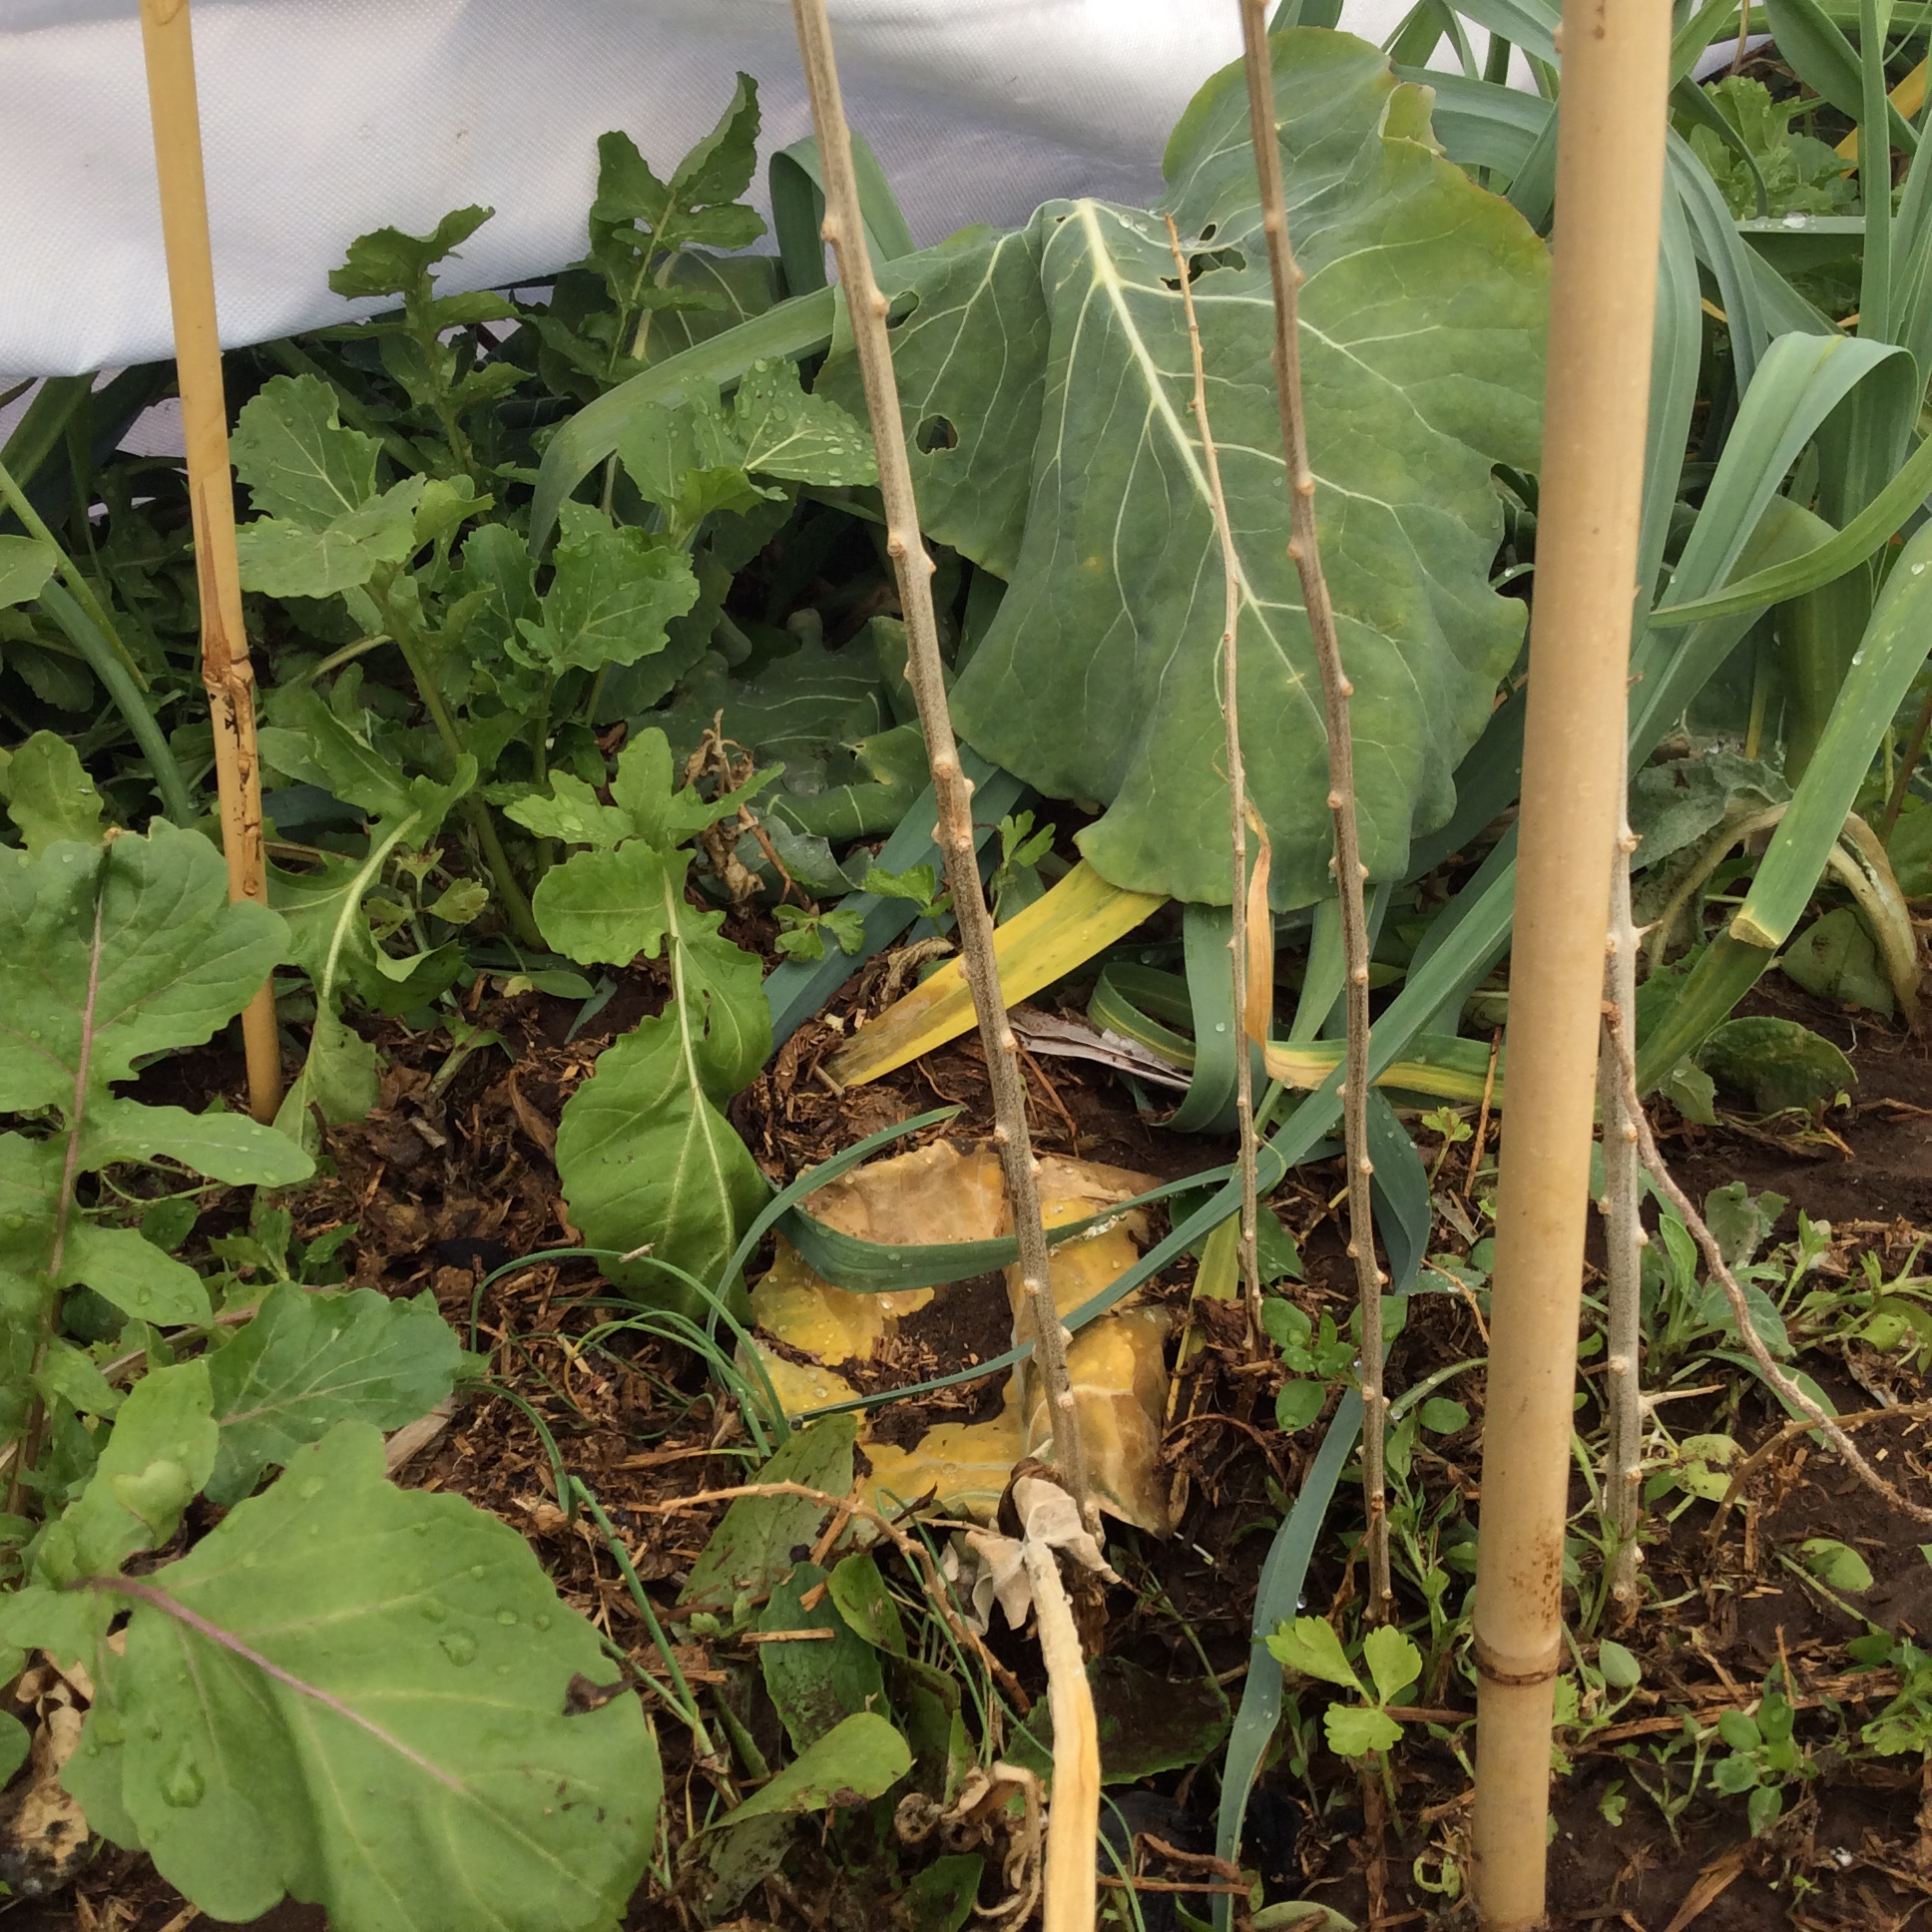
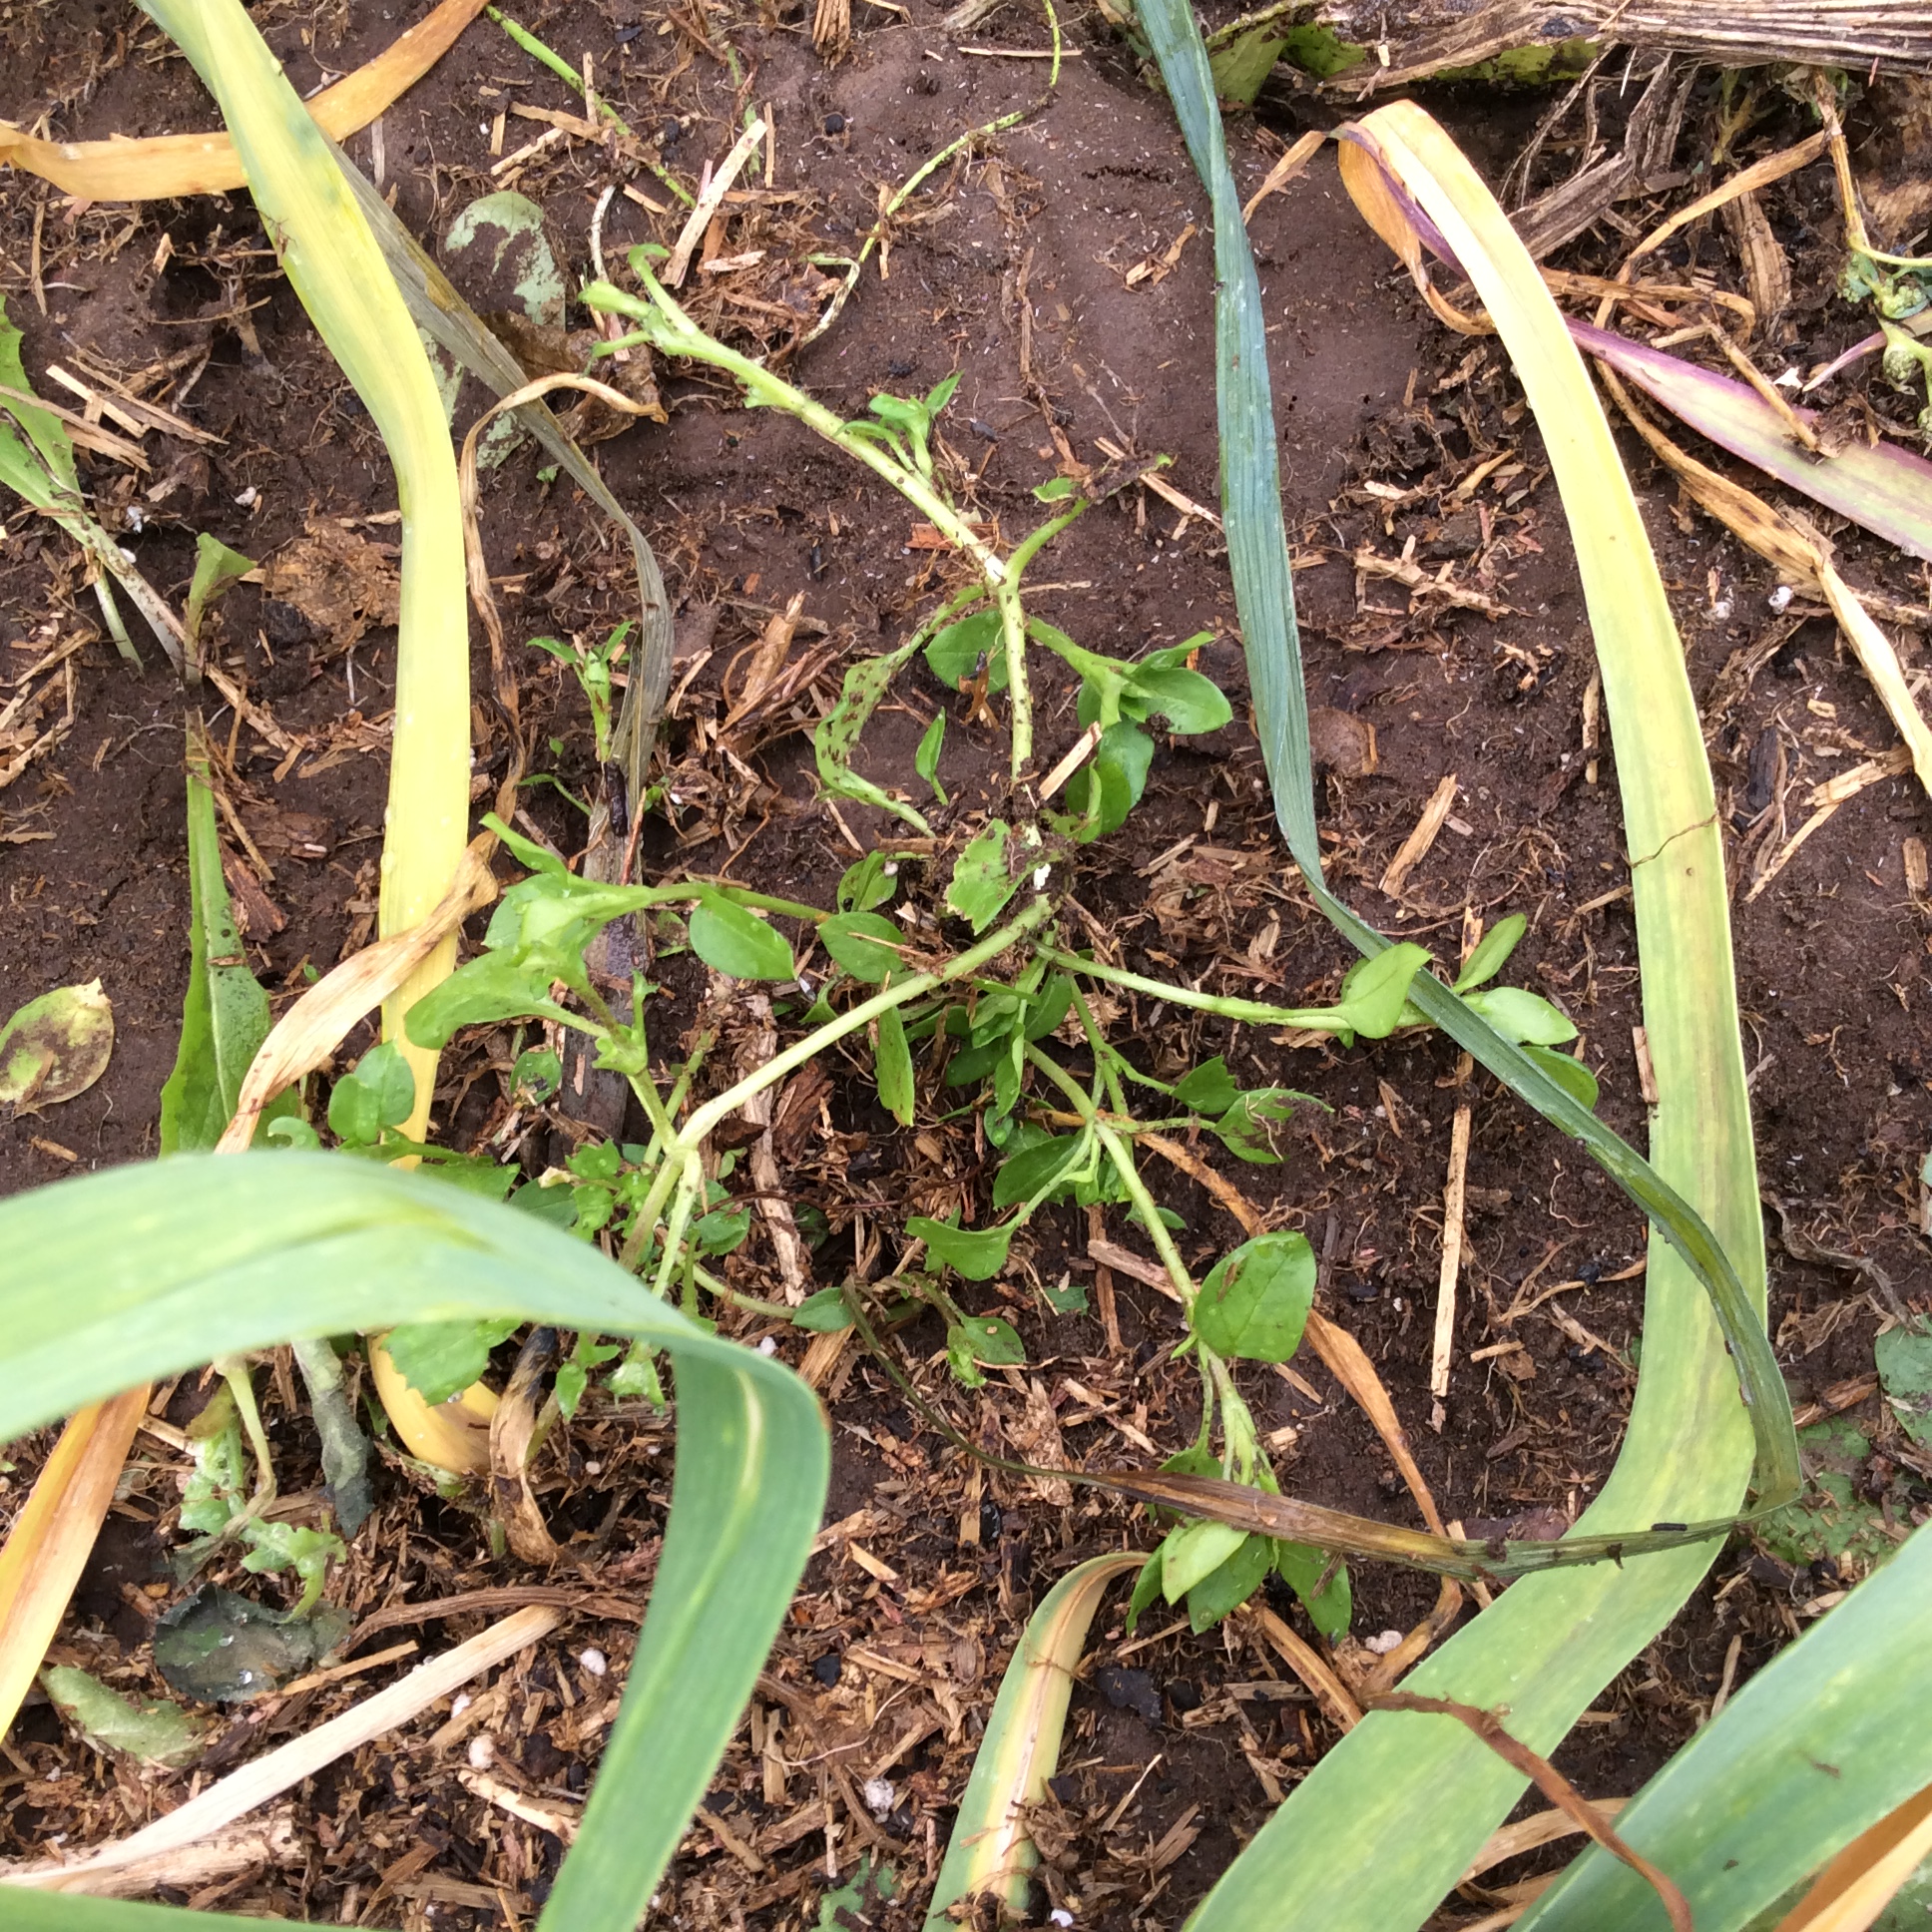
Here are a few interesting things going on. This is an area where a goji berry came up in the middle of the bed last year, and I cut it back hard before I covered the bed and I’m hoping to get some edible shoots out of it. You cannot get rid of gojis once you have them, so whack and eat them enough to keep them within limits.  This is a section of a few feet in the middle of the bed, where I planted Snow Crown cauliflower, and those plants died by November. I have done very well with the same variety in the open, so I don’t know what happened, but I do know that they did not like the conditions under the blanket. No problem. In the open space that they created by dying, you see leeks, garlic, arugula, chickweed, and celery coming up.  You might be able to spot tiny little leaks in the foreground from one that I let go to seed last summer, and then you can see larger leeks growing where I harvested last year‘s leeks  by cutting them off a few inches below the surface and leaving the base and the roots in the soil.  In each place that I did that, there are are two or three healthy leeks coming up from those roots. I am very pleased with this way of growing them, and I plan to keep experimenting with it.  The garlic is there because, after I planted my regular garlic beds, I had a lot of seed garlic left over and just stuck it in all over this bed before I covered it. My hope was to have green garlic earlier than usual, and it seems to be working out well.

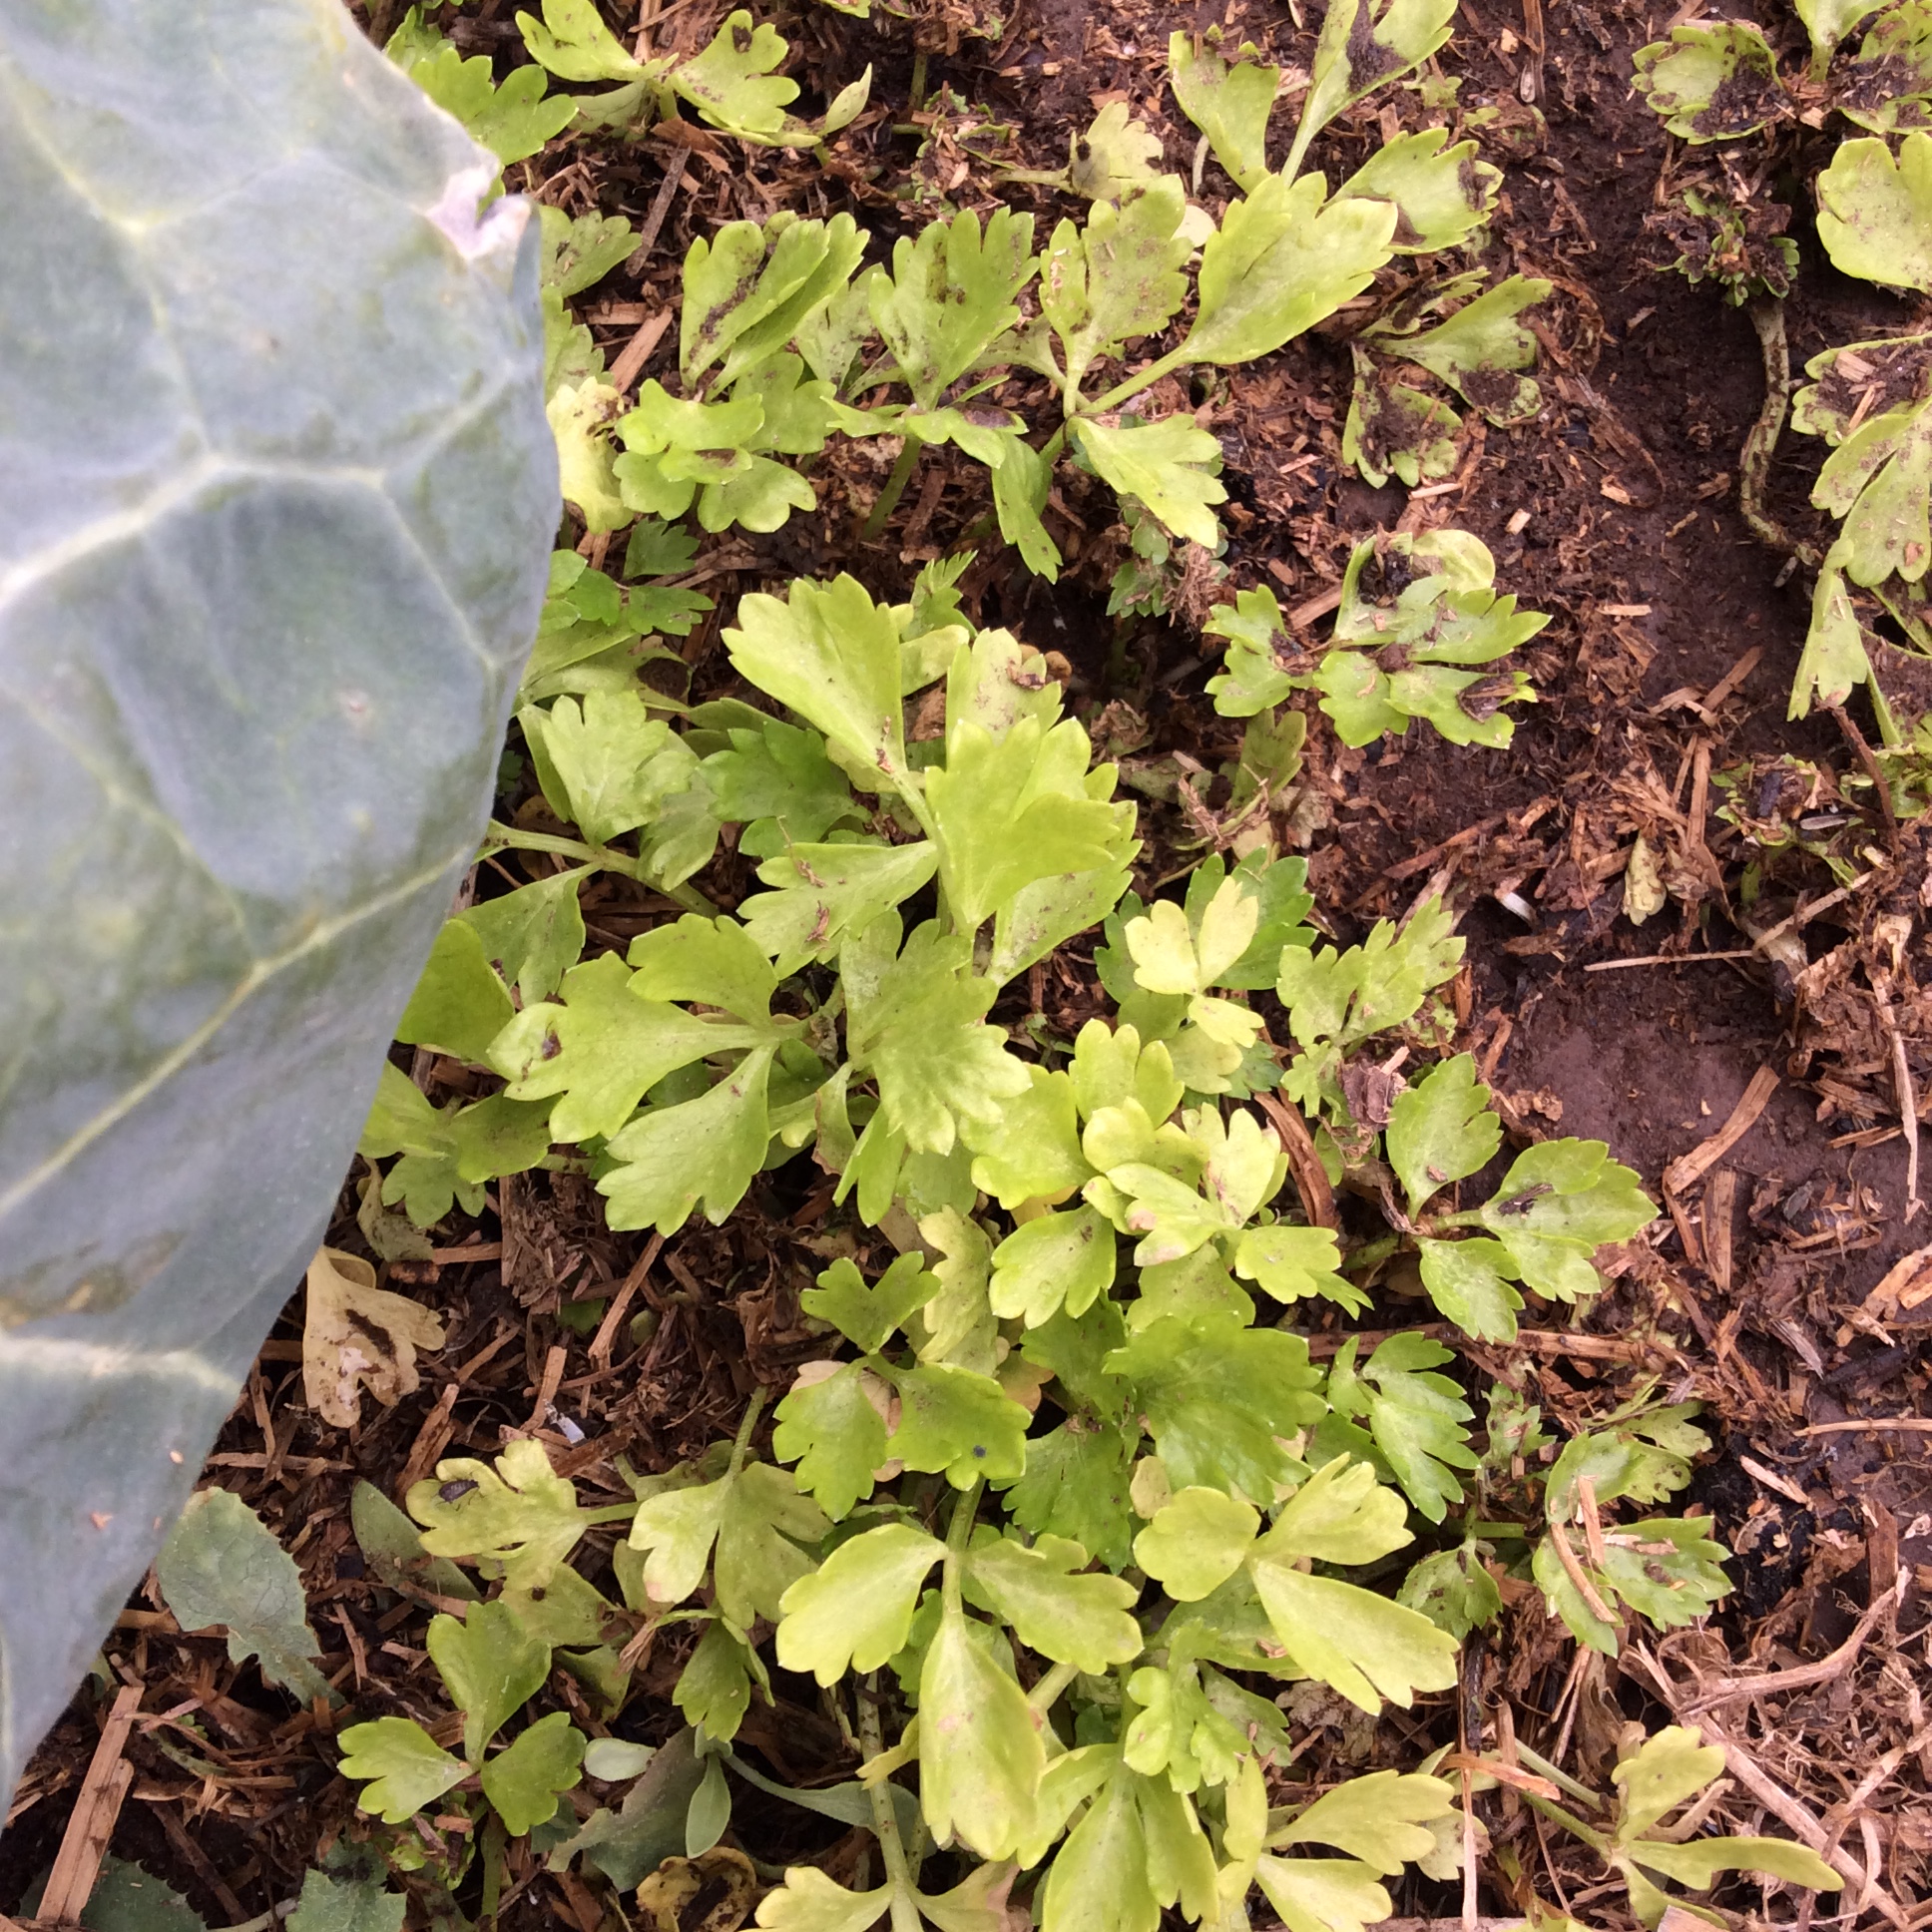
A closer look at the celery seedlings. These are the offspring of a hybrid celery called Tango, and the offspring of a hybrid are not necessarily true to the parent. However, it is likely that some will be close enough, and I’ll weed out the rest.

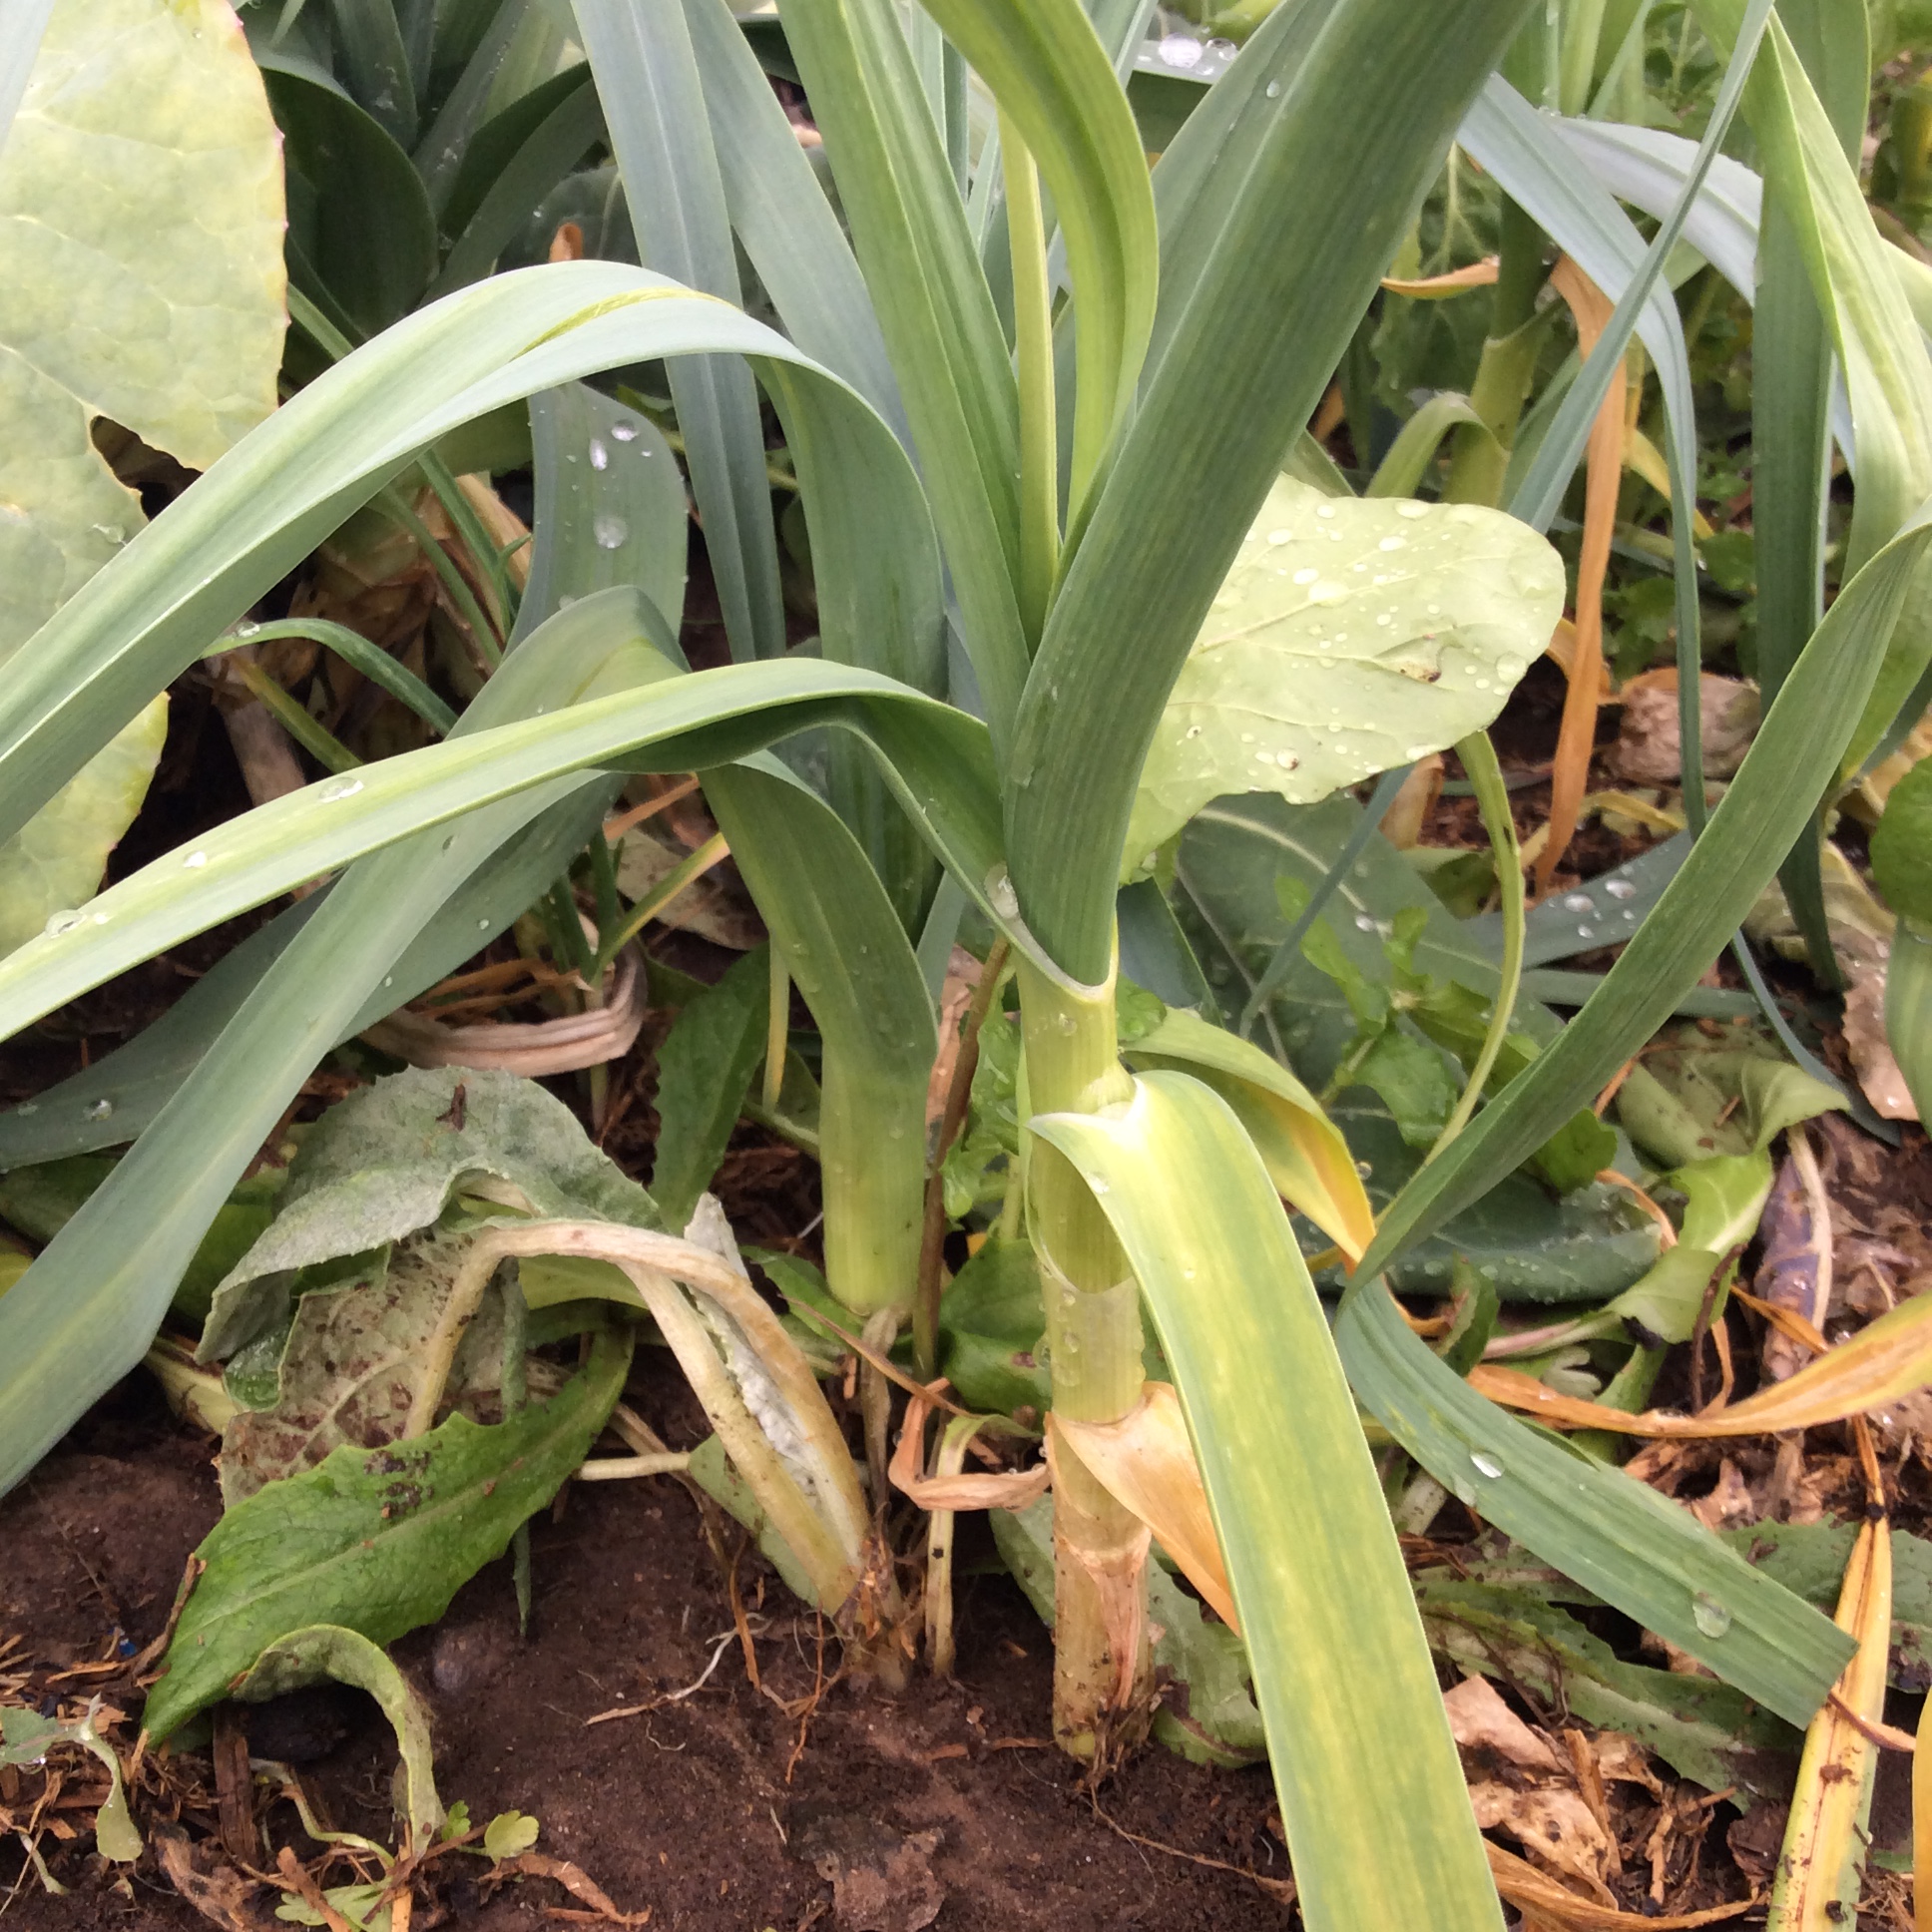
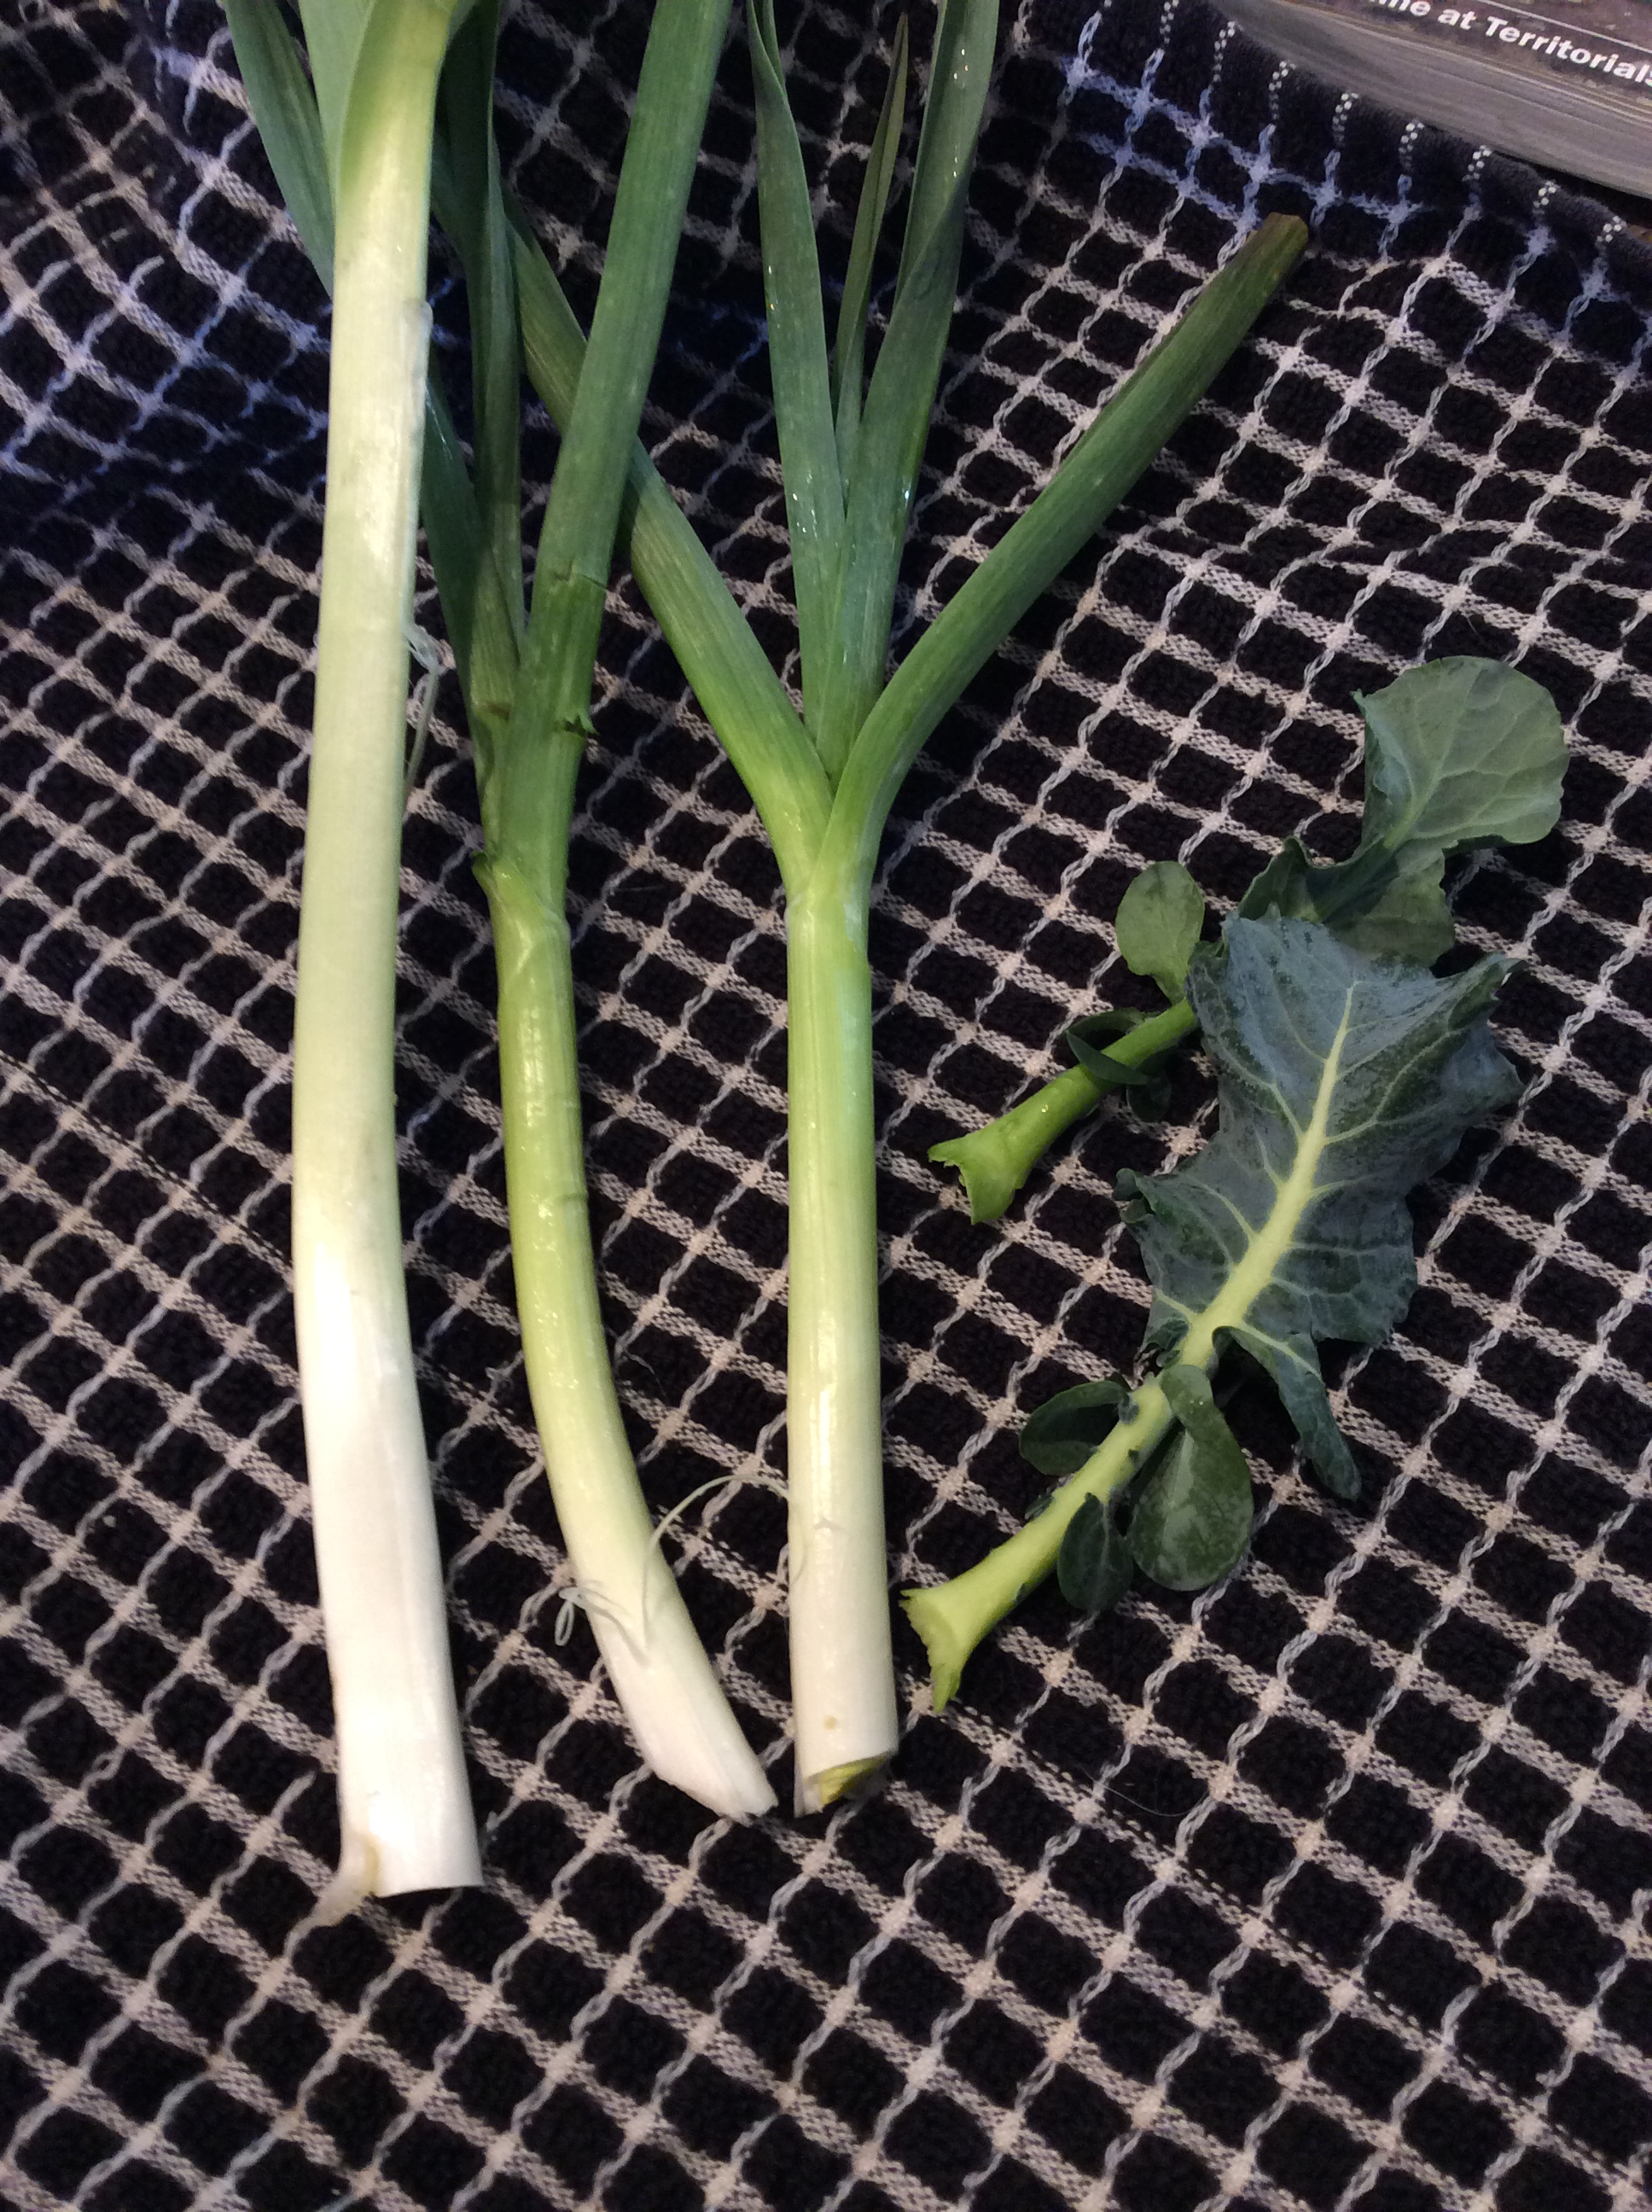
A closer look of the green garlic, growing lustily. These are the same shoots that you will see in the picture below, prepared for cooking.

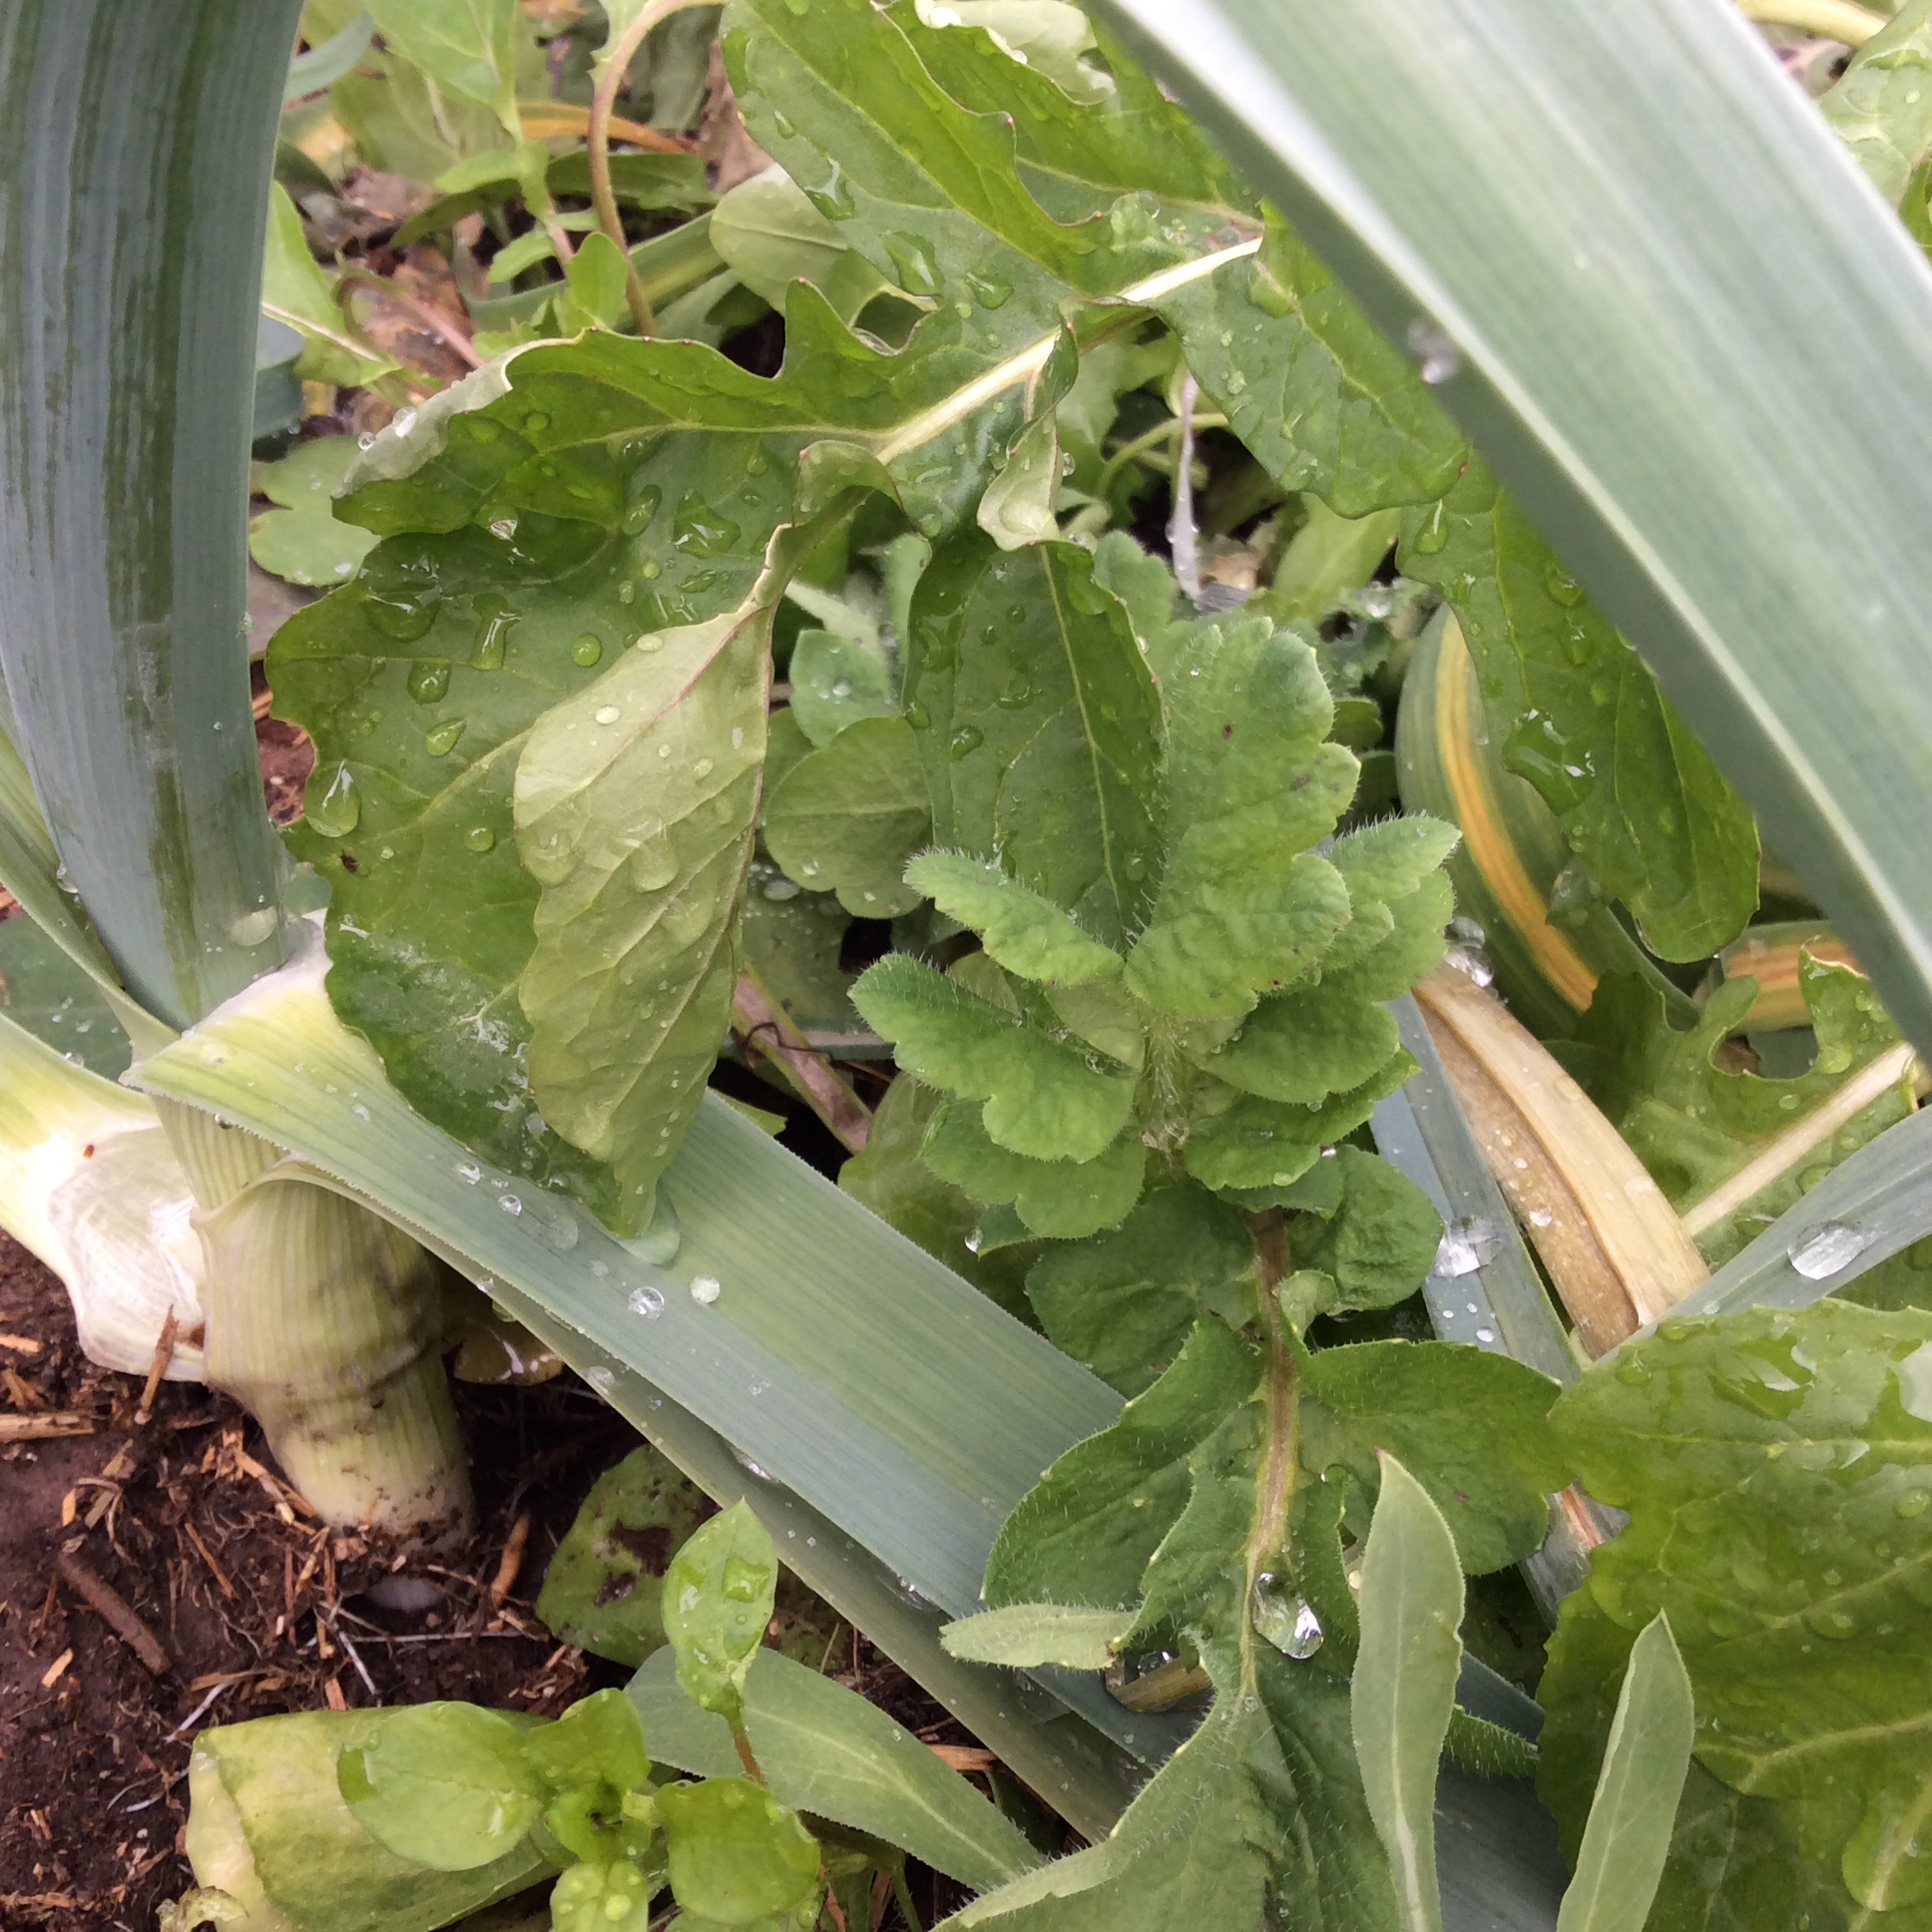
Above you see Shirley poppy, bladder campion, and chickweed joining the party wherever they can find room, next to a sturdy leek.

People who live in other parts of the country might be appalled to know that I planted chickweed on purpose, but it’s a tasty nutritious salad green and good edible ground cover that doesn’t grow here naturally. So whenever I see it seeding itself around a bit, I am quite pleased.

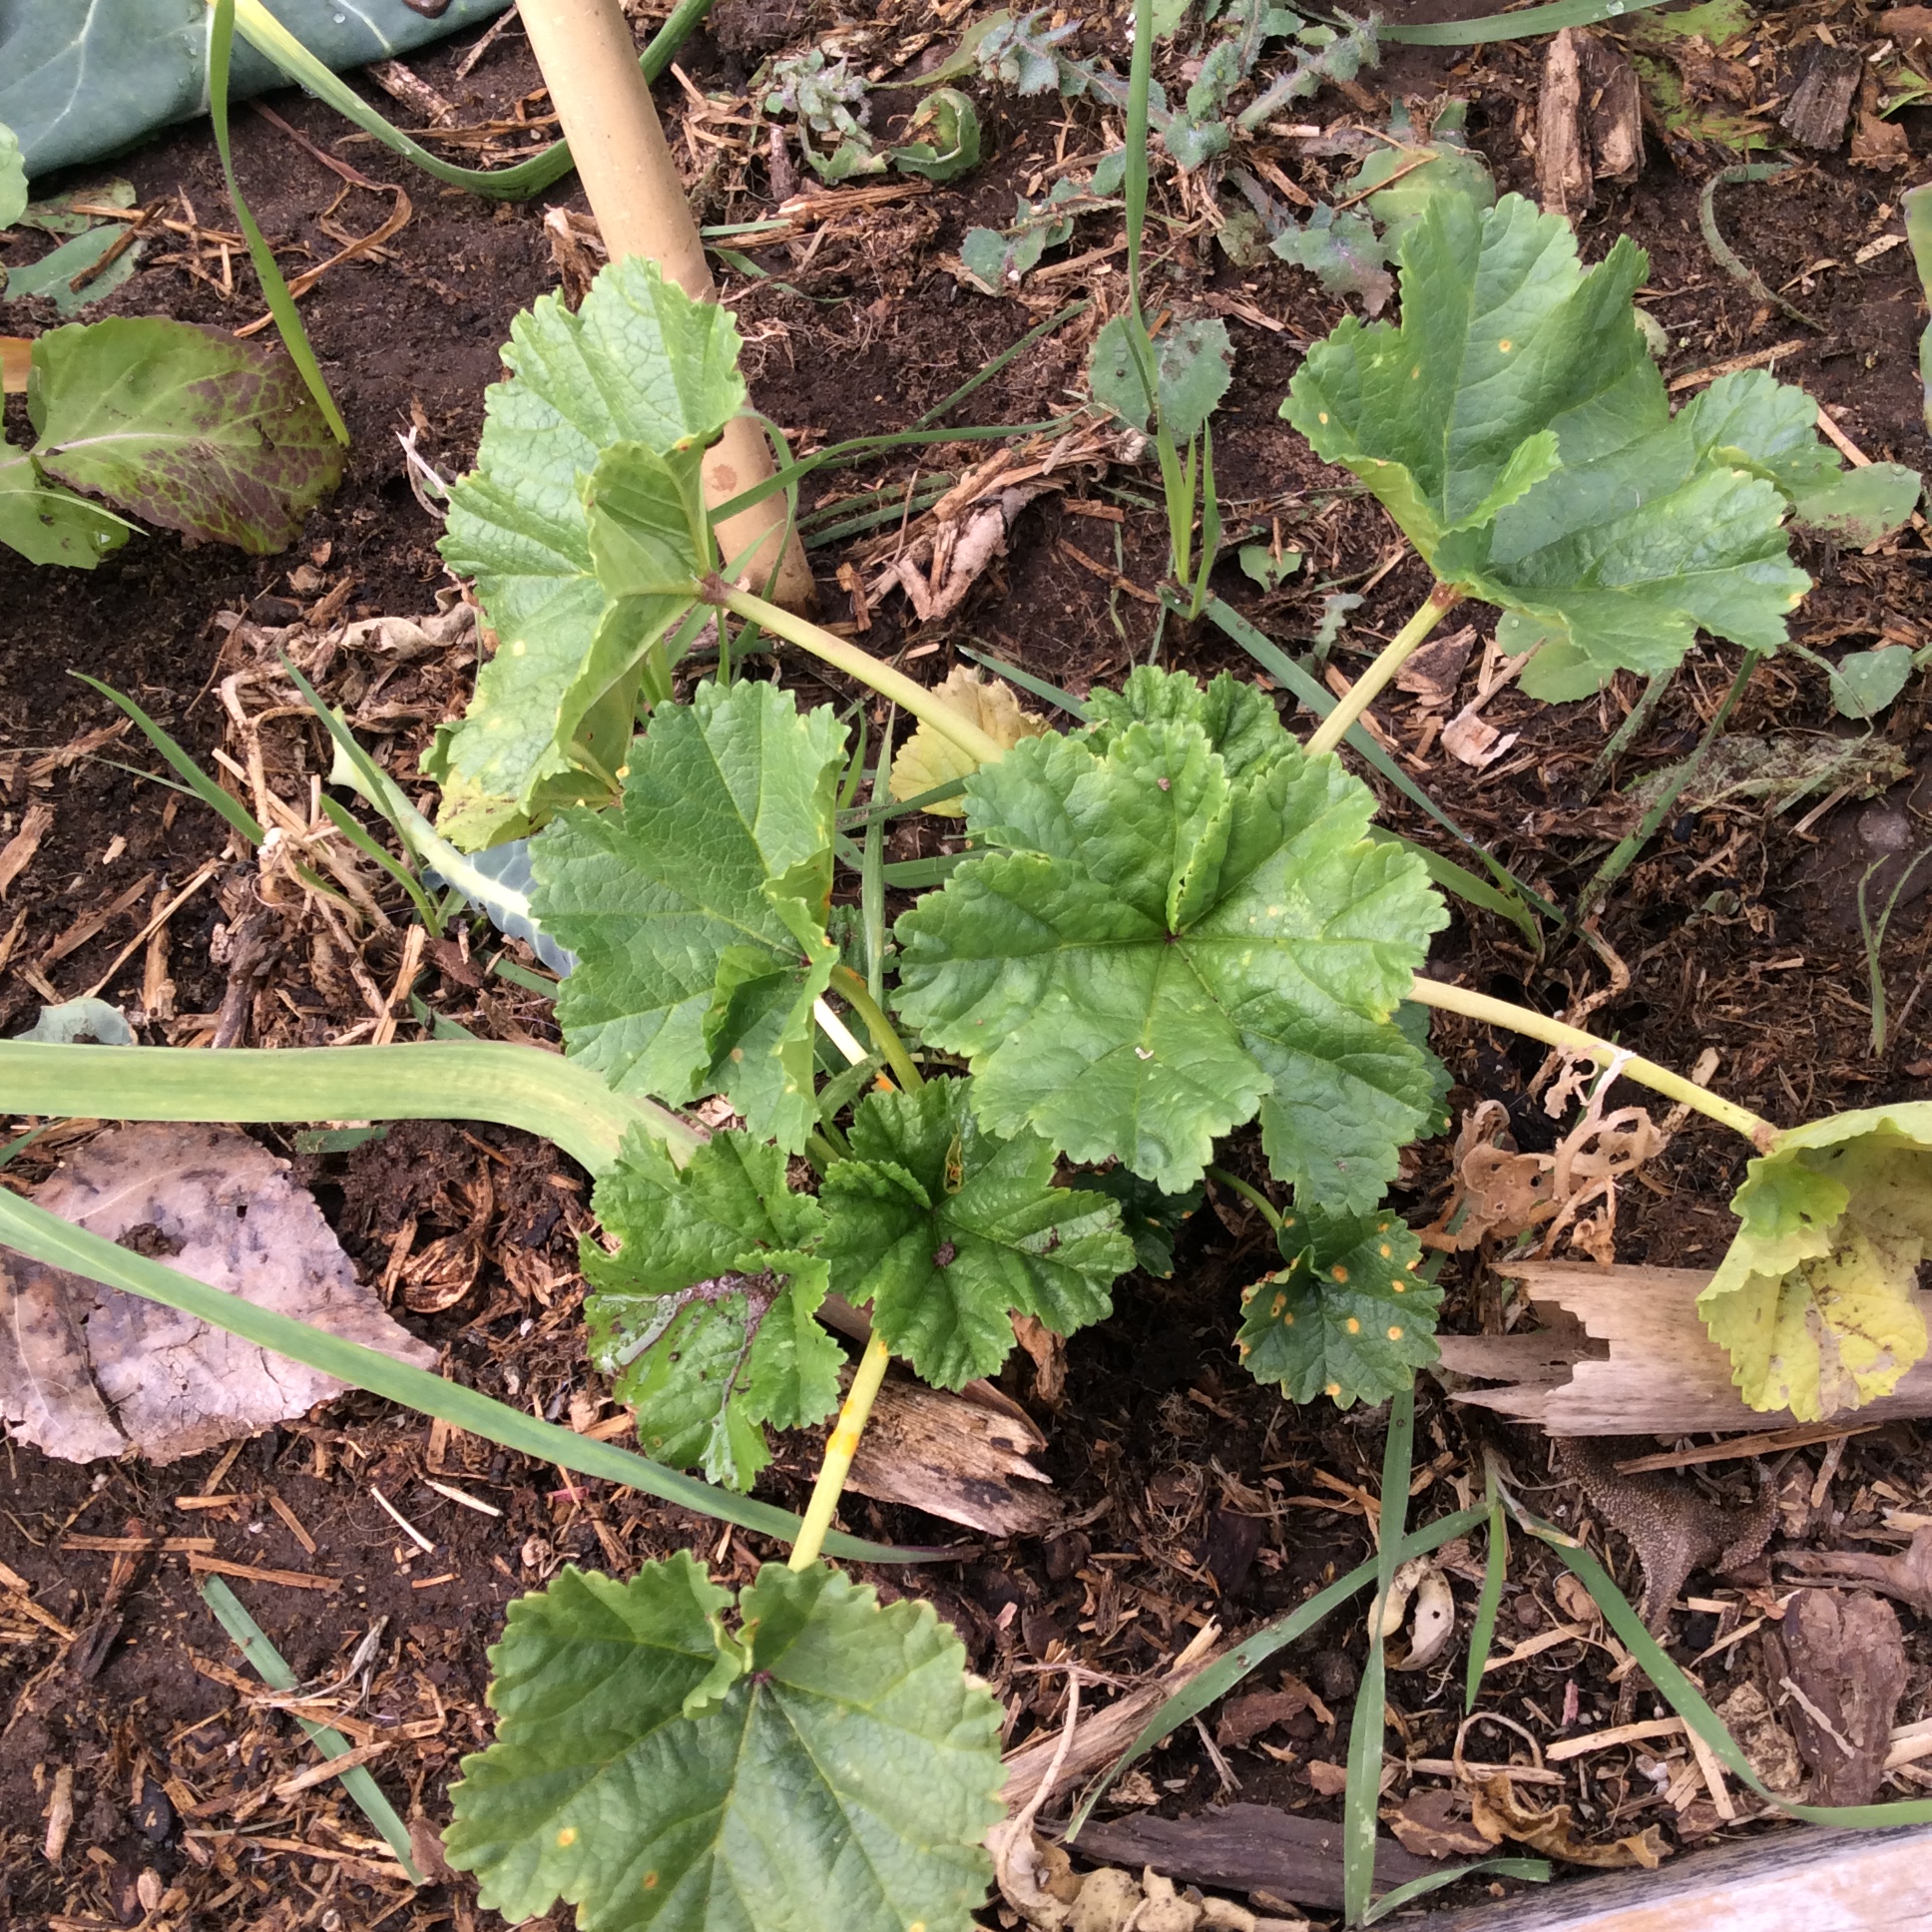
Mallow seeds itself around my garden, and I let some of it grow for greens and because the bees like the blossoms.  It will never be a favorite for greens, because it is just a touch on the slimy side, but as long as it makes up a quarter or less of a greens mixture you won’t notice that.  Behind the mallow you can see a small sow thistle, and I was hoping that these would get larger and more tender under the frost blanket than they do in the open ground, but so far this is not the case and I am not very impressed with them. Oh well.  The whole idea is to try things and see what works.

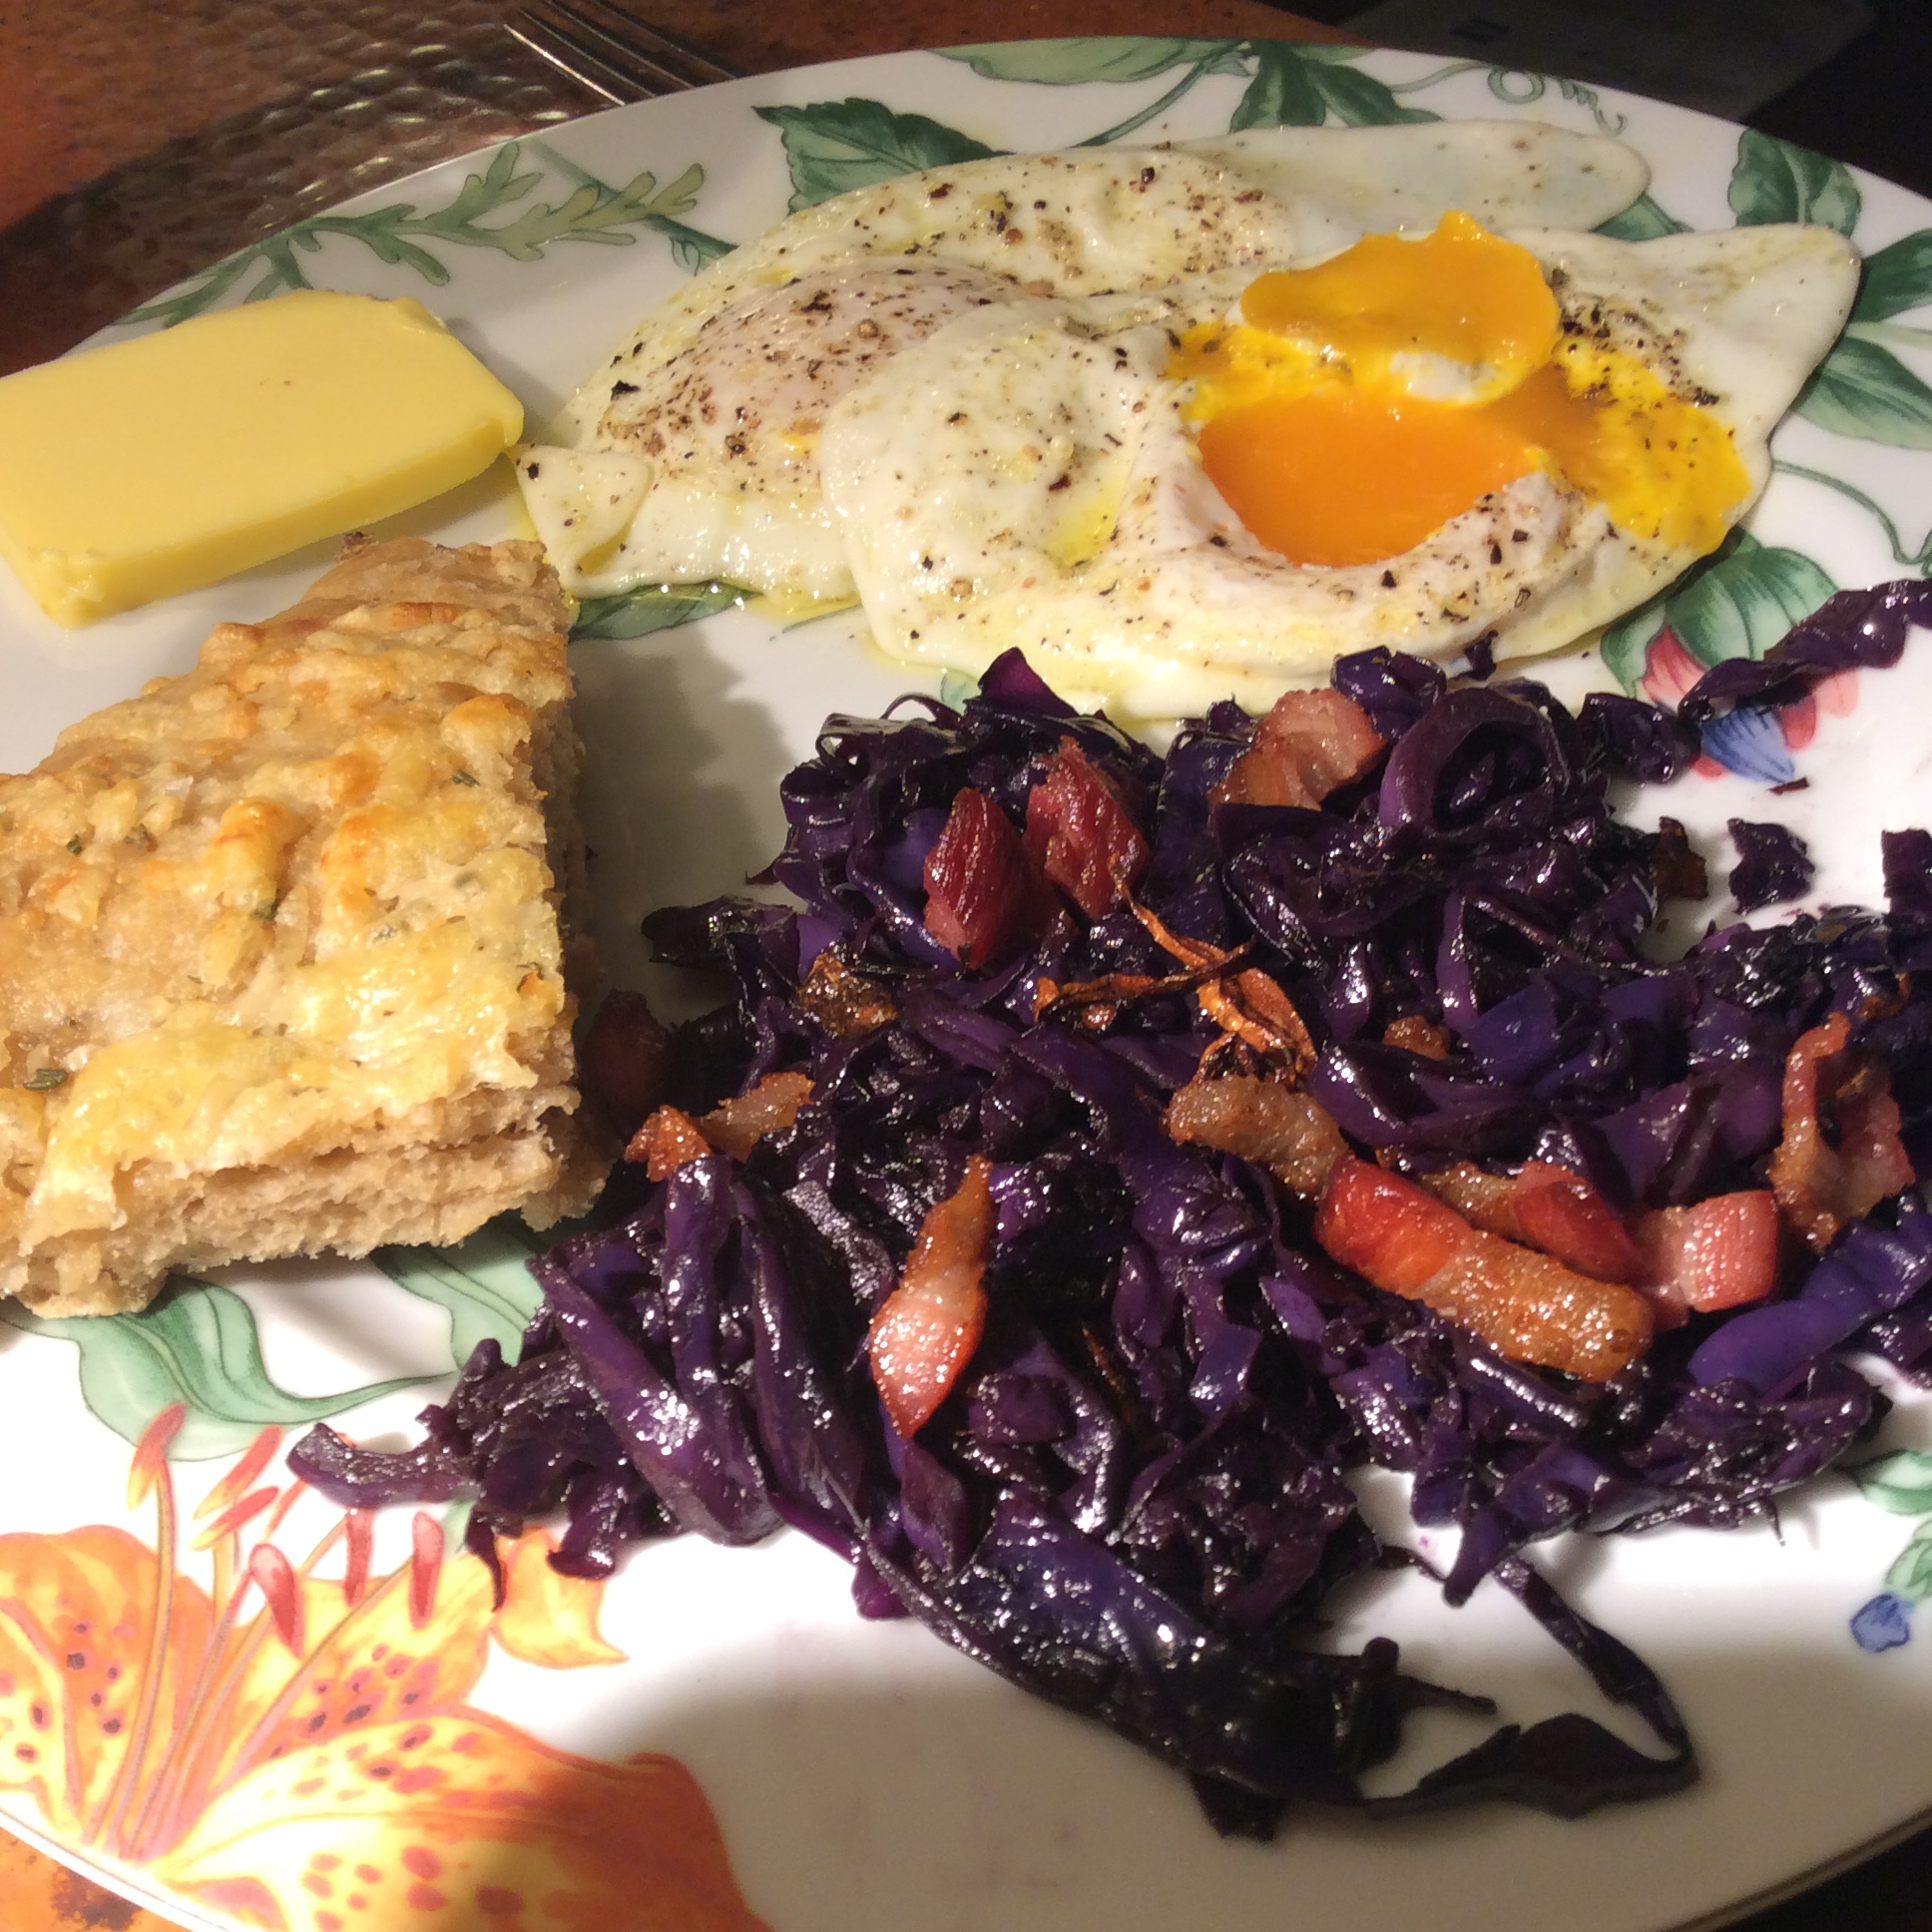
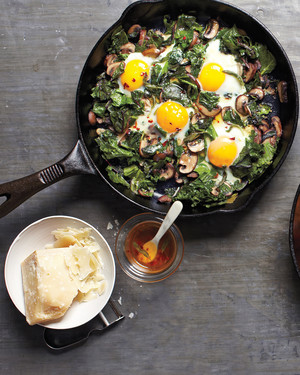
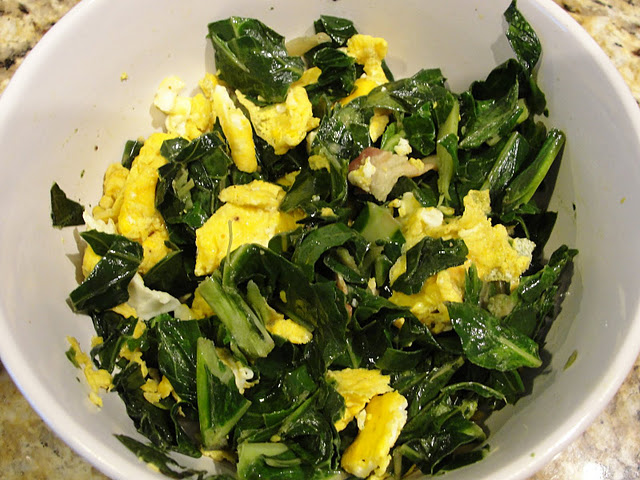
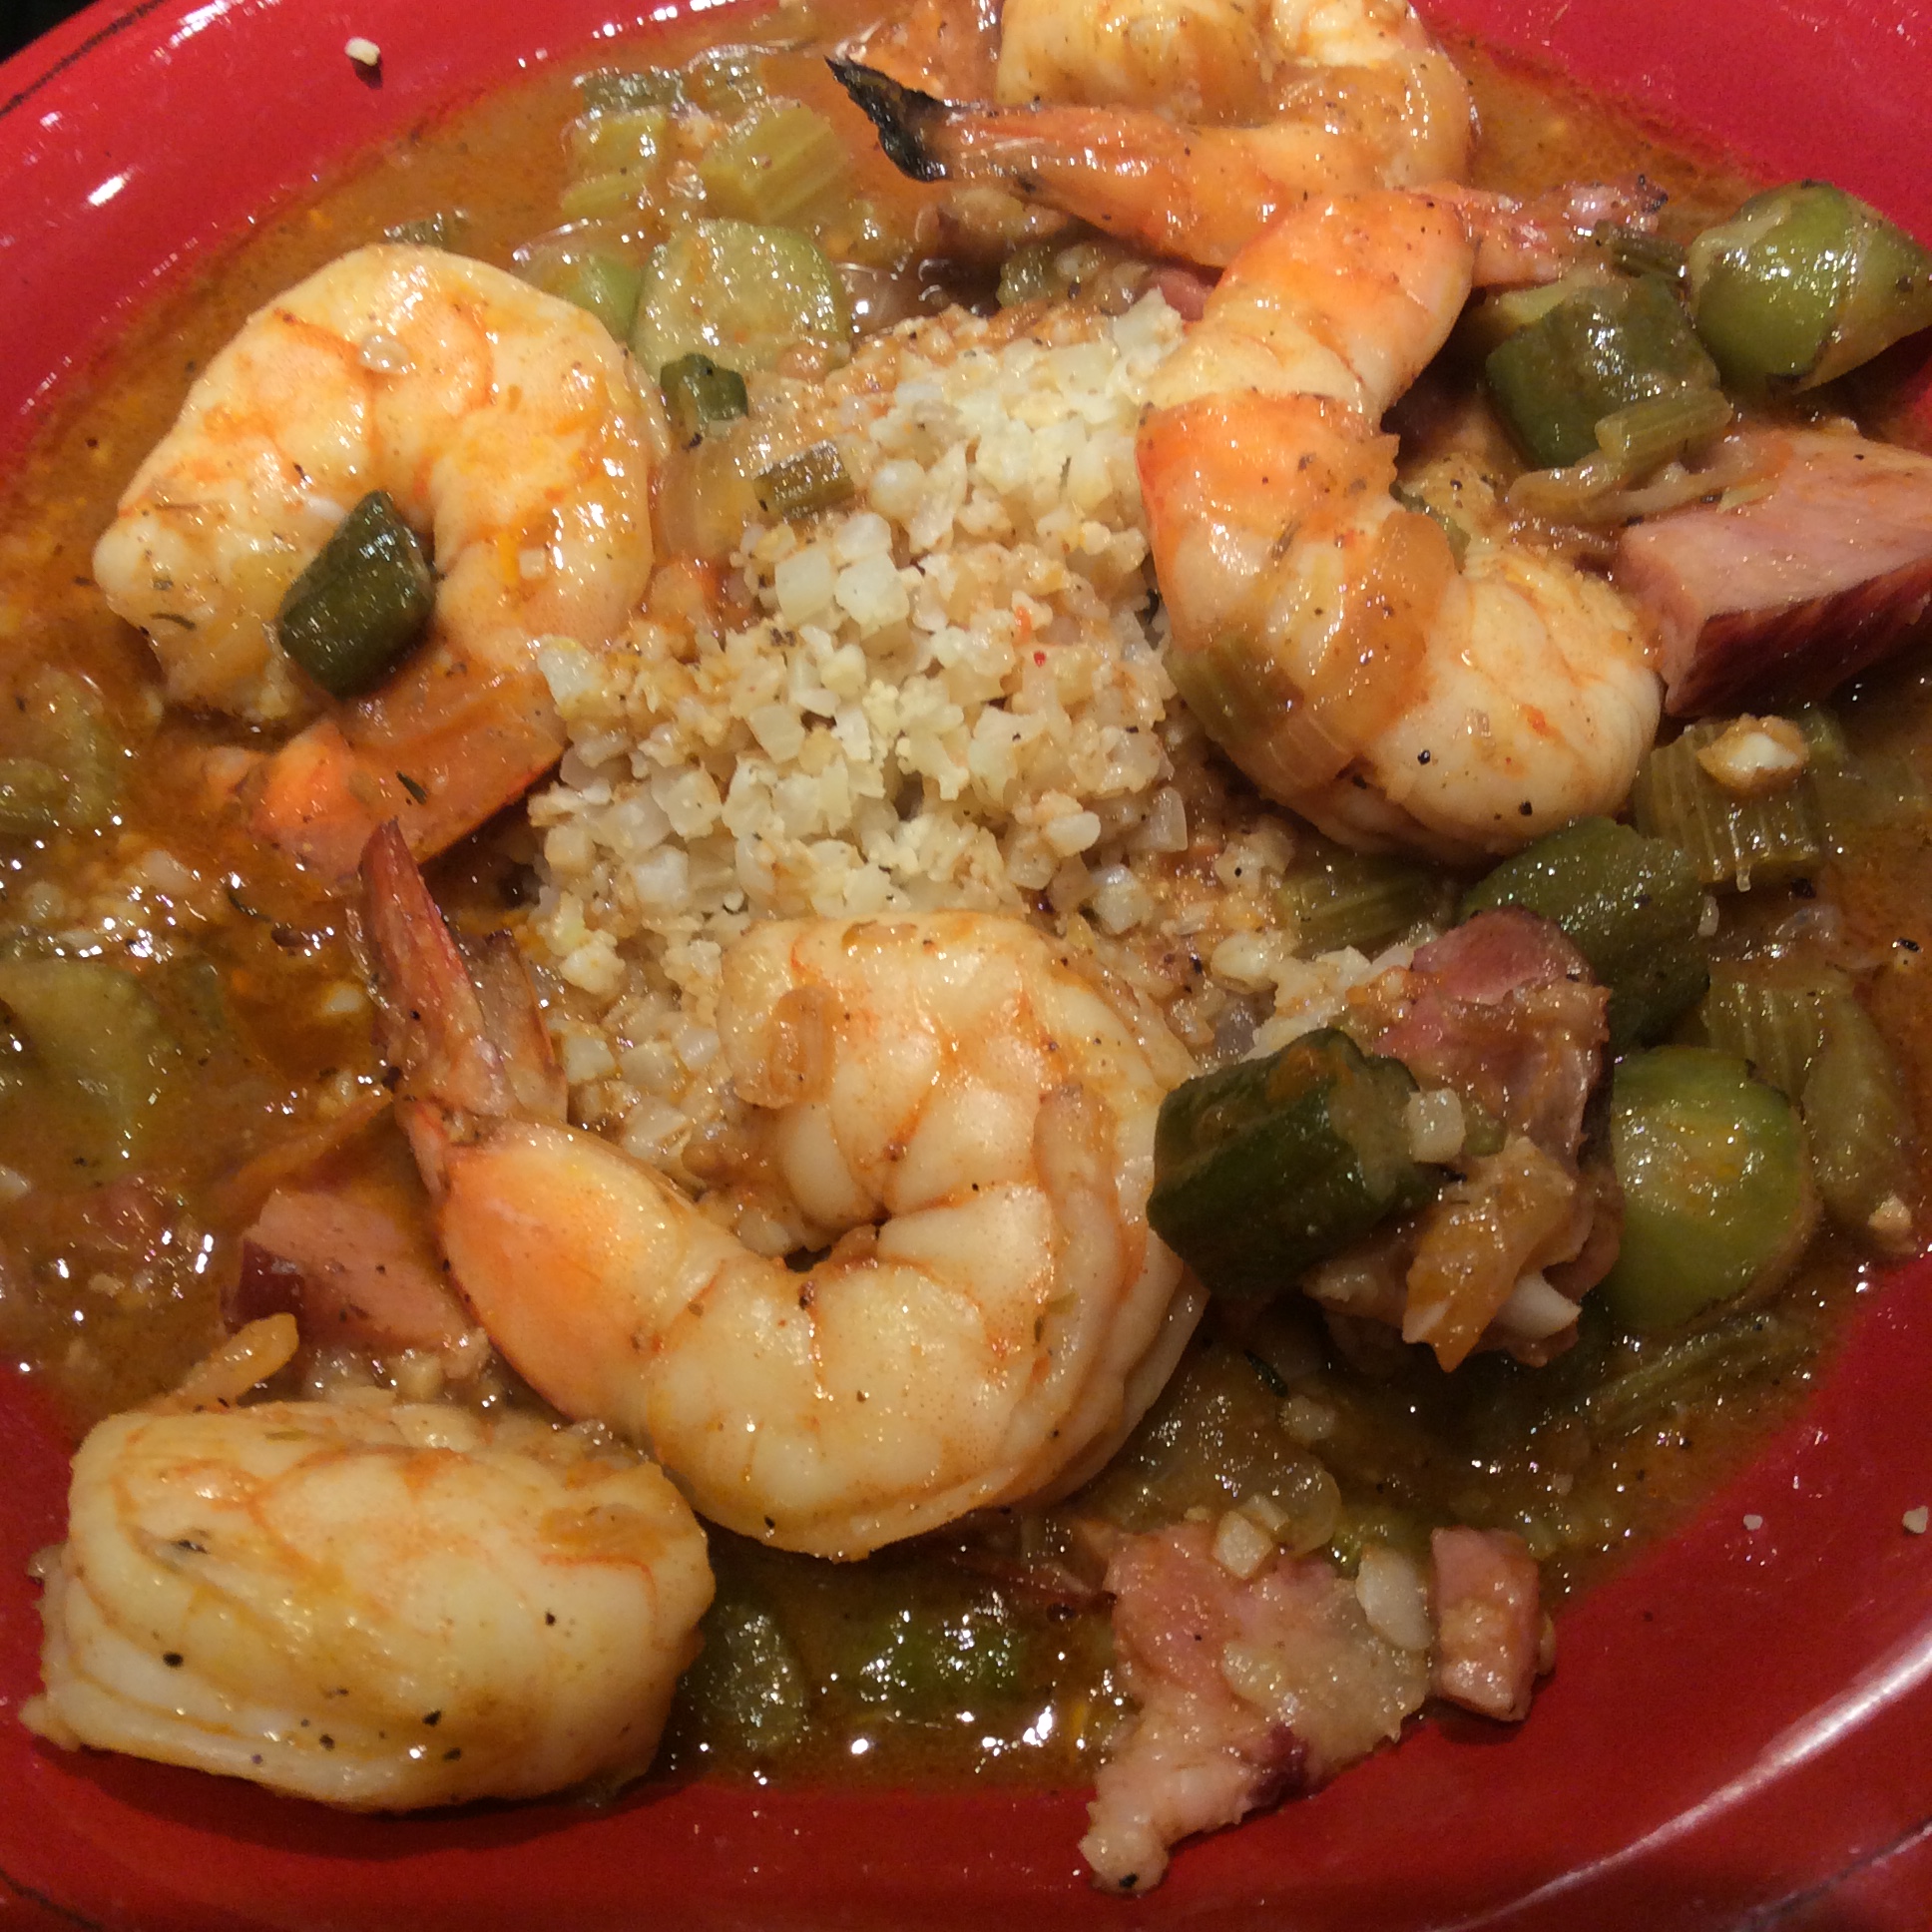
Lunch was a head of broccoli seasoned with the green garlic shoots above and fried eggs from the one valiant hen who is laying this time of year. Eating off your own property just feels good.

Low-Carb Gumbo, and Further Notes on Cauliflower Rice

Whenever I write about Louisiana food, I find myself eager to convey something of the spirit of the place,  and part of the spirit is that there aren’t really many culinary rules. Louisiana cooks are famously adaptable. I have been sternly informed, by people who didn’t grow up there, of various rules such as:

“ NEVER use file’ powder and okra in the same gumbo. It’s one or the other.” Except that it’s actually rather common to use some of each, depending on what else is in the gumbo.

“NEVER use garlic powder.” Except that Louisiana cooks commonly use both fresh and powdered garlic together, getting different flavor facets of the same seasoning.

“NEVER make a roux with butter. It isn’t authentic .” Except that I never knew a Louisiana cook who used anything else.   Cooks who liked really dark black roux might use vegetable oil, but that was not all that common.

“NEVER put anything but butter and black pepper in barbecued shrimp. It isn’t authentic.”  Except that I never knew a Cajun cook who could resist tampering, and everybody has his or her own recipe with a lot of ingredients that aren’t necessarily known to science.

And so on. So let’s forget all that. In the Louisiana that I knew and loved, the only thing that really mattered was whether food tasted good and pleased and nourished people.

With that in mind, I’m going to urge you to get a good Louisiana cookbook if you want to make gumbo,   and then if you want to bristle about authenticity, you can argue with that author and not with me.  Anything by John Besh is good. (Yes, I know about the sex scandal, but it doesn’t alter the fact that the guy could really, really cook.)  Lagasse’s “Louisiana Real and Rustic” is great. And if you really want to go in for the cooking that I grew up with, get an old copy of “River Road Recipes” or “Chef Paul Prudhomme’s Louisiana Kitchen.” And remember that in Louisiana, gumbo is a wonderfully flexible vehicle for using all kinds of meats. If you don’t have shrimp, don’t use shrimp. If you don’t have andouille and tasso, use something else. You can make it work and end up with something wonderfully warming and tasty.   Remember that this started as the dish of backwoods  hunter-gatherers, and wild game of most kinds fits into it really nicely. And if someone happens to give you some alligator or possum  meat, well, you have found a good vehicle for it.

In the spirit of the wonderfully flexible Cajun omnivory, what I am going to talk about here is the fact that I like to keep my diet very low in carbohydrates, but I still want gumbo.  So I adapt. The meats, vegetables, broth, and seasonings are no problem. So the two areas of carbohydrate that you have to look at are the roux and the rice.

To make a low-carb roux,  I think that the best results come from Trim Healthy Mama baking mix,  which is available on Amazon.  It’s a combination of many different low-carb baking ingredients and they work well together in this context. It’s expensive but you don’t use much.   It won’t thicken the gumbo as much as a roux made with flour, but you can easily compensate for that with a little extra okra or file’. I like to make the roux in the oven if I don’t have time to devote exclusively to watching it, because it is easy and pretty foolproof.  Heat the oven to 350, in a small dish thoroughly combine 8 tablespoons of butter and 8 tablespoons of the baking mix, and put it in the oven. Total time will be about an hour and a half or a little less. In the beginning, you don’t have to stir very often, and toward the end you have to take it out and stir it thoroughly and frequently.  How dark to make a roux  is a matter of personal taste, and they vary from almost blonde to almost black.

This is a blonde roux. Way too bland for me.

This is more like it.

And here, where some of the floury particles are very dark brown but the whole roux does not yet taste at all burnt, is where I like it. But you can keep going if you prefer.

You can hold the roux in the refrigerator or freeze it until ready to proceed. You will be combining it with a sautéed vegetable mixture called the mirepoix and adding broth, seasonings, and meat.  When it comes to seasoning, remember that most Louisiana cooks have a bottle of Paul Prudhomme seafood seasoning tucked away somewhere, and it is awfully good in gumbo. Mine was based on ham and shrimp because that’s what I had left over from other meals. It was thickened with okra.

Finally, to serve it, you need rice to soak up all the highly seasoned deliciousness.  Cauliflower rice is better than you think it’s going to be as long as you keep one thing in mind: while a cauliflower seems solid, it is mostly liquid. That liquid is your enemy when it comes to getting a decent texture. You have to get it out of there. If you use frozen riced cauliflower, thaw it completely, and then squeeze and wring it in a dish towel. You will be quite surprised how much clear watery liquid comes out.  If you are dealing with fresh riced cauliflower, salt it rather heavily, let it sit for an hour, and then again squeeze and wring it in a clean dish towel. Really go at it and get all that fluid out. Then cook the cauliflower grains with a pat of butter, but no liquid, in a saucepan,  stirring frequently because it burns easily. And salt during the cooking  so that it cooks in, and you are likely to end up adding more salt than you think because cauliflower is pretty bland and absorbs a lot of salt, but taste along the way so that you don’t overdo it, especially if you disgorged the liquid with salt.   I use only the butter and salt as seasoning because my gumbo is already highly seasoned and very spicy. You will need to keep sampling as you cook to get the texture  right. Personally I don’t want it to crunch like a vegetable, but I stop cooking as soon as it is soft and doesn’t crunch so that it doesn’t get mushy.  I grew up among some of the best rice cooks in the world, and no, this does not taste like really good rice, but I also don’t care to gain lost weight back and have diabetes. So this is a small price to pay.

Also bear in mind that while rice swells in the cooking process, cauliflower shrinks. To make sure of generous portions, I recommend having 8 ounces of riced cauliflower per person to start with, maybe even more.  In the Louisiana fashion, you can always put the leftovers into something else.  Pile a cone of cauli rice lavishly in the bowl, pour gumbo all over it but leave the top of the pile sticking out, and eat. Yum yum yum.