Archive for the ‘Ketogenic diet’ Category

Spring Ricotta

img_5246

This  time of year we are having some warm sunny days and the heavy meaty dishes of winter no longer feel quite right, but I still want something warming  and filling.

At the same time, my doe goat Magnolia is nearing the end of a lactation, getting ready to deliver kids in six or seven weeks. At this point she’s producing just a quart a day, but it’s still rich milk produced entirely on alfalfa and I’m not about to waste it.

So every evening, after filtering the milk, I make ricotta, and when I have a few days’ worth of ricotta saved up I make ricotta al forno. I stole the recipe from Sarah Raven many years ago, and I haven’t tweaked it very much over the years because it’s perfect as is. The main change is that I use egg yolks instead of whole eggs. Yum.

Ricotta, about 1 and a half cups, but a bit more or less won’t hurt.
Yolks of 5 eggs
Salt to taste
Half a cup of heavy cream
Half a cup of grated Parmesan
Half a cup of pine nuts
Cooked veggies as desired. Or none.

Kitchen note: homemade ricotta is drained until quite dry. If you are using store-bought ricotta, you might need to hang it in the sink in cheesecloth or a clean towel for a few hours and let it drain. Otherwise, the resulting dish can be watery.  Another alternative, if you don’t want to take time to drain, is to add one additional whole egg to help it firm up a bit, or leave out the cream.

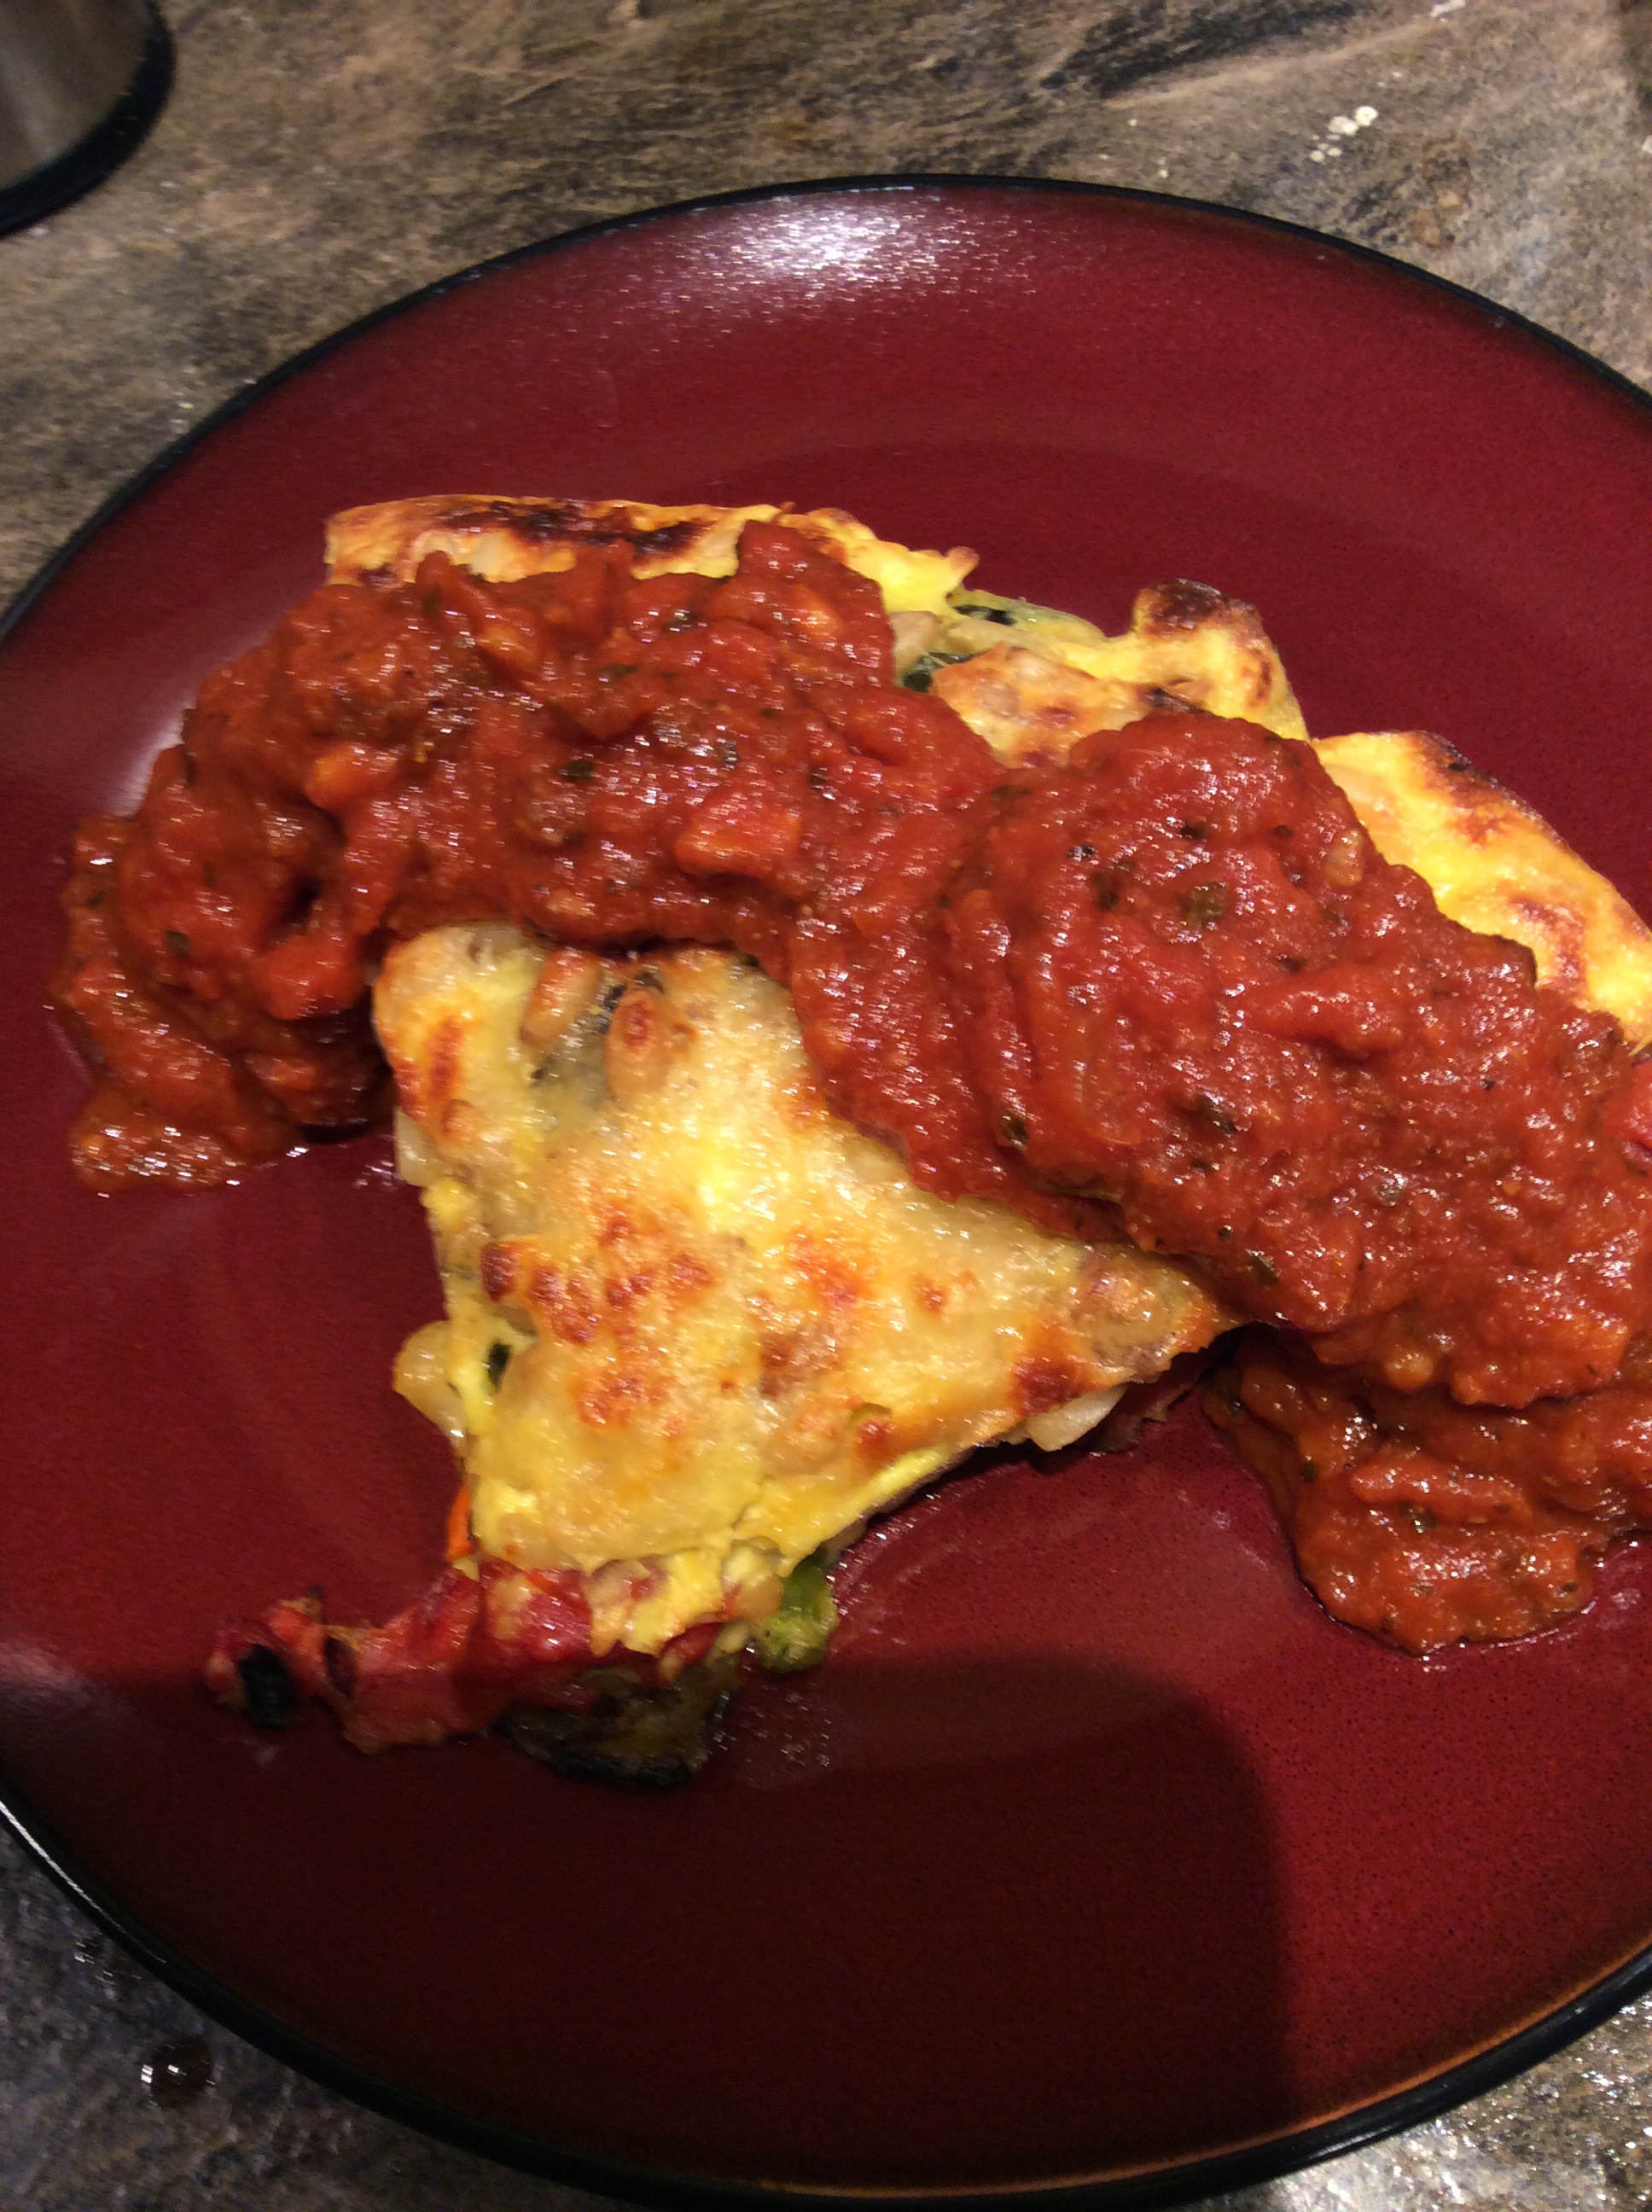
Put the ricotta in the blender with the cream and add the egg yolks one at a time while blending.  Blend in the grated Parmesan just for a second or two. Add salt to taste.  Decide whether you want vegetables. This is an endlessly versatile way to use leftover but good cooked vegetables. The version shown above has a couple of cups of leftover grilled zucchini, red bell pepper, and eggplant.  In the early summer, fresh cooked peas are absolutely delicious in this dish.  A good handful of chopped fresh herbs may suit your taste.  Just be sure that the cheese mixture is already seasoned properly.  Pour it into a buttered 8 inch baking pan, adding any cooked vegetables or herbs that you wish as you go. Top with pinenuts and push them in a little bit so that they don’t burn. Bake at 350 for 25 minutes or until done.  Let it consolidate and settle down for 15 minutes, then serve in  generous wedges.    A topping of your best homemade tomato sauce adds pizzazz.  My husband likes it with a sprinkle of extra finally grated Parmesan on top and run under the broiler for a minute, which produces the brown spots you see above. Just keep an eye on it because it does burn very quickly.

In June this is absolutely glorious made with some chopped fresh herbs and topped with homemade pesto.  For those of us who eat low-carb, it is something to put pesto on.  This lactation will only last two or three more weeks, but by June I will have fresh glorious grass fed milk again and be back in the ricotta business.

img_4114


The January Garden

img_5178

Here in agricultural zone 7 we have a fairly short winter, and I have never gone in for winter gardening.  I don’t have a greenhouse, for the simple reason that I have never been able to make up my mind what kind to get or where to put one. By late fall I have a freezer full of summer food, and I spend the long nights by the woodstove, catching up  on my reading and deciding what to try next.

This year, though, I decided to try some very low-tech strategies to prolong my season.  This came about largely because in September I happened to visit a local nursery for supplies and saw a single lonely six pack of young broccoli plants going begging.  It seemed a shame to let them become trash, so I brought them home and planted them with the vague idea that they might winter over. After a little more thought, I ordered  a roll of Agribon-19 plant protection fabric, a lightweight nonwoven fabric that conveys about 2 degrees of frost protection.  It is 13 feet wide and comes folded double, so I put a double layer over the 10′ row of little plants and held it down with stones and bricks around the edges. I did not use hoops or any other kind of support, just left plenty of room for the little plants to grow. (Please note that you cannot do this with tomatoes, peppers, and other plants that have a “growing point” at the top of the plant. In those cases you have to support the fabric and keep it off the growing tip. But the majority of cold-weather garden plants do just fine this way. )  I watered periodically, but did not pay any other attention to the plants until I noticed small heads of broccoli forming. Then I  started checking more regularly. Naturally, because of the cold, the plants grew more slowly and the heads formed more slowly than they would in warm temperatures. This was an advantage.  I found that the heads would hold for up to a week before harvesting with no loss of quality.

The heads were unusually tender and sweet. I liked them best just steamed with a little butter or olive oil and salt. Not every plant produced well. Two of the six plants began to form heads, then the infant head “browned out” and died, although the rest of the plant looked healthy.  I am not sure if this was a disease or what it was, and hope that maybe one of my knowledgeable readers can clue me in.  But I harvested four beautiful heads, and they are continuing to form healthy side shoots, including the two plants that did not form heads.  Not a bad return for my minimal effort, with an investment of $2.99 for plants and about $10 worth of frost protection fabric which can be reused.

Two weeks ago, after the encouraging broccoli results, I planted three beds of salad greens, cooking greens, and more broccoli. Two beds are covered with a single layer of the lightweight Agribon-19 and the other with the much heavier Agribon-70, which gives about 8 degrees of frost protection but lets less light through. So far, all the beds have germinated well. I will be reporting on results. I still want a greenhouse, but this is looking good as a cheap way to keep fresh food on the table.

Good candidates for  growing this way are lettuces of all kinds, chicory, practically everything in the brassica family including broccoli, kale, and collards, arugula, green onions, green garlic,  and who knows what all else.  One of the beds that I covered is one where I have let edible weeds go to seed in the past, so I will watch with interest to see if I get an early crop of those too.  I have planted some snow peas undercover as well, to see if I get a substantially earlier crop this way.  In my climate we have a lot of wind storms in the spring, and just giving some protection from wind might speed them along.

image

This picture is a cautionary tale: you can see here that before using the lighter cloth, you do need to cut away any old stems etc. that are sticking up, since they can tear the fabric.

Also, because of the decreased light transmission, the plants growing under fabric are essentially hothouse plants and will have to be hardened off to full sun gradually in the spring.  I speculate that the more bitter greens such as dandelion would be tastier and less bitter when grown this way, but don’t know for sure yet.  I am greatly looking forward to finding out.


The Greens of Winter: Soup Base

img_5098

Earlier this week I walked through my frost-killed garden to see what was left. For the most part I don’t make any special effort to protect my garden in the fall because after a long summer I’m ready to move on to the things I do in the winter, so the pickings were slim, but I found lots of chicory, dandelion, chard, broccoli leaves, alfalfa tips, celery, and kale, along with green garlic and green onions, and some of the herbs were still in fine shape. I decided to make soup, and since I had a lot more greens than I remembered planting, it occurred to me to make a soup base that could sit in the freezer, ready at any time to be turned into soup in a hurry. To the garden ingredients I added a large onion and a largish handful of sun-dried tomatoes from earlier in the summer. You could also use a jar of dried tomatoes in oil, drained.  The celery was used from base to leaf tip. I used roughly equal volumes of all the greens types, about the equivalent of a medium-sized supermarket bunch of each.

The onion was sliced thinly and sautéed very slowly in olive oil while I washed and prepared the greens. I was aiming for a rich caramel color, which meant low heat and frequent stirring, which is no extra trouble if you’re in the kitchen anyway. I used my wok because I knew that the volume of sliced greens would be considerable. First the green garlic and green onions were cleaned, finely slivered, and held separately, then everything else was washed and midribs removed and cut in cross section into roughly 1/2″ slices.

img_5084

When the onion was a nice toffee color I added the chopped green alliums, cooked about another five minutes, then added the other greens and some more olive oil along with about a teaspoon of salt. Don’t stint on the olive oil. You want sautéed flavor, not steamed flavor.  The heat was turned up to medium and the whole mass stirred and turned with a wide wooden spoon about every five minutes to keep it cooking evenly. As soon as the greens were in the pan I ground the sun dried tomatoes into small powdery chunks in the blender and added them to the wok. They rehydrated well enough in the moisture from the leaves.  Keep cooking until the greens are soft when chewed.

When you have a darkened dense mass of soft greens, put the whole business in the food processor and grind to the finest paste that you can achieve. Taste. You want it on the salty side, because that helps with preservation and it’s going to be diluted later. Add more salt if needed. I prefer to use fish sauce rather than salt to season at this point because it adds a wonderful rich savor. I used about a tablespoon. Don’t use this if you might be serving vegetarians.

img_5085

Now cool your soup paste and pack it into one-cup containers, each of which makes about a quart of finished soup. Coat the top with olive oil, push lids on tightly, and freeze.

img_5091

When ready to use, put a quart of any kind of salt-free or low-salt broth you like in a saucepan, add a cup of soup paste, and simmer until thawed. Correct the texture with a stick blender if it needs smoothing out. Taste for seasoning and adjust in any way you like. The caramelized onions, deeply sautéed greens, and fish sauce gave a meaty-umami flavor to the potful I made for lunch today, so I salted to taste and added a swirl of fat from my homemade bacon and a generous sprinkling of thyme leaves, a meaty-umami herb if ever there was one. Yum. With toasted buttered slices of my low-carb fake-o cornbread, it made a perfect light healthy Thanksgiving brunch to lead into the excesses to come at dinner.

This basic formula can be varied endlessly according to what you like and have available. If you serve vegans at your table, using some miso rather than fish sauce and good olive oil for the final swirl with water or vegetable broth as the liquid would suit their needs while fully satisfying the omnivores. If you don’t like the brownish color, leave the tomatoes out and it will be more green. Pan-grilled small oyster or other mushrooms would make a good garnish. A fried or poached egg adds tremendous heft to soup if you want a richer meal, or some bacon lardons fried crisp would satisfy any ardent carnivore with a minimum of actual meat. You can add cow or coconut cream for a cream soup (try a toss of chopped fresh tarragon for the final garnish,) or some leftover tomato sauce for interesting tartness, or finish it with a handful of good freshly grated Parmesan along with olive oil and let the cheese dissolve in the hot soup. For a more Cretan effect, use crumbled feta and olive oil on top.  There are a hundred possibilities and you can get any of them from freezer to table in well under 20 minutes. Serve any kind of bready stuff that suits your diet alongside, and you and your table mates will be full. I say that a quart of soup is two servings, but I understand that normal people can serve three or four with a quart. Know your family’s tastes.

In my opinion the celery is necessary rather than optional, and I strongly advise including at least a small portion of bitter greens (dandelion and chicory in this case.) When making mixed greens, I’ve often noticed that a savory-meaty element is lost if I don’t include some bitter greens. The proportion is small and the final product isn’t bitter and is enjoyed be people who don’t like strong greens in other contexts. Besides, they’re so damn good for you.

img_4891

img_4892

img_4888

Superfruit Sauce

img_4763

A couple of years ago I started my low-carb fruit project, aimed at growing maximum antioxidants with minimum carbohydrates.  This summer my plantings started to bear. Here are a few observations:

1. A good Italian plum tree is abundant beyond rational imagination. In season the branches are weighed down with thick ropes of plums and its overblown beauty warms your heart at sight. Make sure you have plans for the fruit. Prune plums are not low-carb at all but have plenty of soluble fiber in a delicious form, so I eat some.

2. Goji berries are my worst garden invader so far. They seem to behave better in other parts of the country, but they love my alkaline desert soil and go wild. Everywhere I look, yards from the parent plant, eager offspring are poking up among the broccoli and muscling aside the beans. The plants are rather thin, though, and don’t block any appreciable amount of sunlight, so I am happy to have them. But if your nature and aesthetic are more meticulous than mine, better plan to use a root barrier. The shoots, gathered when they still snap cleanly, were one of my favorite perennial vegetables this year. The flavor of the fruit is nothing to write home about, but I enjoy them in savory dishes or mixed with other berries.

3. Clove currants, when left on the bush for a couple of weeks after they turn black, are delicious. Eat them before that and you’ll wonder why you wasted space on them.

4. Goumi berries are very well suited to alkaline soil and tolerate heat well. They smell heavenly when they bloom in May, with a far-reaching honeyed sweetness that is free of the grape Koolaid note that can be overbearing in their close relative the Russian olive.  Again, once they turn red, start tasting every few days, and don’t harvest until they taste good. It’s very worthwhile to buy the expensive named varieties. I didn’t, and my wild-type berries are so tiny that harvesting is very slow and tedious. I’ll be planting some selected varieties next spring.

I had relatively small amounts of all the berry types this spring, so I decided to mix them together and add plums to make a sauce base for producing my own hot sauces and chutneys. Other than stoning the plums, I didn’t do any other prep. I threw roughly equal quantities of the four types of fruit in a stockpot, added good red wine to just cover the fruit, and simmered slowly until the fruits were soft. I think it was about 90 minutes. Then I put the mixture through a food mill to remove any woody seeds that the goumis had contributed and to smoothe and thicken the mixture.

img_4765

Add salt to taste. Now you have an antioxidant-rich purée that can go in a number of directions. Cooked down a little further until it thickens up, and sweetened to taste with sugar or your favorite artificial sweetener, it makes a tart local substitute for cranberry sauce. Cooked a bit with sweetener and chopped garlic and ginger, it makes a delicious Asian sauce for garnishing pork, dipping dumplings, or just as a table sauce. Make hot sauce by pureeing a can of chipotles en adobo in the blender and adding to the superfruit base by spoonfuls until you get the heat level that you want. Sweeten or not; I like some sweet with my heat. My favorite use is superfruit chutney: to a cup of base add a couple of teaspoons of mustard seed lightly toasted in a dry skillet, a teaspoon of garam  masala, a small onion and a clove of garlic finely chopped, and a small piece of ginger grated. Crumble in a dried chile or two if you like heat.  Salt a little less than you think is optimal. Simmer together, adding a little water if necessary, until the alliums are cooked and soft. Taste, adjust seasoning and salt, and cool. Serve with nearly anything Indian.

img_4258

I froze some superfruit base in cartons to use this winter. It could also be canned, although I would suggest pressure canning for safety.