
Caesalpinia gilliesii, the Desert Bird-of-Paradise, is a spectacular plant. It is native to South America but is naturalized throughout the Southwest. It would probably grow in other places. It thrives on our alkaline soil, baking desert sun, and low rainfall. It’s gorgeous in bloom and neat-looking when not in bloom. It seeds itself around but is easily eradicated where not wanted. It provides filtered shade to other plants. And it fixes nitrogen. Quite a set of advantages.
I’m making use of it on a dry, hot, unirrigated strip of south-facing land along my driveway where I want to grow goji berries. The goji plants struggled and mostly died at first, but as seed-sown bird-of-paradise takes hold and provides them with some shade and nitrogen, the gojis are getting a new lease on life and have finally put out some berries. I trudge the hose over and give everything a deep soaking about once every 3-4 weeks.

For years I struggled with Caragena arborescans, which is the darling of the permaculturists but simply will not grow well, or at all, for me. Now I have Caesalpinia instead. No part of it is edible but it helps edibles grow. It has survived 10 degrees Fahrenheit with no problems. In Britian they do have hardiness issues with it, and I think it won’t tolerate wet feet. For dry gardens it works beautifully.
So look around you and see what nitrogen-fixers thrive in your area and grow without pampering. Use them. Don’t fuss with the ones that are determined to die.
Posts Tagged ‘semi-permaculture’
10 Jun
Gather Ye Nitrogen While Ye May: Desert Bird-of-Paradise
4 Jun
Mulberry Heaven
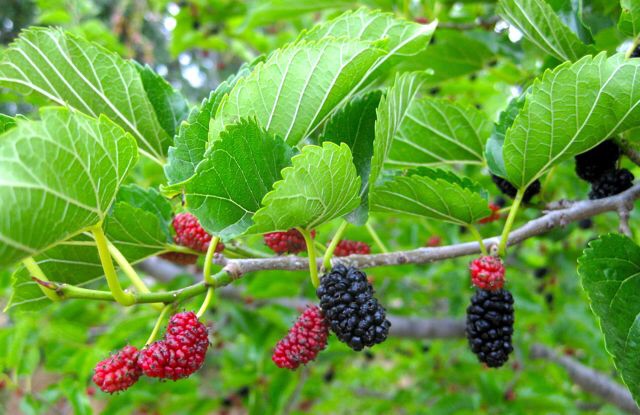
Near my home there is a mulberry tree that has delicious black fruit and low-hanging branches. When the fruit ripens, I throw my ketogenic diet temporarily out the window and go every evening to stand under it, gorging myself, while my dogs eat dropped fruit off the path. This is one of the greatest joys of the summer season. But it isn’t by any means the only use for mulberry trees.
On my own property I don’t have any mulberries big enough to fruit, but I do have two mulberries that I harvest greens from. The leaves of all mulberries are edible when young and tender, but flavor ranges from tasty to nasty. By hanging around a local organic nursery and surreptitiously tasting leaves, I got a couple that had fairly good-tasting leaves. At my last home I had a mulberry with delicious and large leaves, but alas, that tree is no longer mine, and I didn’t try rooting cuttings because I had no clue how hard it would be to replace. But the ones I now have are passable. The trees will rapidly grow tall if you let them, which I don’t. From the time they are 4 feet high I start managing them for leaf harvest by keeping them small. At first this is a matter of a little delicate trimming and weighting some branches so that they grow out nearly parallel to the ground. Later on in their lives, much harder cutting is needed, and by the time that they are 5-7 years old, they need coppicing (cutting off a few feet above the ground) to keep them in check. Coppicing keeps them from producing fruit, and incidentally they also don’t bloom and produce their incredibly allergenic pollen when managed this way. They do produce masses of young tender tips that can be pinched off at the point where they are nonwoody and break easily and cooked as a green, a good green that fills in gaps between cold-weather and hot-weather greens and contains resveratrol as a bonus.
At the point when my coppiced trees start producing more greens than I can use (which is a few years down the road,) I will start harvesting bigger branches for my goat, who thinks that mulberry branches are the food of queens. Mulberry leaves can also be dried to make tea, although I think the resulting tea is pretty insipid stuff and needs other herbs for interest. I would also use “extra” cuttings for mulch and spare biomass.
For more about mulberry trees, see the link below for a terrific and very comprehensive post about mulberries in permaculture. Don’t miss the wonderful pictures of stuffed mulberry leaves! The recipes are available too, and I plan to try this soon.
Temperate Zone Permaculture mulberry post
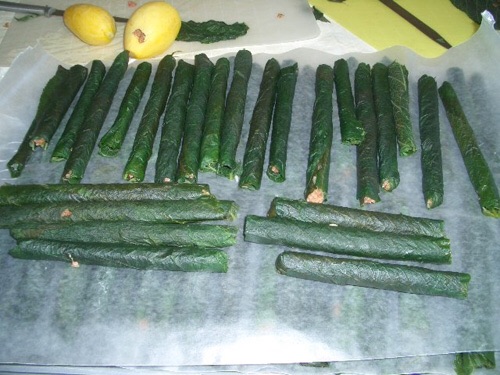
This image of stuffed mulberry leaves, poached from the Temperate Zone Permaculture post linked in above, looks especially interesting to me. Check out the recipes in that post.

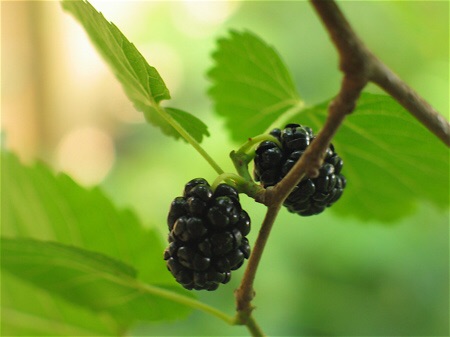
The stigmata of the mulberry fancier. Consider yourself warned.
26 May
Integrating Your Weeds I: lambs-quarters

I’ve written a lot at various times about the Holy Trinity of edible weeds: lambs-quarters, amaranth, and purslane. In this post I don’t plan to say anything much about harvesting and cooking lambs-quarters, Chenopodium album, since I’ve said that already and the short version is “harvest them young, collect as little stem as possible, and use them like any other mild-flavored leafy green.” Personally I dislike the texture and mouthfeel of the raw leaves intensely, and only like them cooked, but others see it differently. This is their great season; after midsummer they are very eager to make seeds and are no longer very usable as a leafy green.
The focus today is on how to have them in your garden without losing everything else. They are highly competitive. First, don’t just let a nice big plant go to seed in your garden, unless you have a lot more space than I do, because they get six feet tall and nearly the same across and tend to flop around, and nothing else in that bed will survive. Instead, look over your self-sown lambs-quarters (which you almost surely have,) choose one right at an edge or corner of a garden bed, cut it down to an inch from the ground, and keep hacking at it until late summer, allowing it to make exactly one branch which lies out horizontally over the ground of the bed. This branch is allowed to go to seed, and everything else is clipped off. It helps if the planned plants in that bed are large and robust. All other lambs-quarters in that bed are pulled out by the roots after harvesting. Your mother plant will dry out in early fall, very unattractively I might add, and when you are sure that it’s dropped its seed, you can dig the husk of the mother plant out. This will take a lot of effort and a good shovel.
Next spring, you will see a fine mist of seedlings on that bed. Keep them watered for tenderness, harvest them at 6-8 inches tall, and be sure to pull out the roots. If you are growing other things in that bed, be sure to give everything else a head start. In the bed shown above, I hoed up the ground when the seedlings showed and planted collards and onions. Don’t worry about hoeing the seedlings. There are millions more to come. Then I let the second wave of lambs-quarters seedlings grow up among my plantings. Today I’ll harvest the lambs-quarters, and mulch around the remaining veggies and let them take over.
No doubt this decreases the total yield of collards and onions, but if you use a rich mulch like stable bedding they will make up for the slower start, and overall you are getting remarkable yields for the space. The returns are especially remarkable if you consider nutrient density, since lambs-quarters are among the most nutritious greens that you can eat.
You should only have to do this once, or maybe once every several years. You will then have millions of potential lambs-quarters in your soil and can grow a crop of them at any point in late spring or early summer that you have a bit of empty space. Just water the ground and stand back.
The marvelous foraging guide by Dr. John Kallas called “Edible Wild Plants: Wild Foods from Dirt to Plate” will enable you to identify and cook your bounty.
