Archive for the ‘Vegetable dinners’ Category

The Squash Chronicles II: Squash Flatbread

I love my ketogenic diet and my blood sugar is superbly controlled, but there are times when I really miss bread.  Not just the flavor of bread, although the flavor of a really good sourdough bread is unbeatable. For that, there is no substitute. But there are times when what I really crave is the ease and convenience of bread, and the way it  pads out a meal and pulls it together.  In this case what I miss is not really the flavor of bread but its use as a “landing” for all kinds of other foods.  I have a few ways to fill in without adding too many carbohydrates, and one of my favorites is zucchini flatbread.

In addition to a couple of good sized zucchini or about a foot of serpiente squash,  you will need two eggs, a cup of grated mozzarella (the semi soft processed kind, not true fresh mozzarella for this purpose,)  half a cup of grated Parmesan, seasoning of your choice, and about a half cup of low-carb baking mix.  The best mix that I have found is the one from Trim Healthy Mama,  which is extremely expensive but does work well.

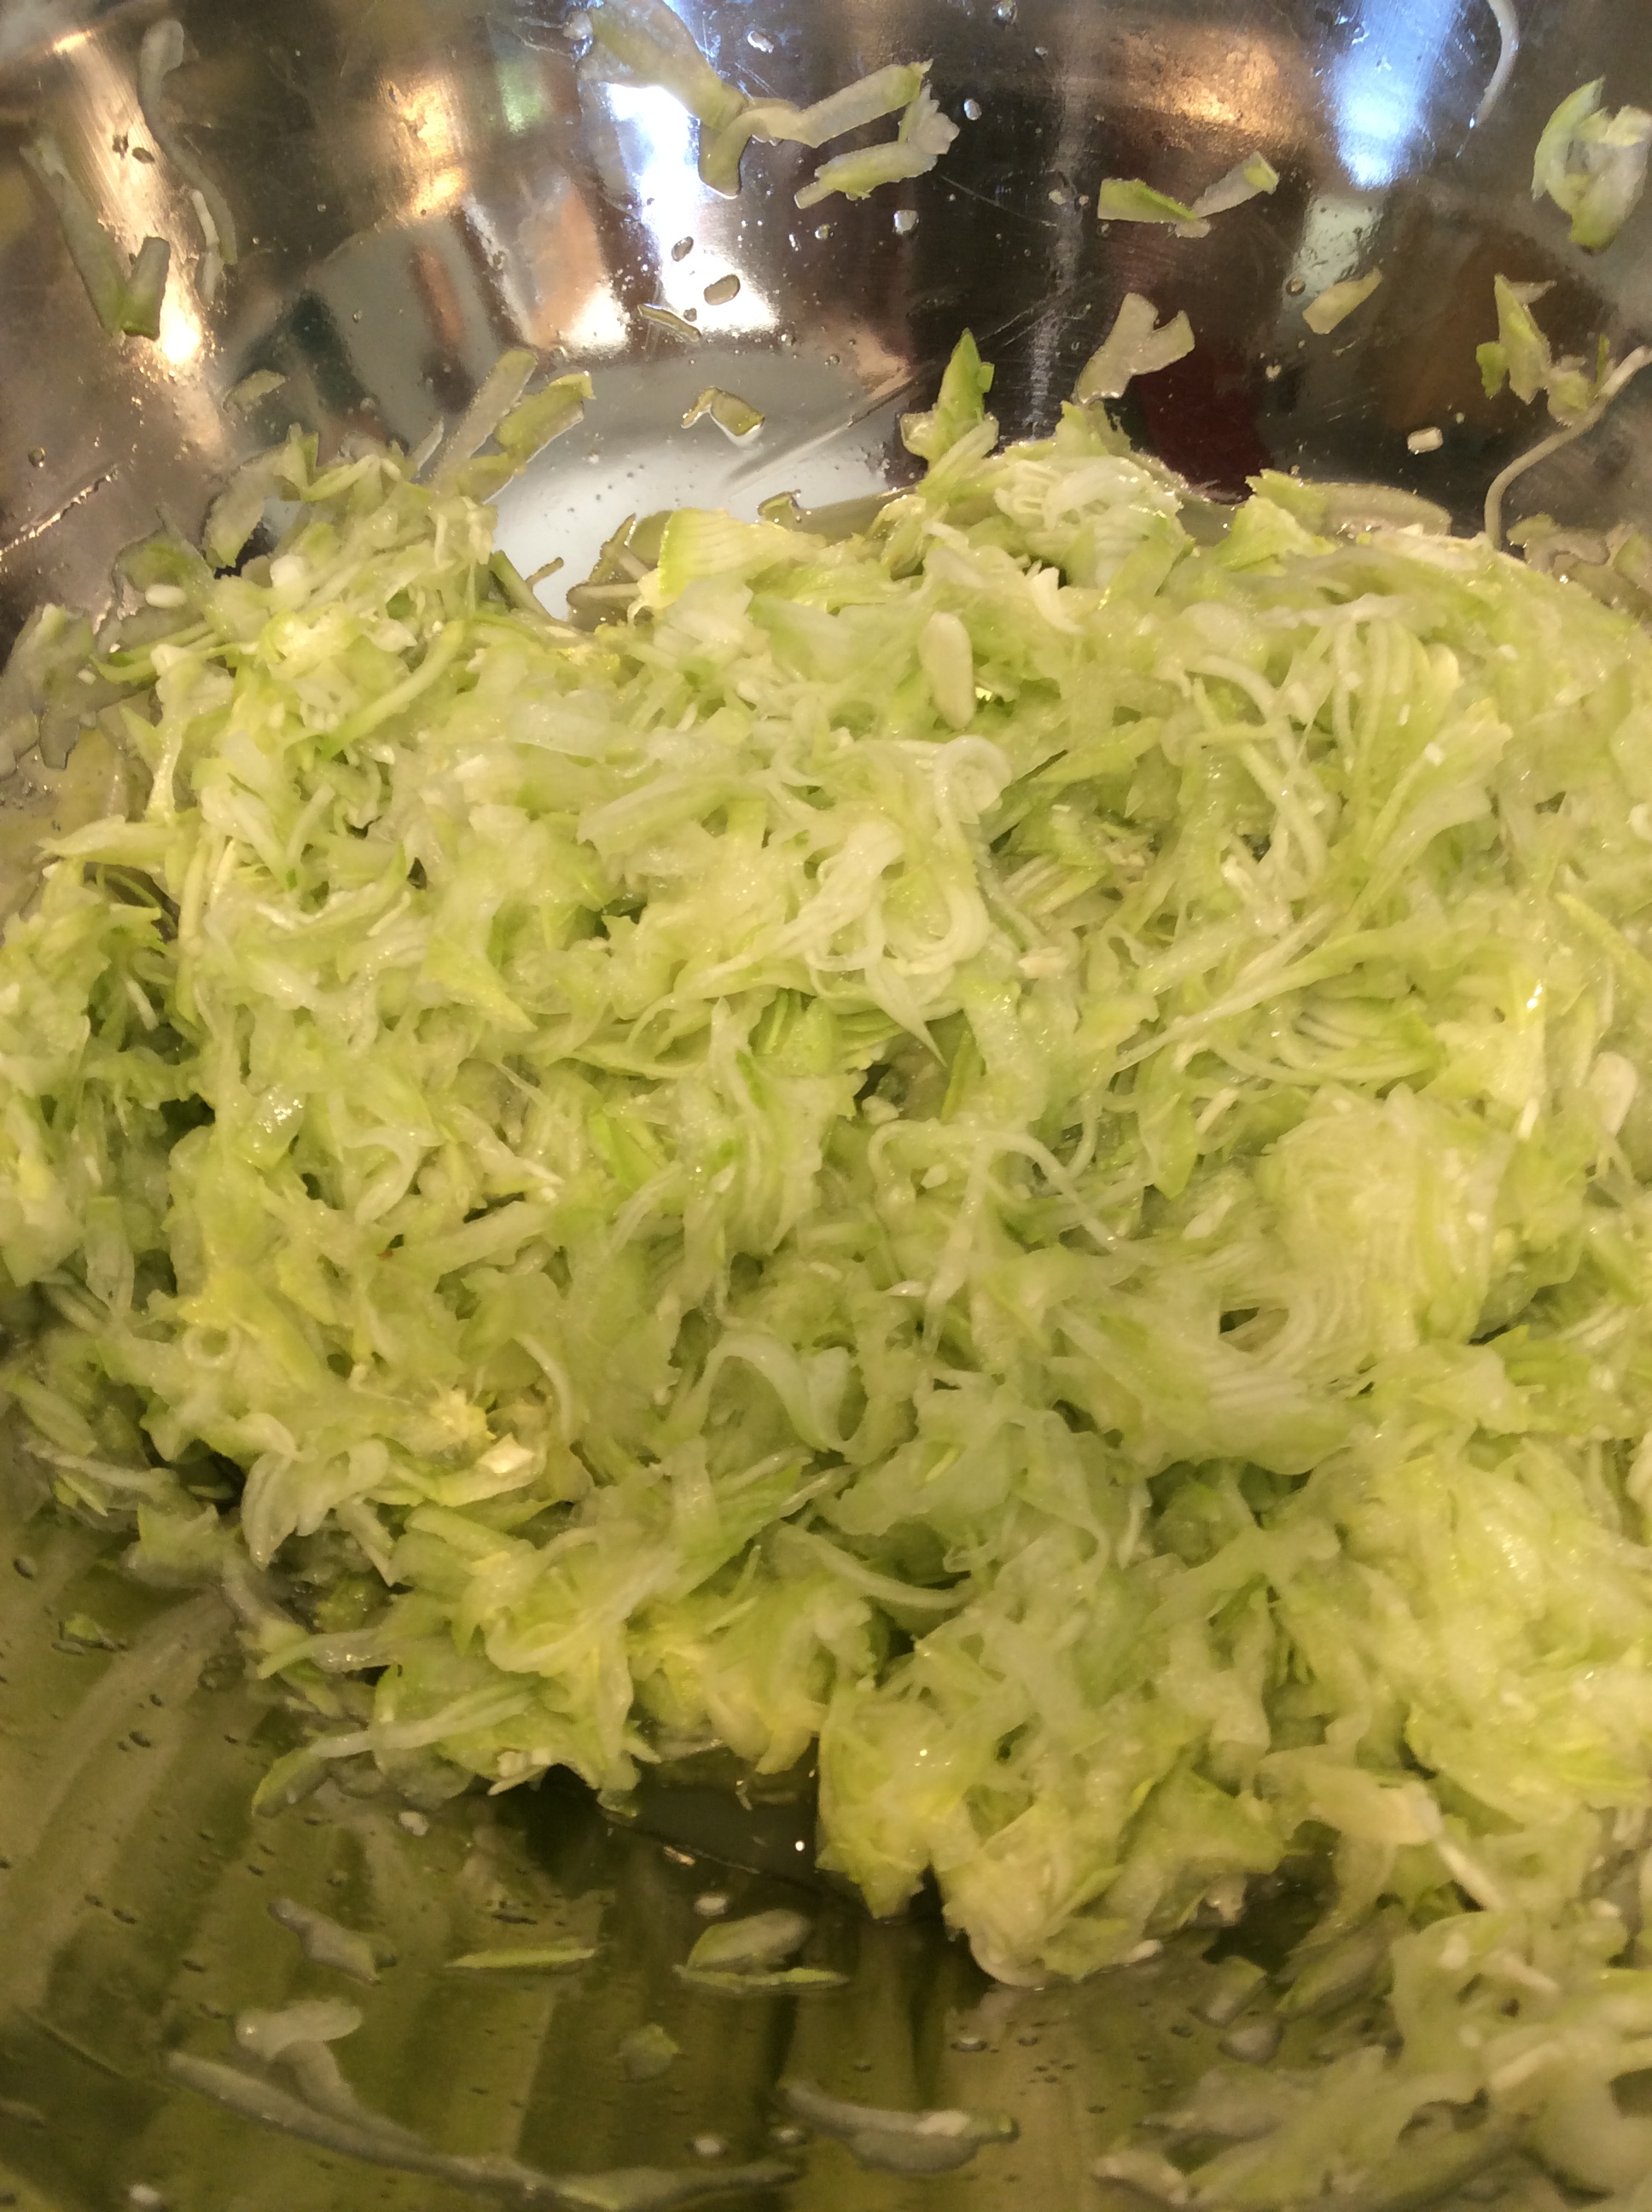
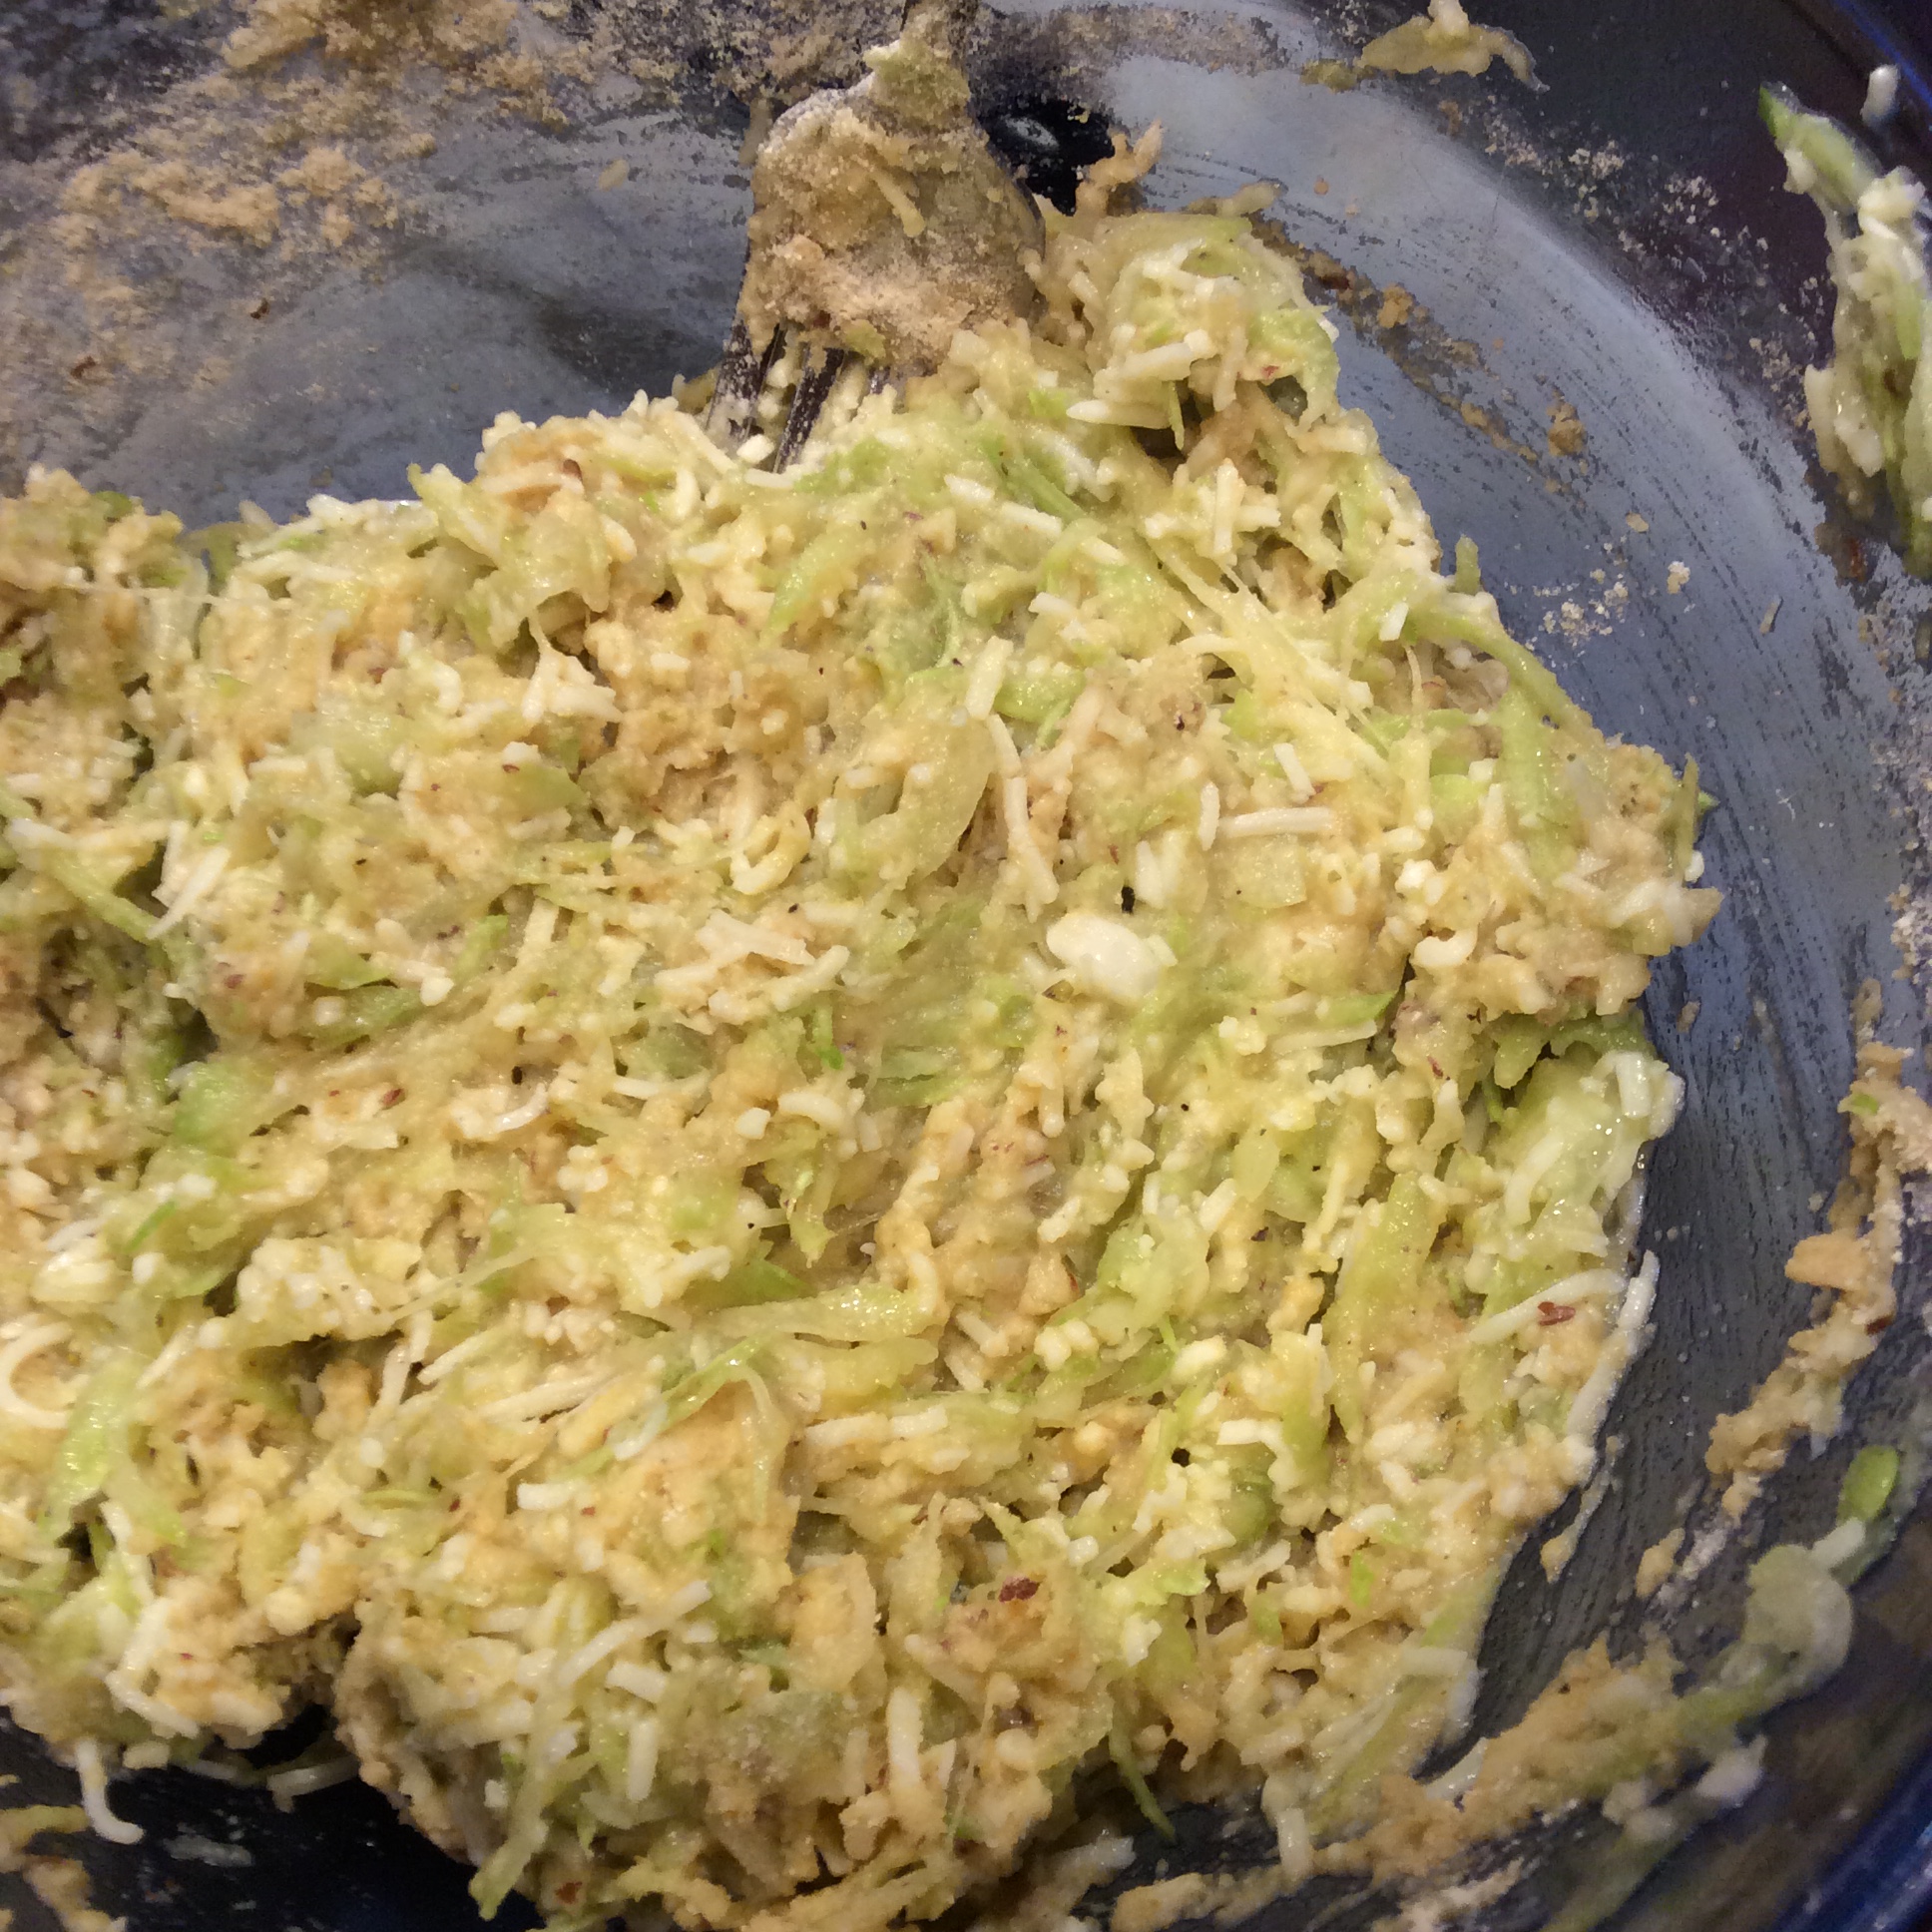
First, grate the squash and mix in about a tablespoon of salt.  Let it sit for half an hour. At this point, the shreds of squash will be swimming in liquid.  Over the sink, wrap the squash in cheesecloth or a thin dishtowel and start squeezing out liquid.  Keep squeezing and wringing, until you are left with about a cup of pulpy squash shreds.  Put these in a bowl and beat in the two eggs with a fork.  Mix in the shredded mozzarella and Parmesan.  Add a half teaspoon of salt (most of the salt that you used for disgorging the squash disappeared with the excess water) and seasoning of your choice. I like some fresh thyme leaves and a pinch of granulated garlic. For some reason fresh garlic doesn’t work well in this recipe. Add in a half cup of low-carb baking mix and half a teaspoon of baking powder and beat until evenly incorporated.

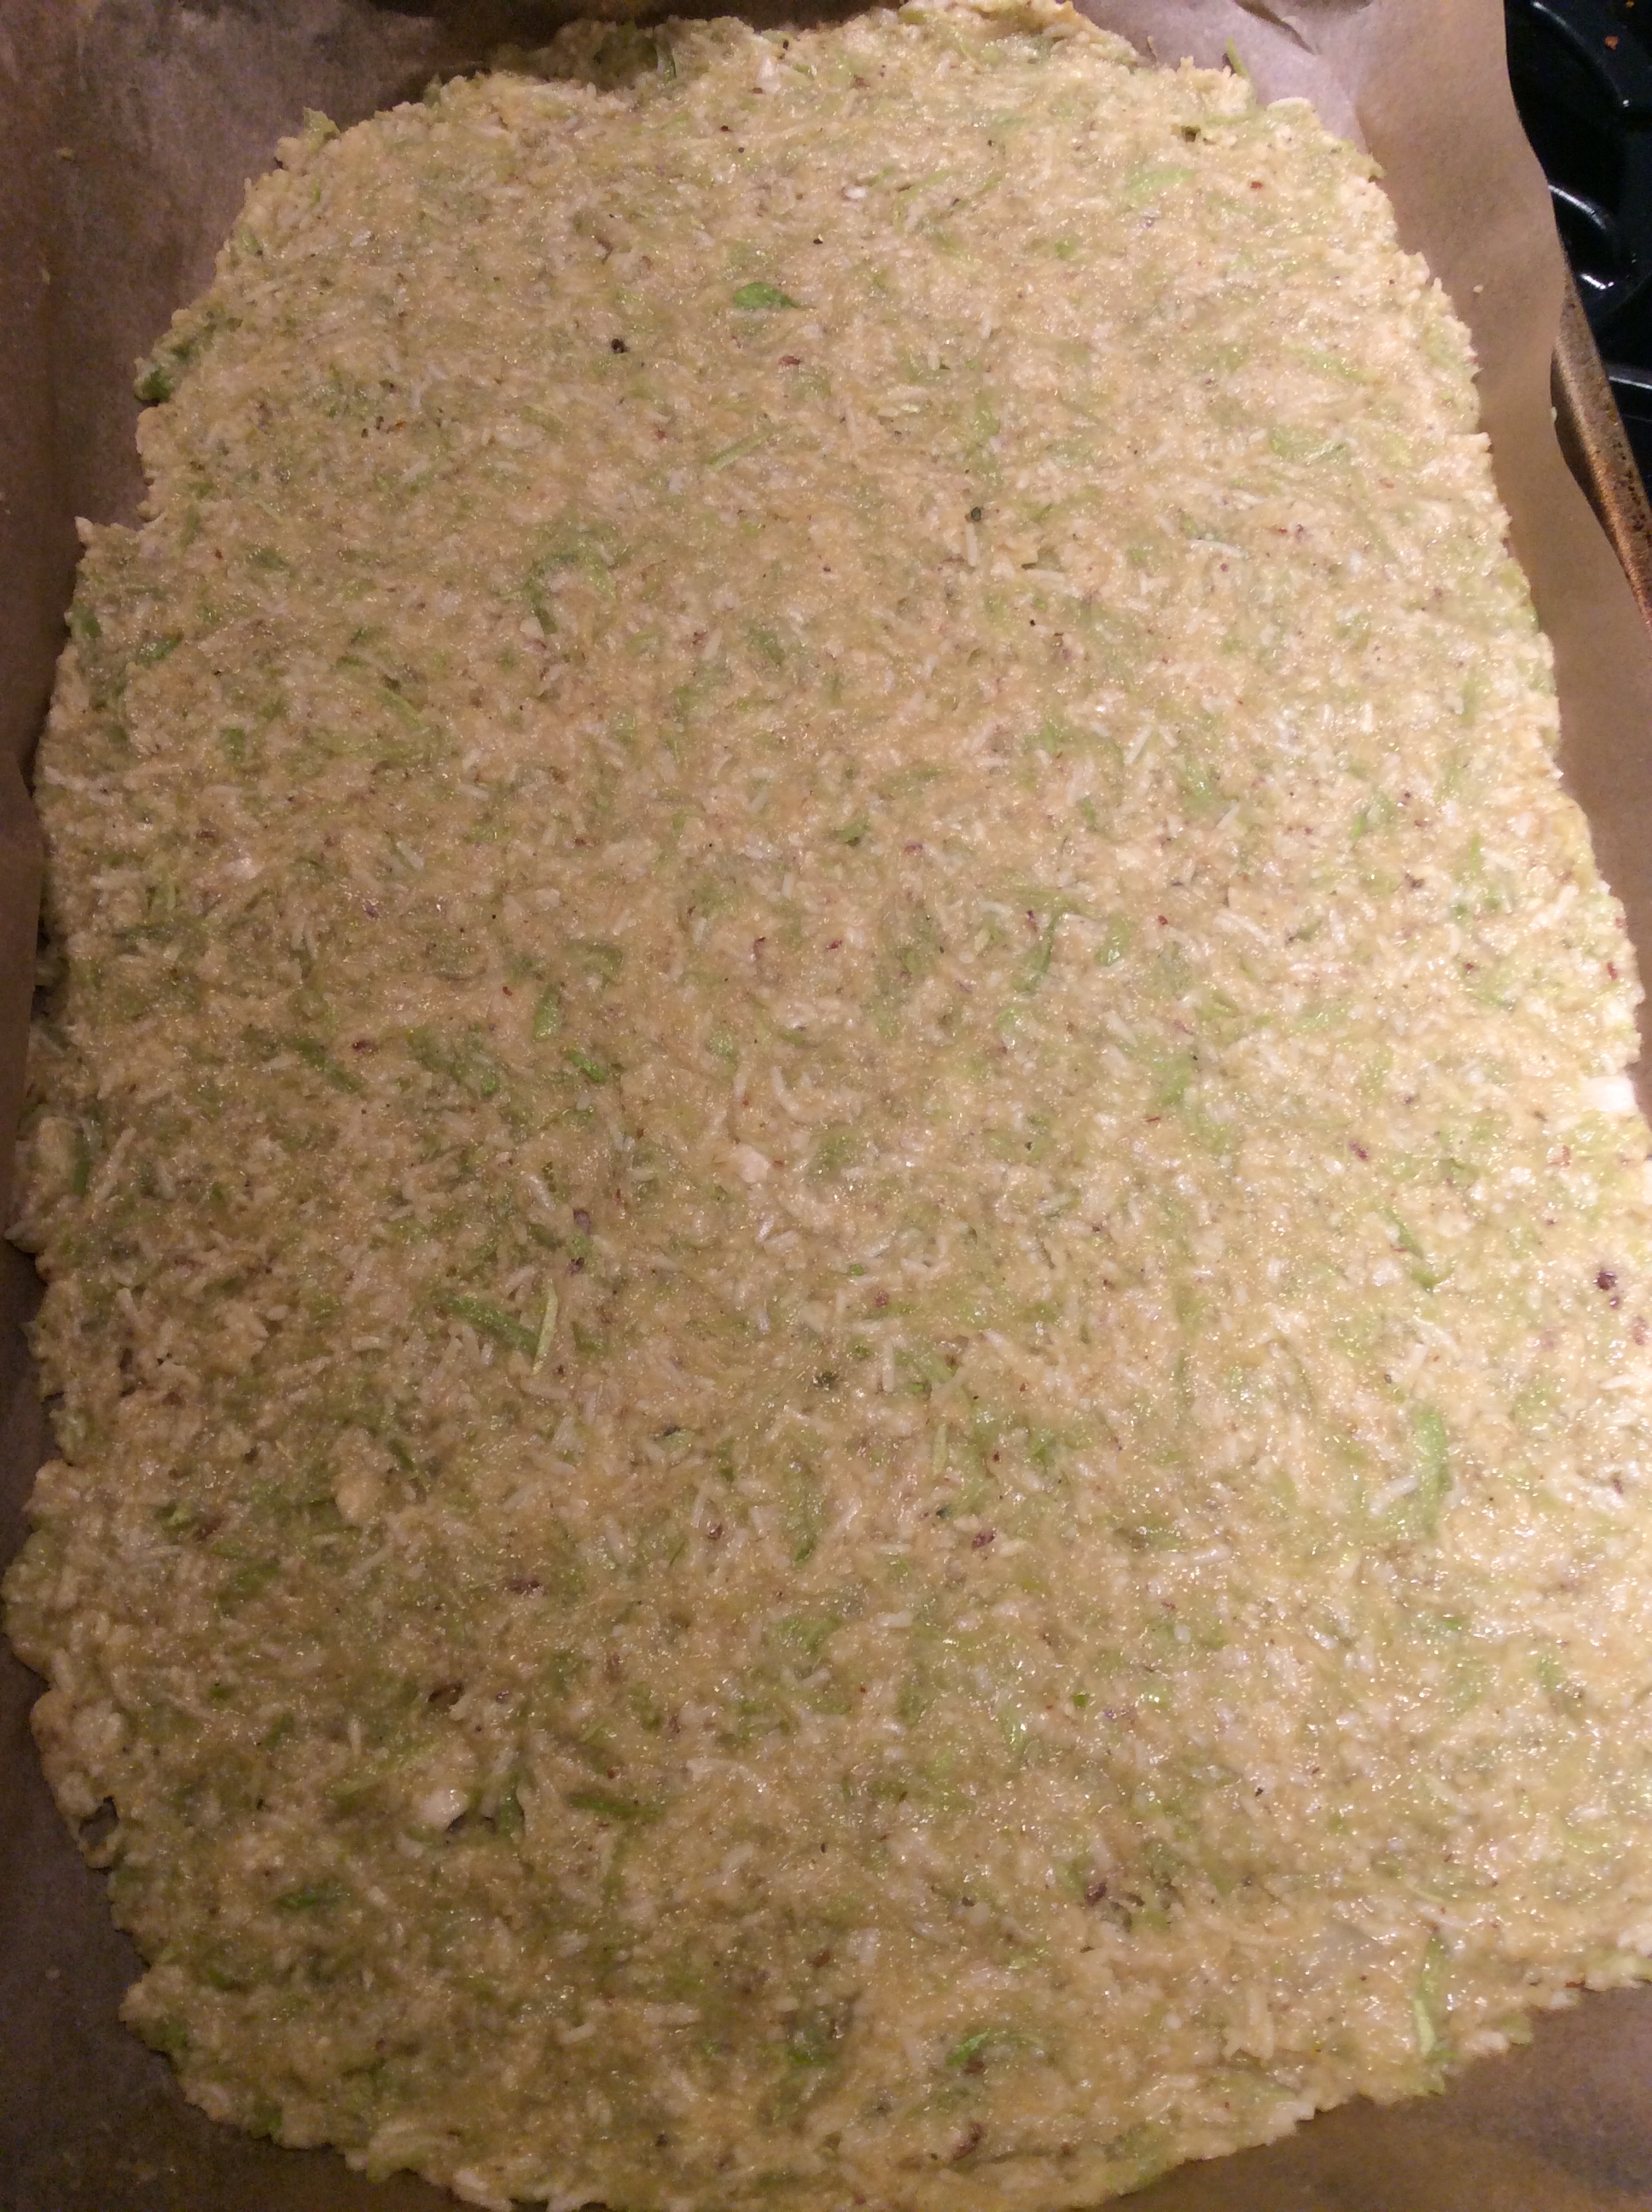
Preheat the oven to 425. Now line a baking sheet with parchment paper, oil your hands with olive oil, and begin pressing out the mixture into a thin even oblong.  Generally I aim for something a little less than a quarter inch thick, but if you plan to use it for breadsticks or a pizza crust you may want it a little bit thicker.  Make sure that there are no holes. The dough is lumpy and you will have to keep patting it down with the flat of your hands.

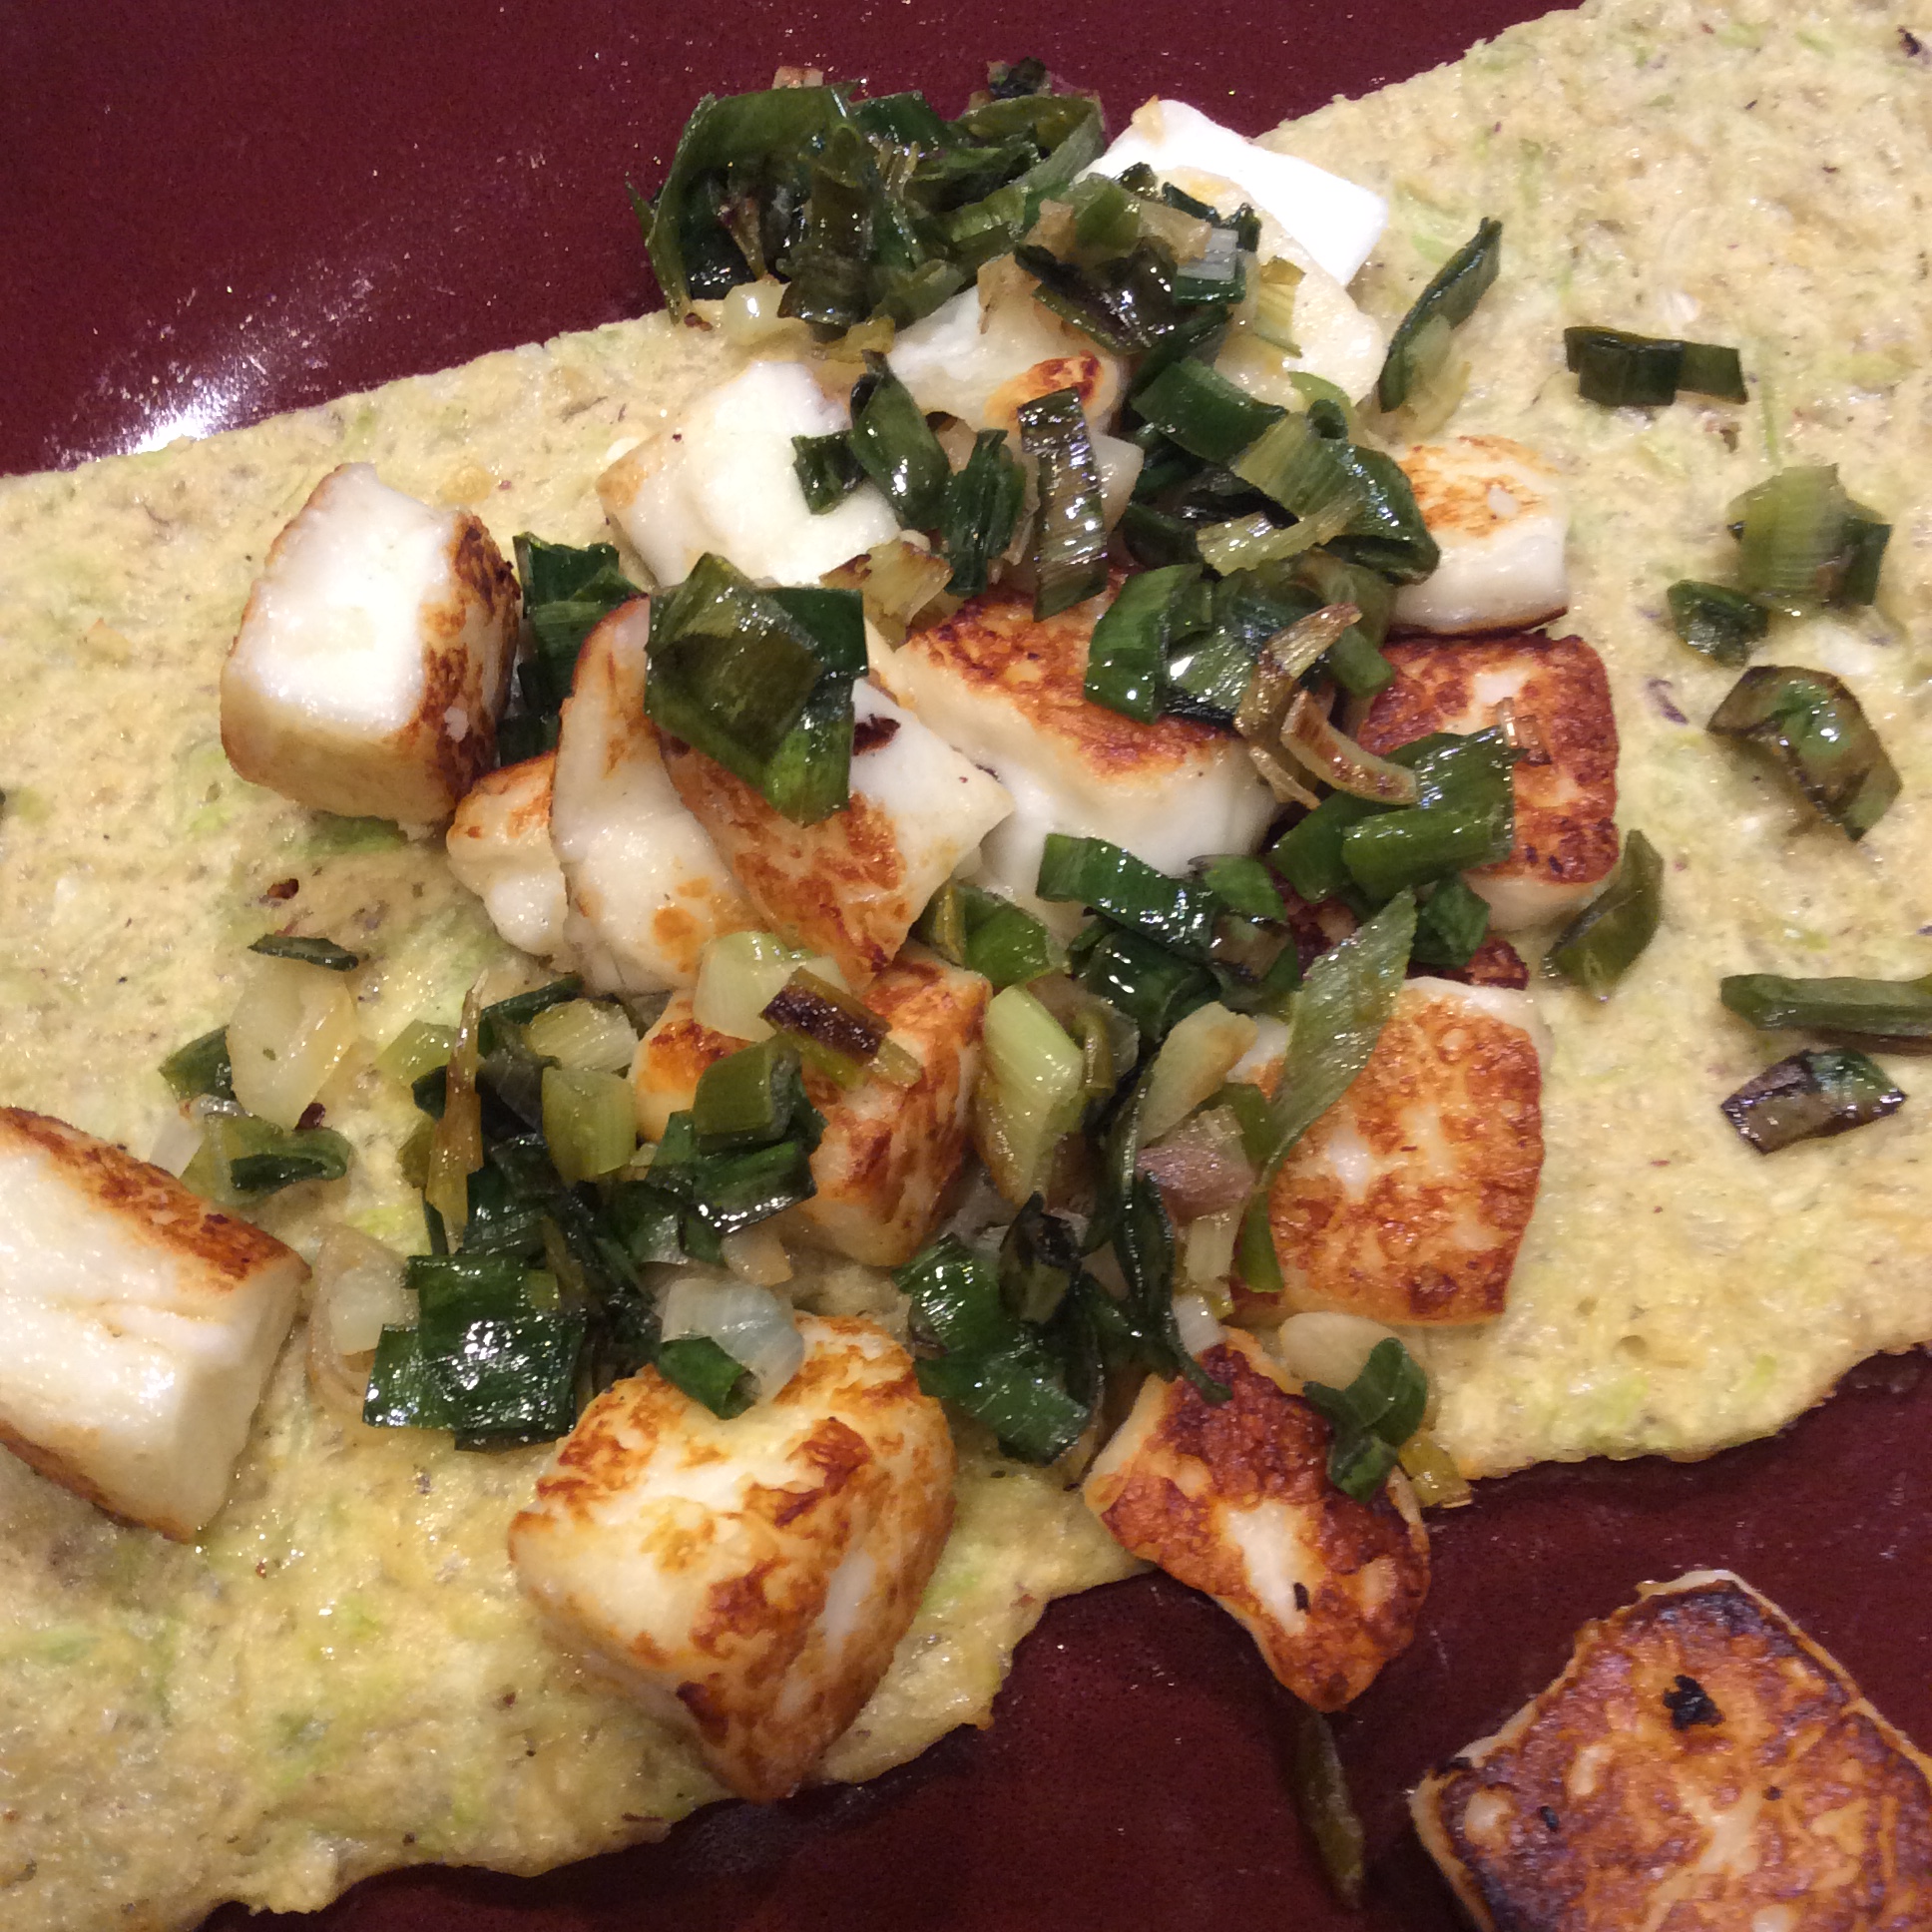
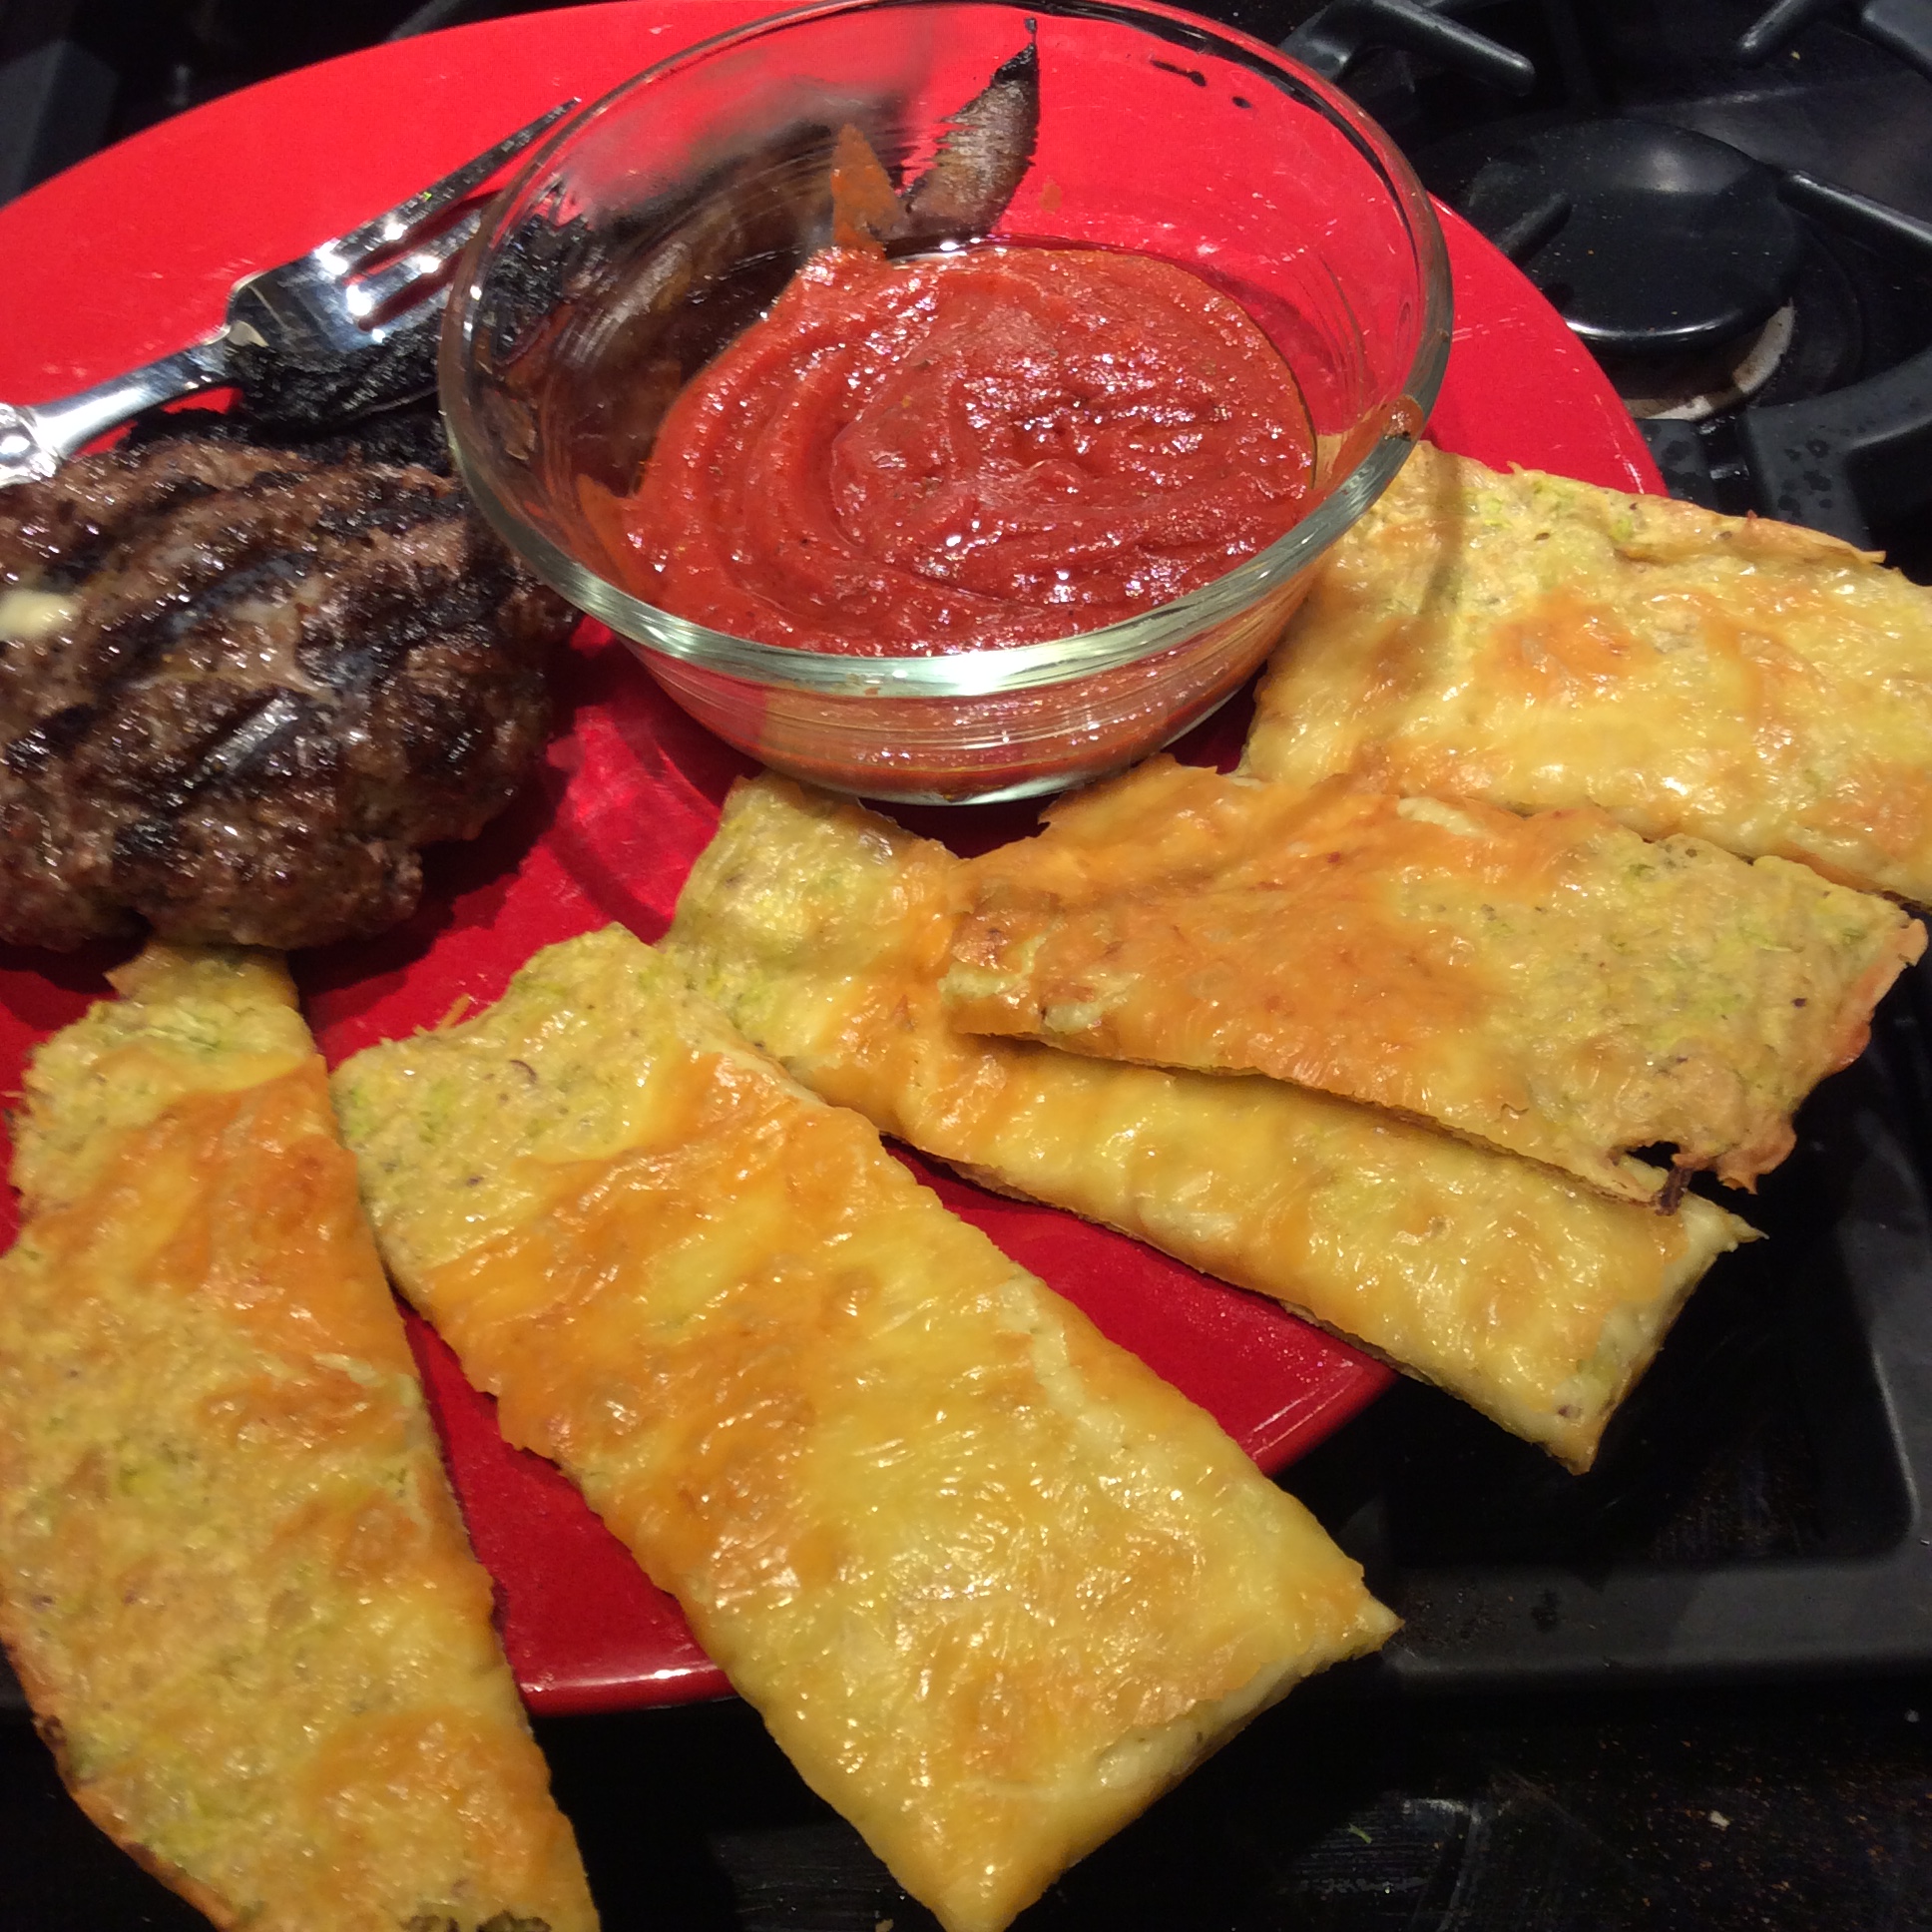
Bake at 425 until done to the right degree for your purposes.  It has to be baked enough to hold together well, but if you want to use it as a wrap, you will have patted it out pretty thin and should bake it only until it is cooked through and will come off the parchment paper in one piece but is still flexible.  If you want to make sticks as shown above, it should be more crisp, and the same goes for a low-carb pizza crust.

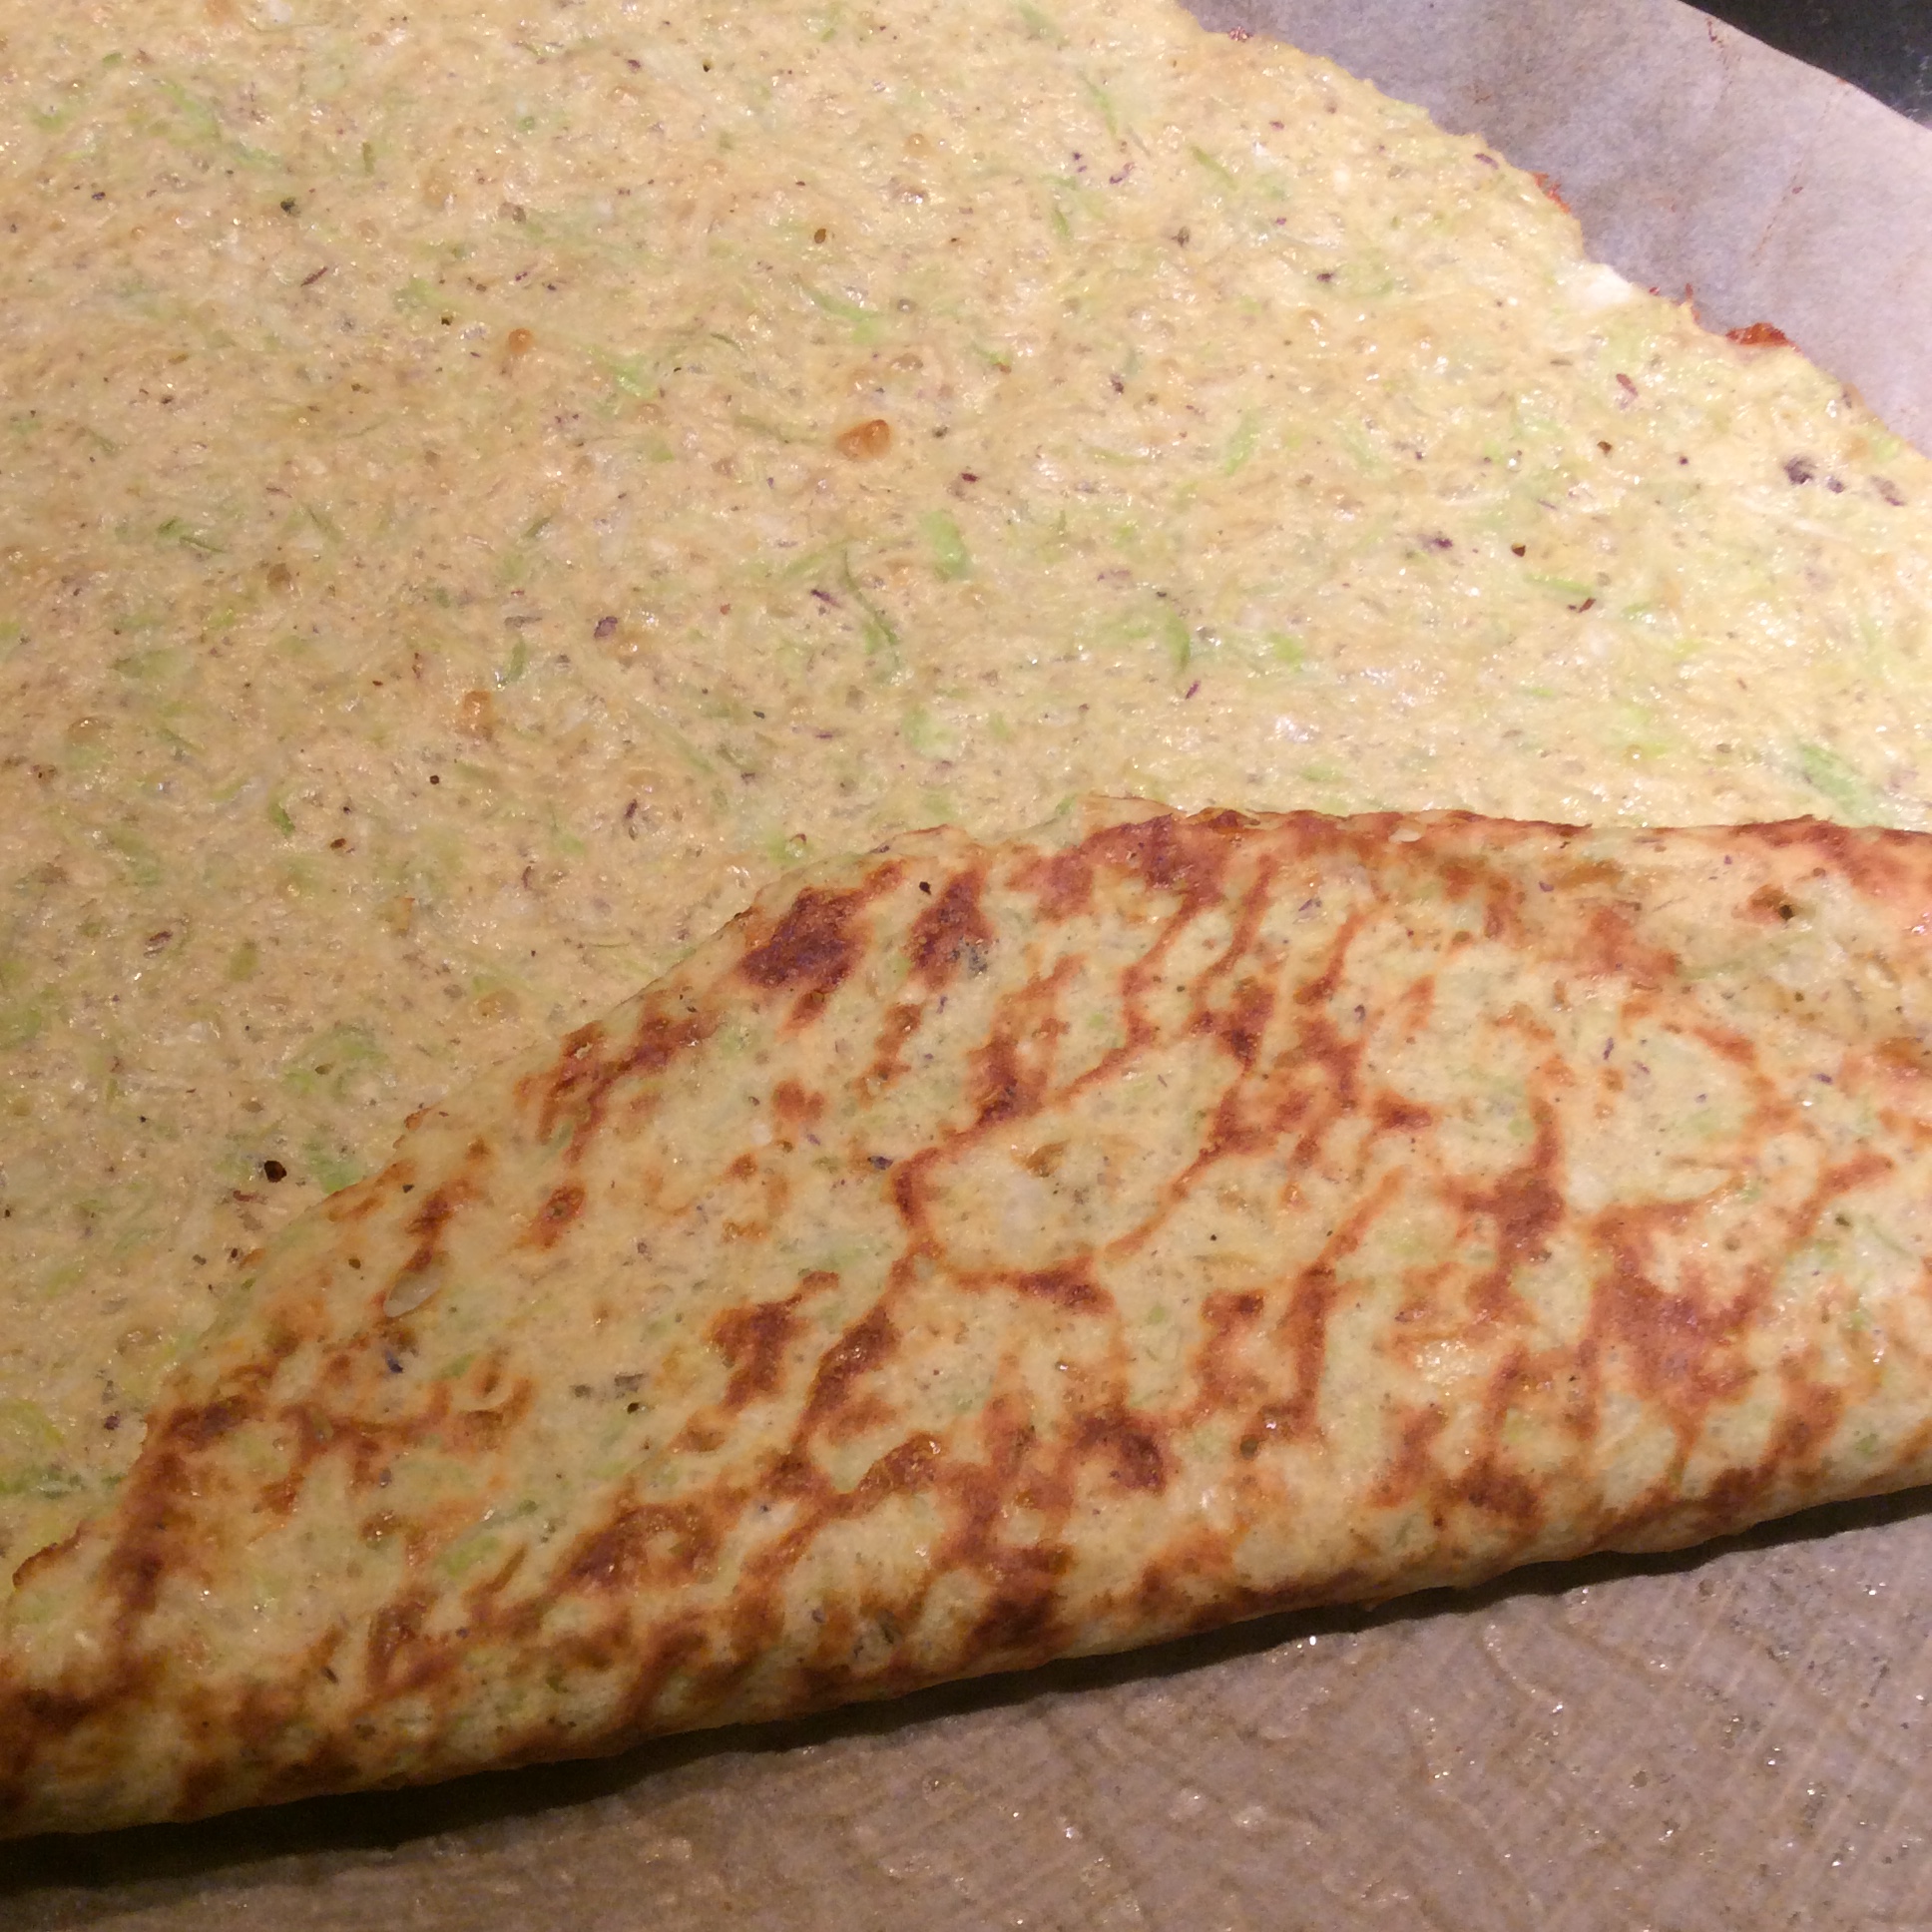
Above, it’s just cooked through, browned on the bottom, and right for making wraps. To make the breadsticks shown above, once it is baked to the right degree, top with another half cup of shredded mozzarella  and some chopped roasted garlic.  Return to the oven and broil until the cheese is melted and a little bit browned.   It is good dipped into your favorite pizza sauce, preferably the kind that you make yourself.  Any kind of herb pesto or sour cream dip is also good.

To make an impromptu low-carb pizza, cook the flatbread until fairly crisp. Brush the top lightly with a thick flavorful pizza sauce, coat with shredded mozzarella, and top with pepperoni, sausage,  or what you will.  Return to a very hot oven and bake until the cheese melts.

It goes without saying that if you insist on the wonderful malt flavor of really good bread, you need to eat really good bread and there are no substitutes.  But having a few options like this one means that you can save the great bread for very special treats and keep your carb intake down the rest of the time.  This is also a good way to take in extra vegetable fiber, with all its health benefits.


The Squash Chronicles I: Ambitious Summer Squash

Every year  I lose my zucchini to diseases in late summer, despite the fact that I always plant whatever is most highly touted for disease resistance. This year I decided to try some new squash types  and see if I could overcome the disease issues, and still get some summer squash. The two I planted were Thai bottle squash and Italian Serpiente squash, both from the entrancing Baker Creek seed catalog.   I planted a couple of seeds of each in the compost pile next to the chicken coop, and thinned to one plant of each when they were small.  The results were as you see above; they are quite frighteningly successful. The vines are up to 30′ long, so be prepared.  They covered the chicken coop in nothing flat, providing some nice shade for the hens, and I was amused to note that wherever squash formed hanging down into the chicken run, the hens would jump up and peck them down to stubs.

Both can be picked at any point when your thumbnail will still penetrate the skin without significant pressure, and used just like zucchini.  They taste like zucchini, by which I mean they really have very little taste and need some help from seasonings.  When cooking any summer squash I prefer to slice it, salt heavily, and let it sit for 30 minutes to an hour and then squeeze out the large amounts of excess water by wringing the squash slices in a dish towel. Proceed to cook any way you like.

I like to make low-carb wrap bread out of  summer squash, and I’ll write about that in the near future, but today I want to encourage you to try marinated squash. Slice up one zucchini or a comparably sized chunk of a serpiente or bottle squash or whatever, salt heavily, and let sit 30 minutes or so. Meanwhile, chop a clove of garlic and slice a scallion or two thinly and put in a bowl large enough to hold the squash with half a cup of very good red wine vinegar. Add a half teaspoon of salt ( most of the salt you put on the squash will be squeezed away with its liquid) and herbs to taste. I like a few sprigs’ worth of thyme leaves.  Wring the squash slices out thoroughly in a clean dish towel, then fry in olive oil until the texture is the way you like it, which for me is done but not mushy. Dump the hot cooked squash slices in the bowl, stir the vinegar mixture through, and let cool to room temp, stirring a few times to distribute the seasonings. It can be made ahead and sit for a few hours, or refrigerated until needed, but do let it warm to room temp before serving.  When you are ready to serve, drain off all the excess vinegar,  pressing a bit to get any excess liquid out,  and toss with a quarter cup or so of your best olive oil and maybe add a small handful of chopped parsley or chopped young carrot leaves.  I like this as a side dish, and if you have some roasted pinenuts to sprinkle over the top, that adds deliciousness. Some crumbled queso  fresco would turn it into a light lunch, and it could be tucked into a wrap bread and eaten with a dip of seasoned yogurt or hummus for a more substantial meal  that would suit plant-based or vegetarian inclinations. Using a mildly sweet late harvest vinegar or adding a dash of honey, and finishing with chopped roasted salted pistachios would give the dish an interesting Sardinian sweet-and-sour turn.

As you can see above, the use of red wine vinegar gives the dish a pinkish cast that some people might object to. I use red wine vinegar because I make my own and love the flavor, but if it bothers you just use white wine vinegar instead.

The whole concept of a cooked vegetable salad goes as beautifully with Asian meals as with western style dinners. Try using rice vinegar and palm sugar or sweetener of your choice, adding a few teaspoons of chopped ginger along with  the garlic, and garnishing with scallions. Some slivered chiles would be great if you like heat,  and a handful of chopped cilantro would make a pretty and tasty garnish.


An Easy Southeast Asian Evening: Thai-ish lettuce wraps

In hot weather  I start to crave the food of hot climates, especially Thai food.  Since I eat as few carbohydrates as possible, much of what I cook is pseudo-Thai, but it can still be delicious.  Having some good condiments on hand can be a shortcut on an evening when I worked late, and my favorite Thai condiment is nam prik pao.  Once I made my own according to the complex directions in David Thompson’s authoritative and addictive cookbook Thai Food,  and it was the best I ever had, but it is quite an undertaking and involves deep frying a succession of ingredients before grinding them together, and deep frying is not my favorite cooking modality.  Too messy.  So except for special occasions, I use the fairly good bottled one from Mae Pranom.  Just as a warning, this excellent Thai company makes several different condiments that all say “Thai chili paste” on the label, and are only fully and accurately labeled in Thai.    So my recommendation would be to order through Importfood.com, a very good US purveyor of Thai ingredients, and get the one that they say is nam prik pao.  While you’re at it, order some Shark brand Thai sriracha sauce, which is different from the Vietnamese style and can be hard to find.

Besides the nam prik pao, you will need a pound of good ground meat.  I used wild boar because I had some in the freezer, but ground goat, ground pork, or plain old ground beef would all be fine.  The vegetable component was a pound of Oregon Giant snow peas. Any good snow pea or sugar snap pea will do.  Lettuce leaves are needed for serving, and I used leaves of the hot climate celtuse-type  lettuce Balady Aswan,  but romaine is fine if you don’t grow your own.  Other needed ingredients are a small knob of ginger, two cloves of garlic,  one large or three small green onions,  fish sauce,  coconut cream (unsweetened) or coconut oil for cooking, sweetener of your choice, and a large handful of chopped fresh mint.

Blanch the snow peas or sugar peas in boiling water for two minutes, drain and cool in ice water, and slice diagonally.  Slice the scallions diagonally, and chop the ginger, garlic,  and mint. Now you’re ready to cook.

Heat a skillet or wok over high heat and boil the coconut cream hard for a minute or melt coconut oil. Stir-fry in the chopped ginger and garlic for a minute, then add 1/4 cup of nam prik pao  and fry until it looks like the picture. Add your ground meat now and continue to stir-fry over high heat. When it’s about half cooked, add the sliced green onions, sweetener to taste, and fish sauce to taste. I used a quick squirt of liquid sucralose and about 3 tablespoons of fish sauce. If you’re being authentic and using palm sugar, I would guess that about two tablespoons would do it. Go easy if you’re not sure, because you can adjust later. Stir-fry until the meat is completely cooked, add the blanched snow or snap peas, and cook over high heat another minute or two until they are heated through. Taste and correct the seasoning if needed.

I should add that I was using my large perennial green onions, and in the hot weather this time of year they take a bit of cooking to become tender and pleasant to eat. If you are using the store-bought kind, you can add them closer to the end of the process. Know your ingredients and adapt your methods to get the best out of them.

Top with chopped fresh mint just before serving and serve with stacks of lettuce leaves. I like to add a sweet-hot dipping sauce made with equal parts fish sauce and rice vinegar, artificial sweetener added until it’s pretty sweet, and sambal oelek or sriracha added until it’s pretty hot.

Once you have the basic formula, the dish is endlessly accommodating.  Use whatever ground meat you have, and I speculate that ground chicken or salmon might work well too. If snap or sugar peas aren’t in season, consider green beans ( be sure to blanch until tender) or greens of almost any kind. Collards could be delicious, especially if preblanched for a minute to improve tenderness.  Even slightly bitter greens are worth considering, although I would reduce the quantity and not use anything more than slightly bitter. But the coconut fat and sweetening does a lot to  ameliorate a small amount of bitterness.  Broccoli would be delicious if blanched and then cut in small cubes to fit into  the general texture of the dish. Mushrooms  are another excellent possibility, and dried soaked shiitakes cut in cubes would be good but mushrooms that you grow yourself might be even better. Some mushrooms such as oysters are pretty juicy and it is worth dry sautéing them in a separate pan to get excess liquid out before adding them to the mixture.

Other herbs are worth considering. Thai basil is a natural, and Italian basil is  something that I would consider if I did not have Thai basil or mint handy.  It just occurred to me that the licorice-sweet leaves of sweet cecily might be really good in this context, so I will be trying that.

Personally I get very annoyed with finding most  Thai food in America smothered in chopped peanuts, but I admit they’re delicious and they do add a good texture. If you want to explore other texture additions, a little chopped jicama or maybe even raw Jerusalem artichokes would add a sweet crunch.


The hallmark of a good basic recipe is that you rapidly learn how to make it come together easily and adapt to your whim of the day and what is available in your garden.  I always keep ginger, garlic, fish sauce, and some basic Thai condiments in the house, but ultimately your supply of basics may be different.  If you want to announce your food as authentic Thai, then by all means read David Thompson’s cookbook and follow his lengthy and exacting directions. But if what you want is to have delicious food on your table that suits your needs and what is available in your garden, then be imaginative and don’t worry yourself overmuch about authenticity. Just pay attention to the basic logic of the flavors.

The Oregon Giant Pea and the Taste of Early Summer

I think that I have written before about my entrancement with the snap pea/sugar pea called Orgeon Giant. In my opinion, it’s the most delicious thing of its kind  and I gorge on this type for as long as its season lasts. I begin to harvest my early spring planting in late May, waiting until the pods are bulging but not round and making sure to pull the strings off, and at first I eat them blanched in boiling salted water for four minutes and then sautéed in butter with a pinch of salt for a couple of minutes. They go well next to everything.

But as the season gets into full swing, I have enough of them to get ambitious. I continue to be obsessed with Joshua  McFadden’s new cookbook Six Seasons,and tonight I happened to be struck by his addition of English peas to Pasta Carbonara. I don’t eat pasta for carby reasons, but it occurred to me that the traditional carbonara flavors, while rich, are also rather full and gentle, and might go wonderfully with sugar peas even if there were no pasta involved. I hasten to add that there is no question that a large plate full of sugar peas will not do anybody’s carbohydrate count any good. However, we all have our vices, and I do tend to allow anything green.

Have all the prepping done before you start cooking because it goes very fast.
So I started with 2 quarts of enormous peapods, loosely packed. I picked them over and pulled the strings off, and cut them diagonally into pieces roughly an inch long as you see above.
There is no question that piggy products do peas a world of good. I did not happen to have the classic carbonara ingredient pancetta on hand and so I decided to use a thick slice of mild applewood smoked bacon. I cut it into cubes a little bigger than 1/4 inch square. I chopped two cloves of fresh garlic very fine, finely  chopped a small onion, grated about a cup+ of very good Parmesan, and separated out the yolks of three eggs. A quarter cup of heavy cream ended up smoothing out the mixture.

The bacon cubes were rendered gently over medium heat, and the onion and garlic thrown in when they were about half cooked. This mixture was cooked together until the onions were cooked soft without allowing it to color, and meanwhile a couple of quarts of salted water were brought to a fast boil. The heat was turned off under the bacon mixture, and the chunks of pea pods thrown into the salted water and cooked for exactly 4 minutes. The pea pods were drained well in a strainer but not shaken totally dry, and then returned to the hot saucepan, the bacon mixture added, the cream poured in, and sautéed over medium heat for about a minute. Now, working very fast off the heat and stirring  continually with a wooden spoon because a metal spoon would break up the peapods, the egg yolks were added and tossed around for a little under a minute, until the cream looked a bit thickened. Then the Parmesan was tossed in off the heat. When the sauce amalgam look thick and creamy, about a half teaspoon of freshly ground pepper was stirred in and the dish was immediately plated. You can add a little more cheese on the top if you like. Serve hot with some additional black pepper ground over the top.
This may be the purest expression of the sugar snap pea pod, somehow even more classic than the simple blanched pods. The pods retain some texture, and the swollen peas that float around the finished dish are pure essence of early summer. This is a main dish  and if you accompany it with some good white wine, you are very unlikely to want anything else.