Posts Tagged ‘nettles’

Nettle Ale, and notes on the Drinkmate

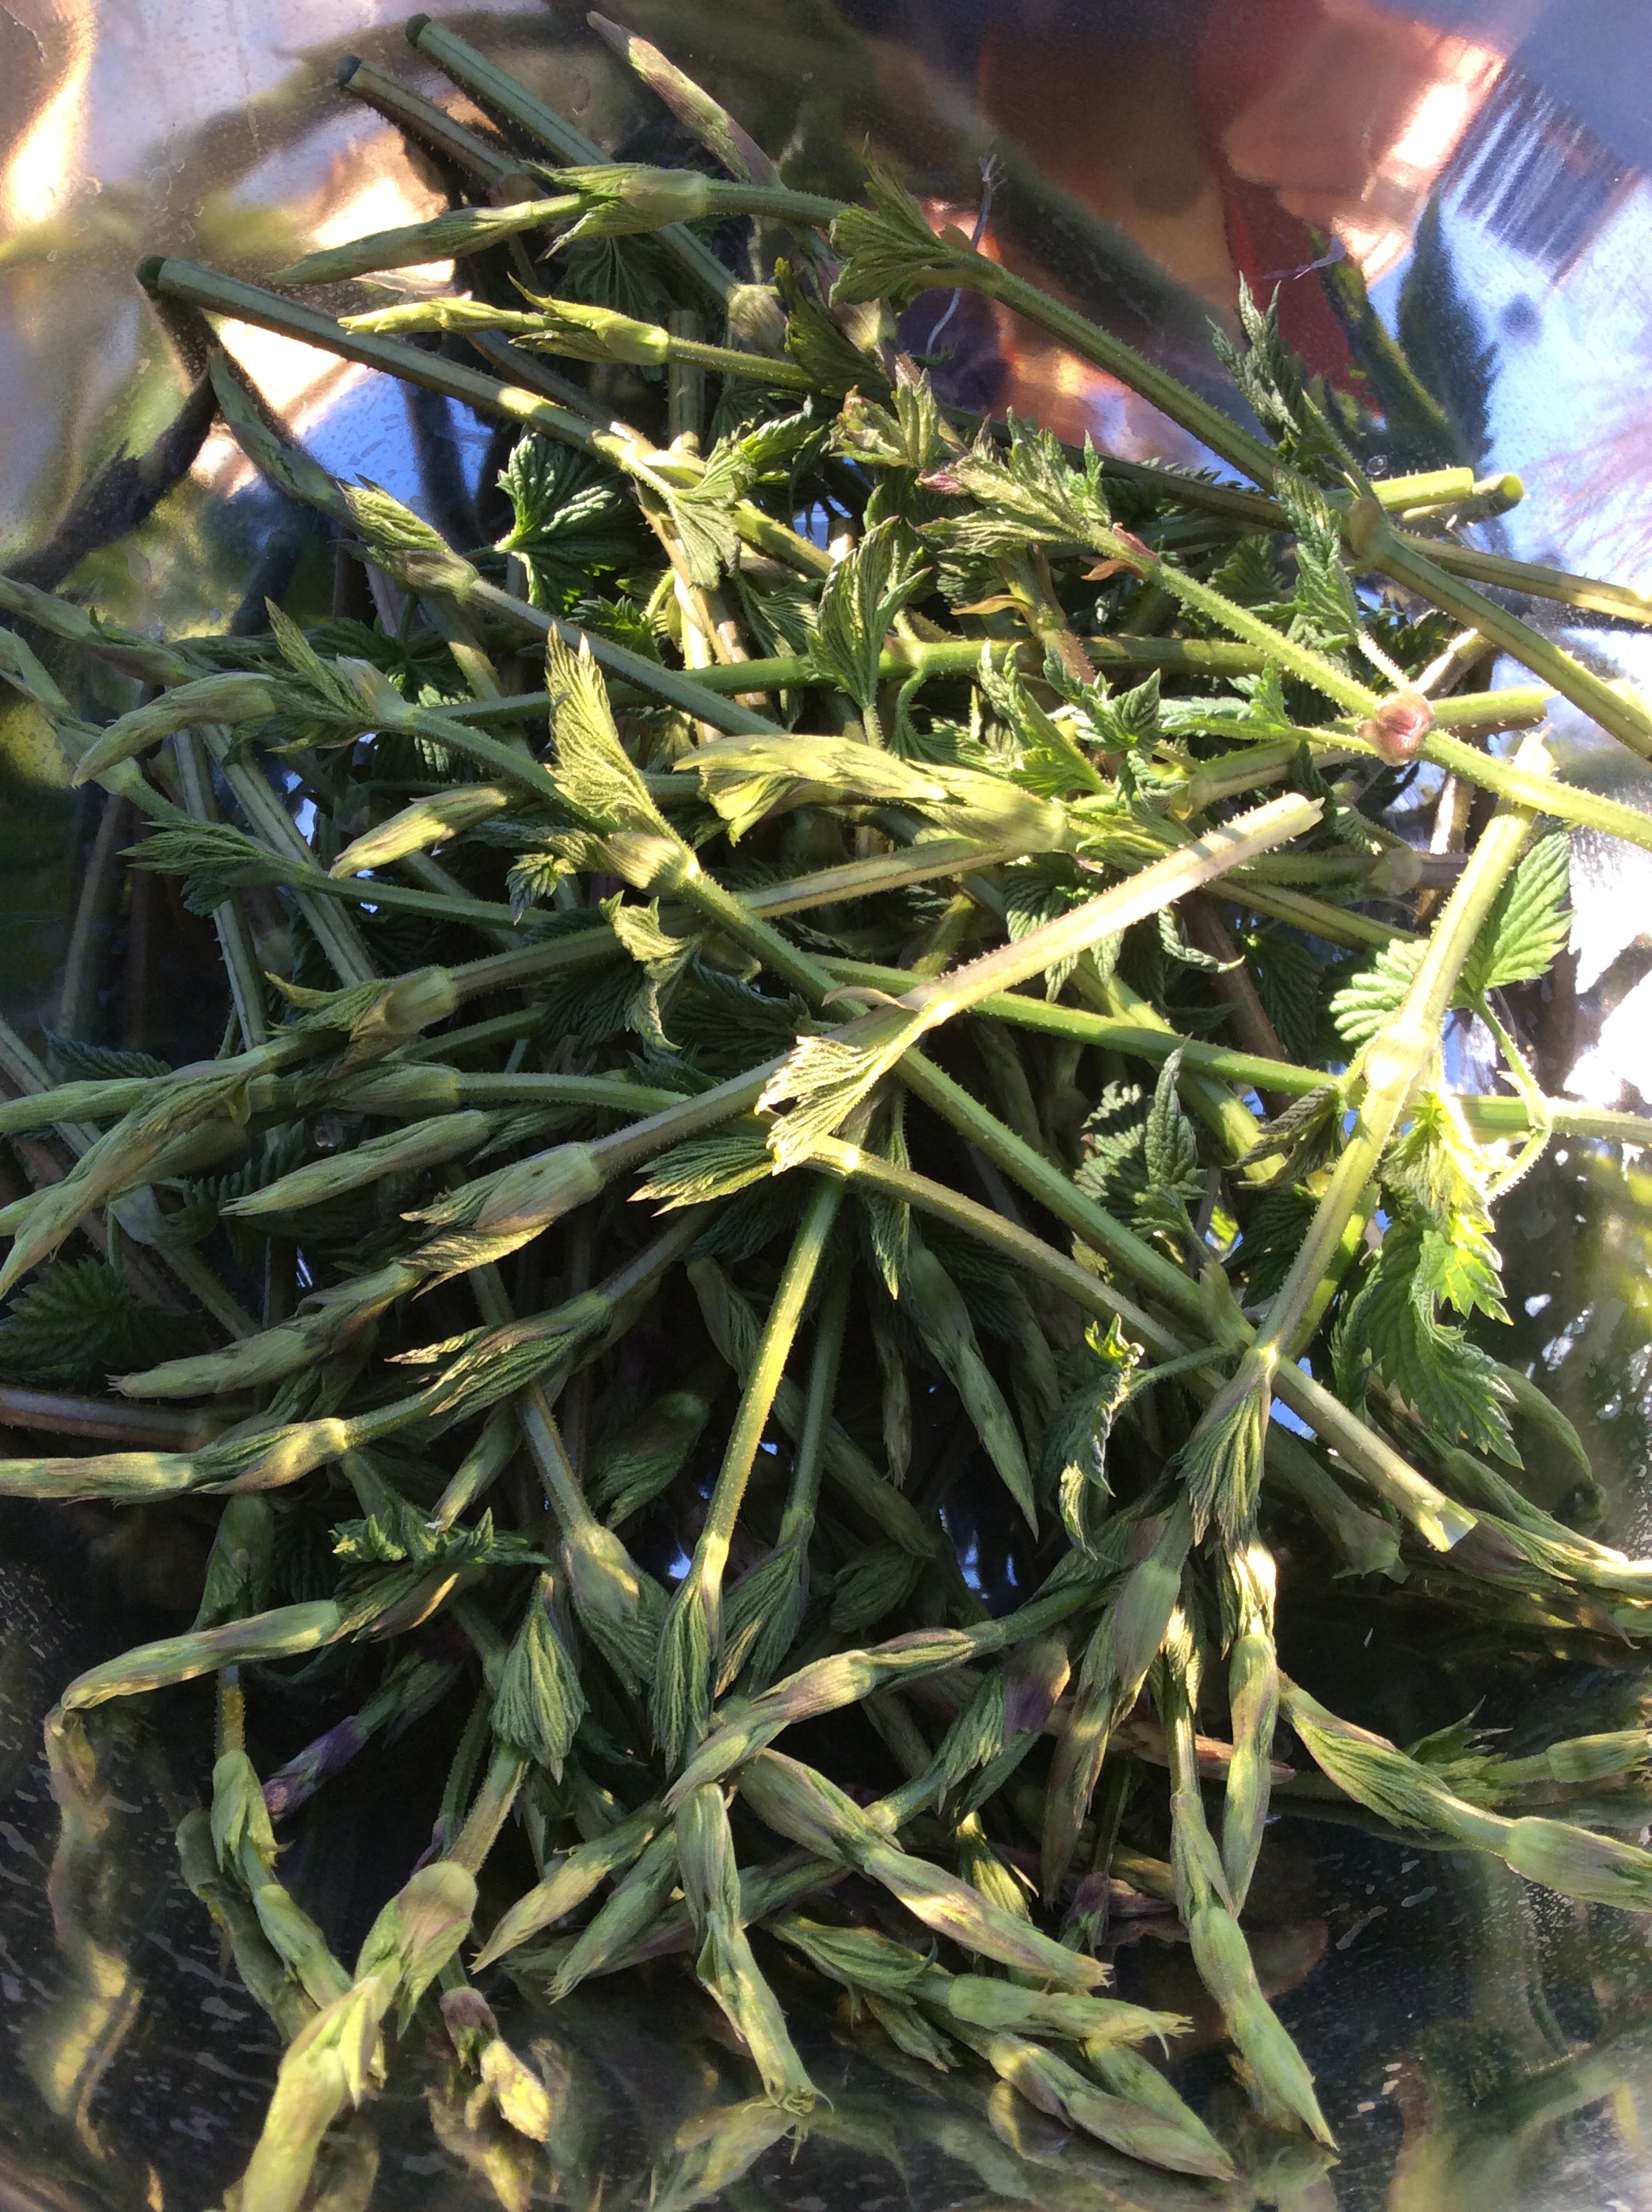
One of the nicest things about having an active permaculture garden is that you have strange plants around you in all phases of growth and you’re led to read and to experiment. A couple of months ago I found myself eyeing my healthy nettle patch, where the nettles were almost three feet tall and well past the greens phase, and wondering what could be done with them. I got on the Internet and came across British recipes for nettle beer. I was curious about it because the cooking water from nettles has a strong and distinctive taste that I don’t find exactly pleasant, yet people reported liking the ferment. Well, no harm in trying. I started with three gallons of water in my huge stockpot, and picked (with sturdy leather gloves) about 75 nettle tops. I also added 10 large hops leaves and 10 large Concord grape leaves on grounds that, if the brew was revolting, at least it would contain some resveratrol and chalcones. I boiled all this at a full rolling boil for fifteen minutes, and then let it cool. I fished all the plant material out with a strainer scoop, pressed all the residual juice out and returned it to the pot, and gave the pressed mass of leaves to the chickens. No sense in wasting those nutrients.
I brew by instinct and not by recipe, and I think the next step is the most important: TASTE THE COOLED JUICE AND THINK ABOUT THE FLAVOR before sweetening the liquid. The sweetness will be fermented out, so it’s important not to think of it as part of the finished flavor.  Don’t think in terms of a recipe that you’ve read. Think about what it needs to improve the flavor, and try to supply that.  This juice was not promising, with a strong nettle taste and little other flavor. It lacked any acidity so I added the juice of four oranges and one lemon, giving it a light but pleasant acidity. I decided to go with the strong herbal flavor and added a large angelica leaf and stem, which would remain in the fermenter during primary fermentation.  I also added back the squeezed rind of one of the oranges. Use organic if you do this. Next, I needed to give the yeasty beasties something to eat. I sweetened with one pound of organic sugar per gallon of water, for an eventual alcohol level of 4-5%, just above near-beer, and pitched a yeast intended for hard cider. This all went into the primary fermenter, where it bubbled merrily for a couple of weeks. When the bubbling slowed, I racked it into a clean fermentation bucket, leaving the angelica leaf and rinds behind with the sediment. I tasted  the brew at this point,  and to my surprise the distinctive nettle taste was completely gone.  I could taste the aromatics from the oranges, a slight and becoming touch of bitterness from the angelica and hops leaves,  and an overall mild herbal flavor, and while the brew  still tasted raw and unfinished, it was pleasant.  After another two weeks, it was racked into a keg and put under carbonation.   Chilled and  carbonated, it has become one of our favorite choices for a quick glass of something-or-other in the evening.  It is blessedly  low in alcohol and good with light meals like salads. It tastes best sweetened slightly with a drop or two of liquid stevia or similar added to a glassful. We like it so much that I promptly started another batch dubbed Stinger Brew II,  but this time I left out the oranges and just added the juice of one lemon to a 4 gallon batch.  When primary fermentation is finished and I rack it off for secondary fermentation, I will taste and see if it needs any more acidity, and I plan to dry hop it at this stage because my hops should be in full bloom at that point. Where Stinger I is more like a light herbal wine, Stinger II will be more like a light true ale.  If you really want it to taste like a beer rather than a wine, you could use malt syrup  or malt extract  to sweeten the juice, but I like the more winey  quality that comes from using sugar.

So, as I am always saying, embrace the experimental nature of cooking, brewing, gardening, and life.  If I did this commercially, I would have to keep very exact measurements for consistency between batches and would have to try to maintain each batch exactly like the one before, since that is what customers expect.  But my ingredients are variable, my process is variable, I am variable, and I do not want two batches that taste the same.  This is very freeing.  Liberating yourself from the tyranny  of the recipe is one of the nicest things that can happen to a cook and brewer.

Beer, wine, and mead can be carbonated by charging with some sugar, bottling in swing-cap bottles, and waiting. But there are easier and surer ways. If I want a large quantity carbonated, my husband oversees a kegerator made for refrigerating and carbonating 5 gallon kegs, and then the bubbly stuff is dispensed via a tap. It’s very handy, but needless to say, you don’t necessarily want 5 gallons of any one thing. In those cases, I use the Drinkmate. It’s a sleek carbonation device that uses smaller CO2 canisters and special bottles to carbonate a liter or less at a time in just a couple of minutes. There are a number of carbonation devices on the market, and they all work just fine for carbonating water. The Drinkmate is different because it will carbonate any liquid. Carbonated juice could be delicious if you drink juice, and it occurs to me that sparkling mint tea would be delicious in the summer.You can read more about the device here. If you want to buy one, you can get it here. Replacement CO2 cylinders are available at Bed Bath and Beyond, and empties can be traded in there for half-price new cylinders. Order a few extra bottles when you order your Drinkmate. I’ve noticed that when plain carbonated water is available in the fridge, I drink more water in total, and sparkling water is better with meals than plain water. Carbonation also brings out the flavor of water kefir, which I make in large quantities. With or without a drop of sweetener, it’s delicious.

The First Nettles of Spring

This year we ate all winter from the broccoli and greens growing under frost blankets. Even so, it remains a major spring event when the first nettles are ready to pick. They taste so good and give such an all-over glow of virtue.  There are people who think that nettles have special medicinal benefits. My own belief is that all dark leafy greens have medicinal benefits, and the important thing is to eat as wide a variety of them as possible. But that first meal from the uncovered soil does confer a special feeling that spring is finally and truly here.

If you aren’t familiar with them, consult a good wild-food field guide, and be aware that the sting is quite uncomfortable and can last hours. Have leather gloves handy for picking. They’re ready to harvest when 6-8” tall. I cut off the top 2” or so, including as much leaf and as little stem as possible.

I turn them into a big bowl of water and stir gently with a wooden spoon for 2-3 minutes to get dirt off.

My favorite tool for lifting them out of the water, leaving any dirt that was present at the bottom of the bowl, is a pair of “salad hands” that somebody once gave me as a hostess gift. A large slotted spoon would work too. I make sure to throw the water on a garden bed. We live in the desert, after all.

Cooking nettles is a breeze, but in my opinion chopping is a necessary step, to eliminate stringy stems. First I put them in the pan with about half a cup of water, and cook over high heat, stirring, for about two minutes or until thoroughly wilted. The water should be pretty much gone. Turn out on a cutting board, let cool for five minutes or so, and chop. The cooking has eliminated their capacity to sting, and you can handle them with impunity now.

The flavor of nettles is rather like spinach, but deeper and richer, with a slight feral twist. I especially like them creamed, and always eat the first ones this way. Slice up two big fat green onions, sauté them in butter until cooked, add chopped nettles, sauté another minute or so, add heavy cream just to cover, boil for a couple of minutes until the cream is thickened, and salt to taste. Serve with freshly ground pepper and nothing else, so that you can taste the true flavor of the nettles.  You can also use netales in absolutely any way that you would use cooked spinach. They are infinitely versatile, and I have never served them to anyone who disliked them.  After the initial cooking and chopping, they can be frozen for later years. Whenever I wash and cook nettles, I try to make about twice as much as I need for immediate use, so that I can freeze the other half.

They can be dried for tea, although I do not care for the watery tasting tea that results and don’t bother.  Adding a twist of orange peel or something similar would give more flavor. I am not much of a tea drinker, but if you are, this might be worth considering.

If, like me, you live in an area who are nettles don’t grow naturally, there are some considerations to growing them in your yard.  First is obtaining them. When I first started growing them in central New Mexico about 12 years ago, I could not get seeds to germinate and no herb nurseries offered them. I finally called an herb nursery from whom I was buying other things and asked if they could please find me some nettles.  The “plants” I received had clearly just been dug from the nearest roadside, and were little more than cut rhizomes in potting soil, but they grew just fine.  These days they are easier to find and a number of mail order nurseries have them.

Siting  must be done carefully, because of the sting and because they are invasive.  I have mine in an area surrounded by concrete, where they cannot escape to parts of the yard where I don’t want them.  My large dogs are readily able to avoid them, but I have heard that they could do real harm to very small dogs, so keep this in mind.   Growing them in areas where small children could get into them is an obvious no-no. They get tall and gangly and flop around, but if cut or mown back in summer, they stay neater and make a second crop in fall.  I hope that I am never without nettles in spring.


The Fall Summation IV: Perennials

I am beginning to plan for those future years  when digging in the garden is not such a pleasure. For that matter, there are already days when digging feels less like a hobby, pleasure, and form of worship and more like a chore, and so I am trying to have patches of perennials around that would carry me through a time when I did not feel able to dig.  I am also trying to create deep mulched beds that would make it possible to grow annuals with less work, but more about that in another post.

Some of the perennials that I have experimented with:

Stinging nettles are a real success. They have to be sited in a place where people and animals do not have to be exposed to them and get stung, but once established the only care they need is some water in my desert area, and cutting back in the winter so that the spring greens can be easily harvested. From now on, I will also cut back the withered stalks at the peak of late summer heat, so that when new shoots come up in the fall they can be gathered without much trouble.  They are delicious when cooked, and there is no more nutritious green, so I am even thinking of starting a second patch in another out-of-the-way corner of the yard. I have written about their kitchen uses in a number of past posts,  and I guess all I will say here about their flavor is that it is mild but somehow more intensely green than almost anything else that I’ve tasted.  They have to be handled cautiously and with gloves to avoid stings, but I have read with fascination that some people believe in putting the raw greens into smoothies, and apparently they are edible raw in that form. There are also contests in some places in Europe in which raw nettles are eaten in large quantities. Bizarre, but then, people are. Suit yourself.

Scorzonera  is a favorite of mine for its delicious stalks topped with tightly packed flower buds, and I have also learned to appreciate the leaves as a substantial but mild flavored addition to salads. It produces a small but useful second crop of leaves in late fall.   It tolerates drought  exceptionally well once established. I will be planting a lot more of this one. Be aware that I am talking about Scorzonera hispanica. There are other members of genus Scorzonera that have thready and insubstantial leaves. I don’t find the root to be worth the trouble of digging it up, and I leave it in the ground to make more leaves and stalks year after year with no labor on my part.

Salsify  produces long thin leaves which, in the spring, are tender and reasonably tasty.  The buds are probably the best part of the plant, although they are tiny and you would need a fair sized patch to have enough to be worth eating.  I have planted a new larger patch of it because I read somewhere that the long thin early spring leaves, when blanched for just a minute in boiling water, make a kind of “vegetable spaghetti“ that some people enjoy. I haven’t had a chance to try this yet but it would be a useful addition to my low-carb diet, which is “deficient “ in things to toss with butter and good Parmesan. Salsify  is often grown for the roots, but I find the root fairly bland and not that interesting. I would certainly eat it if I were hungry, though.

Asparagus  is one of my favorite vegetables, and this coming spring I will be planting more of the purple kind, which I find most delicious.  There is just nothing better. If only it were available in the garden for more of the year, I might not bother to grow anything else.

Turkish Rocket  makes delicious buds when harvested at exactly the right phase, with a bitter-nutty flavor very much like broccoli rabe. The season for it is short but pleasurable. I have never found any culinary use for the leaves or older buds.

Sorrel  makes one of my favorite simple sauces when chiffonaded and stewed briefly in butter with a little salt. Salmon was born to be grilled and eaten with sorrel butter. In addition to a healthy large clump of spring leaves, it makes another, even better clump in late fall. Very deserving of garden space. Above, you see the chiffonaded leaves used raw in salmon salad. It takes a surprising amount to make a good flavor impression, so think of sorrel as an ingredient, not a seasoning.

Hops  were planted all along my fences back when I used to brew beer. I don’t brew very  much anymore, but hops shoots are a lovely wild-bitter tasty treat that I look forward to every spring.  I am convinced that fancy preparation is a bad idea. Just rinse them, chop a bunch of them in 1 inch lengths, and fry quickly in olive oil with a generous pinch of salt. Nothing else. Be sure to let them form some browned crispy areas so they can taste their best.

Mulberry  can be kept tightly pruned or coppiced for an excellent harvest of small tender young leaves and shootsat the twig tips.  Don’t try the leathery older leaves, and stems should be tender enough to easily nip off with your thumbnail. It matters which mulberry you get, since some have perfectly good leaves and some are awful. I surreptitiously tasted at the organic nursery where I bought mine, to get leaves that had no unusual toughness or off flavors.  Mulberries have a good amount of resveratrol, but I have no idea about the resveratrol content of the leaves. I would guess, however, that it’s probably in there.  Once you have a mulberry tree you have it forever, and the only problem is keeping it pruned tightly enough that you can reach the leaf tips.  I recently learned from Samuel Thayer‘s newest book that the flowers can also be eaten in salads. I will be trying this next spring.  If you have a yard goat, goats adore mulberry branches above almost anything else, and will happily eat up your prunings. There are some wild food books  that claim that the leaves are hallucinogenic, and others that say the leaves are not hallucinogenic but the water in which they are cooked is. I call nonsense on all of this. Young tender mulberry leaves are one of my favorite greens, and I eat a lot of them, and drink the water that they were cooked in, and nothing remotely interesting has ever happened as a result.  Mulberry leaf tea is also widely used in Asian and given to children and old people, with absolutely no concerns.  I don’t know where this stuff comes from.  I am happy to say that Samuel Thayer, a profound expert on wild foods if ever there was one, talks about culinary  use of the leaves and does not mention this at all. A tightly pruned or coppiced mulberry can be kept in any front yard, since if you keep cutting it back it doesn’t bloom, and after the first few years  will provide a  surprising amount of greens.

Linden  is in all the permaculture books as a tree with edible leaves that can be used in salads or cooked. I have two small Linden trees, and I love the scent when they bloom, but to my taste the leaves are a little bit bland and I prefer good Mulberry leaves.  Still, they make a nice substantial addition to a salad with a good flavorful dressing, and are tenderest and best when gathered just as they emerge from their bracts.

To my immense pleasure, I find that I have more perennial veggies of interest than I thought I had, so I will put the rest in a second post.


Fall and Winter Leaves II: Nettles

Nettles are one of my favorite greens, and one of the most nutritious plants around, so treating them with the respect and care that helps you avoid stings is definitely worth the trouble. I have a thriving nettle patch in a corner of my yard that I don’t routinely have to visit, so I have always harvested the new greens in the spring and then assiduously ignored the nettle patch for the rest of the year.  This is partly because I get interested in other things, but mostly because as a child, when I first started foraging to the intense dismay of my parents, my mother wisely bought me a set of Euell Gibbons books so that I would not poison myself.  Mr. Gibbons wrote eulogistically about nettles, but cautioned his readers that after the spring flush they develop oxalate crystals and are gritty and inedible.  I believed every word he wrote, and so I never tried them after they were about a foot high.

Here in the desert, in the unwatered spot where they have to live in my yard, nettles die back beginning in July, and the stems look dead by September.  But this year we got an uncharacteristic long heavy rainstorm in late September, and to my surprise the dead nettle stems began to leaf out again.  This week I noticed a mat of fresh nettle leaves, and told myself that no doubt they would be gritty, exactly as Euell had predicted.  But I did gather a couple of quarts (using leather gloves) of nettle sprigs and tried cooking them. They were exactly as verdant tasting as the spring greens, and neither gritty nor tough.  Now that I know this, I will try to remember to cut my nettle patch back when it dies in the hottest late summer weather, and begin to water in September so that the late fall shoots will be easier to pick.

Cooked greens in the refrigerator are an appetizing snack or light meal waiting to happen.  Today I didn’t particularly feel like eating a heavy lunch, but I did want something, and I wanted it to be healthy. I had a cup of blanched nettle greens hanging out in the refrigerator, and half a cup or so of leftover cooked cauliflower rice, so I grabbed two large scallions out of the walking onion patch and picked three large carrot leaves off the last remaining carrots.  The garlic that I planted in late summer is sprouting, so I picked one stalk that was about 6 inches high  to use as green garlic.  The fresh green stuff was chopped and sautéed in butter until cooked through, then the cooked nettles and cooked cauliflower rice were added along with about 2 cups of canned chicken broth and half a cup of heavy cream.  You could certainly leave this as a chunky soup, but I decided that I wanted a cream soup, and put the little potful in my Vitamix blender. About a minute later, it was completely creamy and thickened. I poured it back in the cooking pan, added a little water to thin it to a good consistency, simmered for 10 minutes, salted to taste, and ate it with a spoon full of drained yogurt on top to supply a subtle acidic element.  The entire process, including grabbing the green stuff from the yard, took about 15 minutes. This is a pretty small time investment for something as absurdly healthy as nettle soup.

Needless to say, vary to suit your own taste. Cooked cauliflower is a surprisingly good creamy thickening agent, and if you are vegan you could use olive oil for the initial sauté  and vegetable broth for the cooking liquid, and leave the cream out or substitute nut milk. It could be finished with a few drops of lemon juice instead of drained yogurt. Vegetarians can change the broth and leave everything else the same. As written it is a delicately flavored and very comforting soup, perfect for days when fate is being unkind, but if you want something more emphatic  you can start playing with herbs.  If you don’t happen to have a nettle patch, use some other leafy green. Have fun in your kitchen and make the result work for you.  My mother objects to my greens soups on the undeniable grounds that they are green, but if you have a prejudice against the color green in food I do hope that you will get over it, because it is the marker for some of the healthiest food that you can possibly eat.

And by the way, Euell Gibbons wasn’t right about everything, but his foraging books are still well worth reading for their palpable joy in the outdoors.  In one plant essay he says that wild foods are his way of taking communion with nature and the Author of nature, and I think this sums it up.